Create the Security Onion Virtual Machine
Now it’s time to create the Security Onion virtual machine (VM).
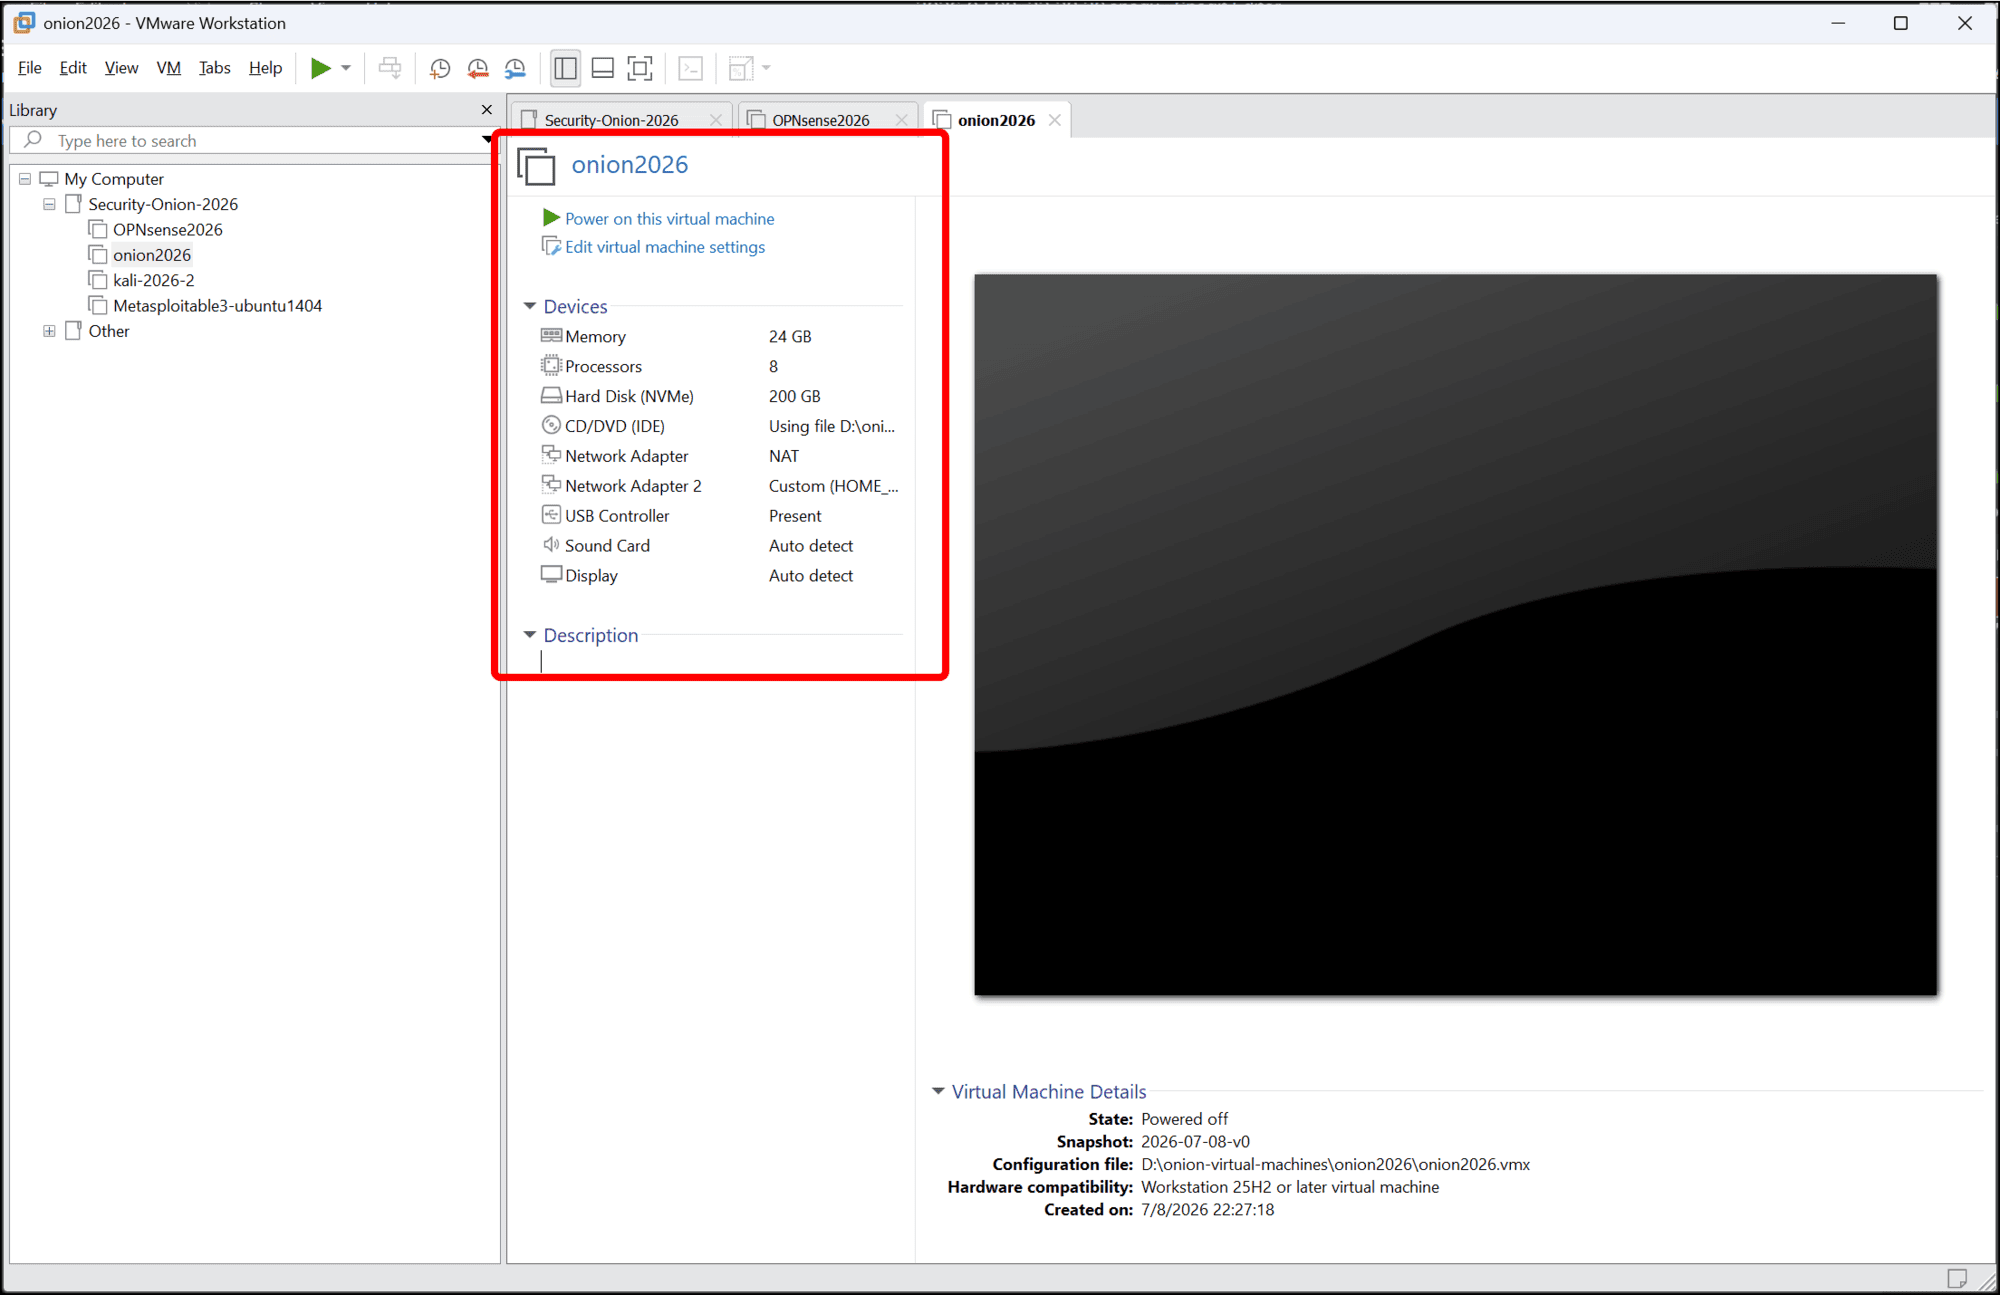
As I mentioned in the introduction, Security Onion is very resource intensive, particularly for RAM/memory. Review their Minimum Specs for hardware. In this tutorial series, I am going to deploy a Standalone instance of Security Onion using:
- 8 CPU cores (4 recommended)
- 24GB of RAM
- 200GB of disk storage
- 2 network interface cards
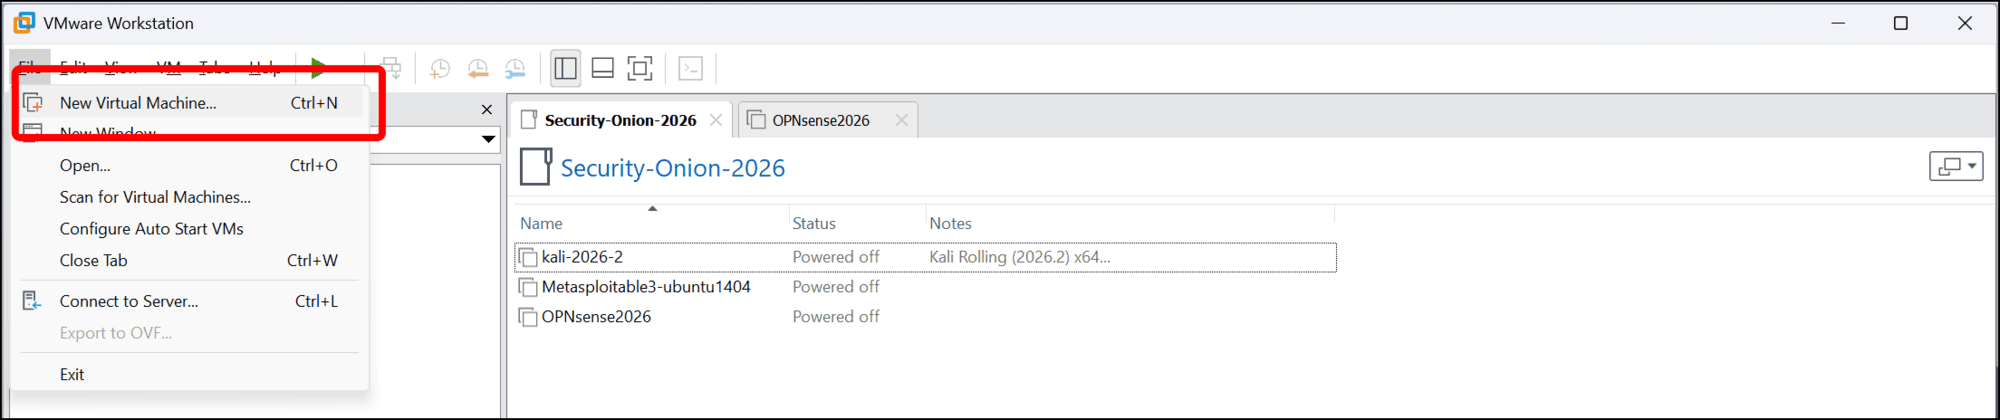
- In VMware Workstation Pro, click the File menu and then click New Virtual Machine.
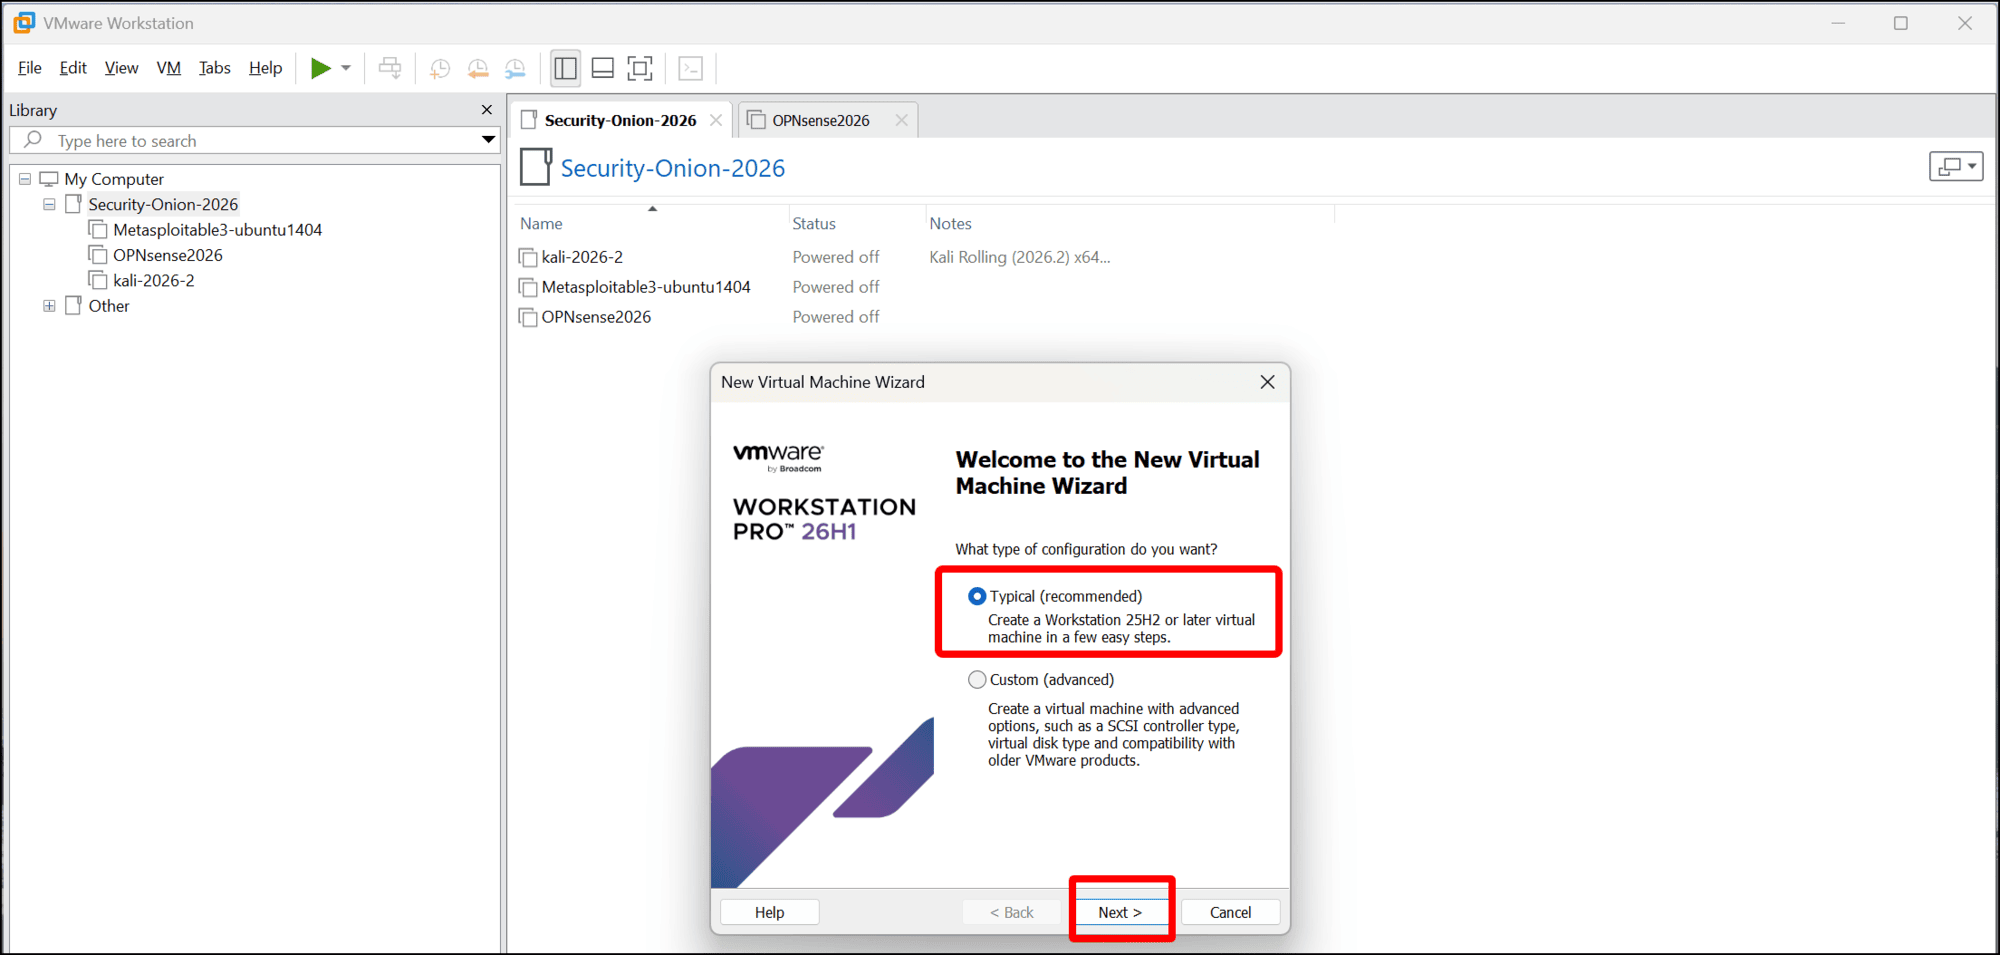
- When the New Virtual Machine Wizard opens, leave the Typical (recommended) radio button selected and click Next.
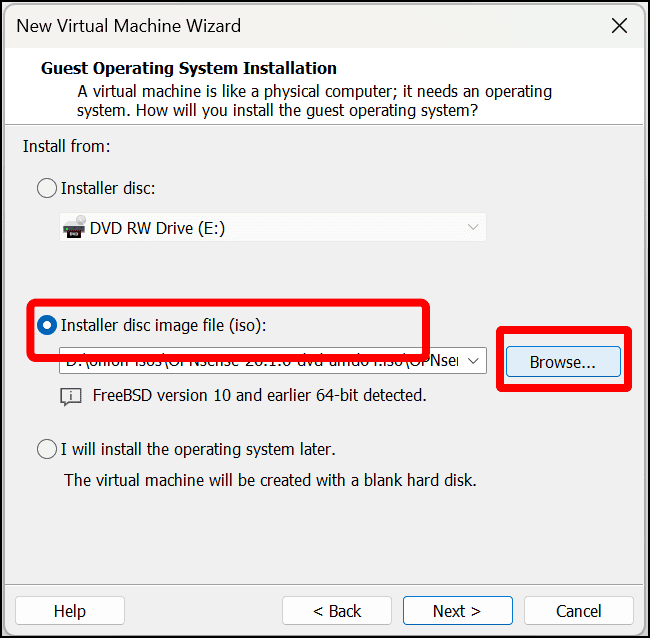
- On the Guest Operating System Installation screen, select Installer from disk image (iso) and click Browse underneath it.
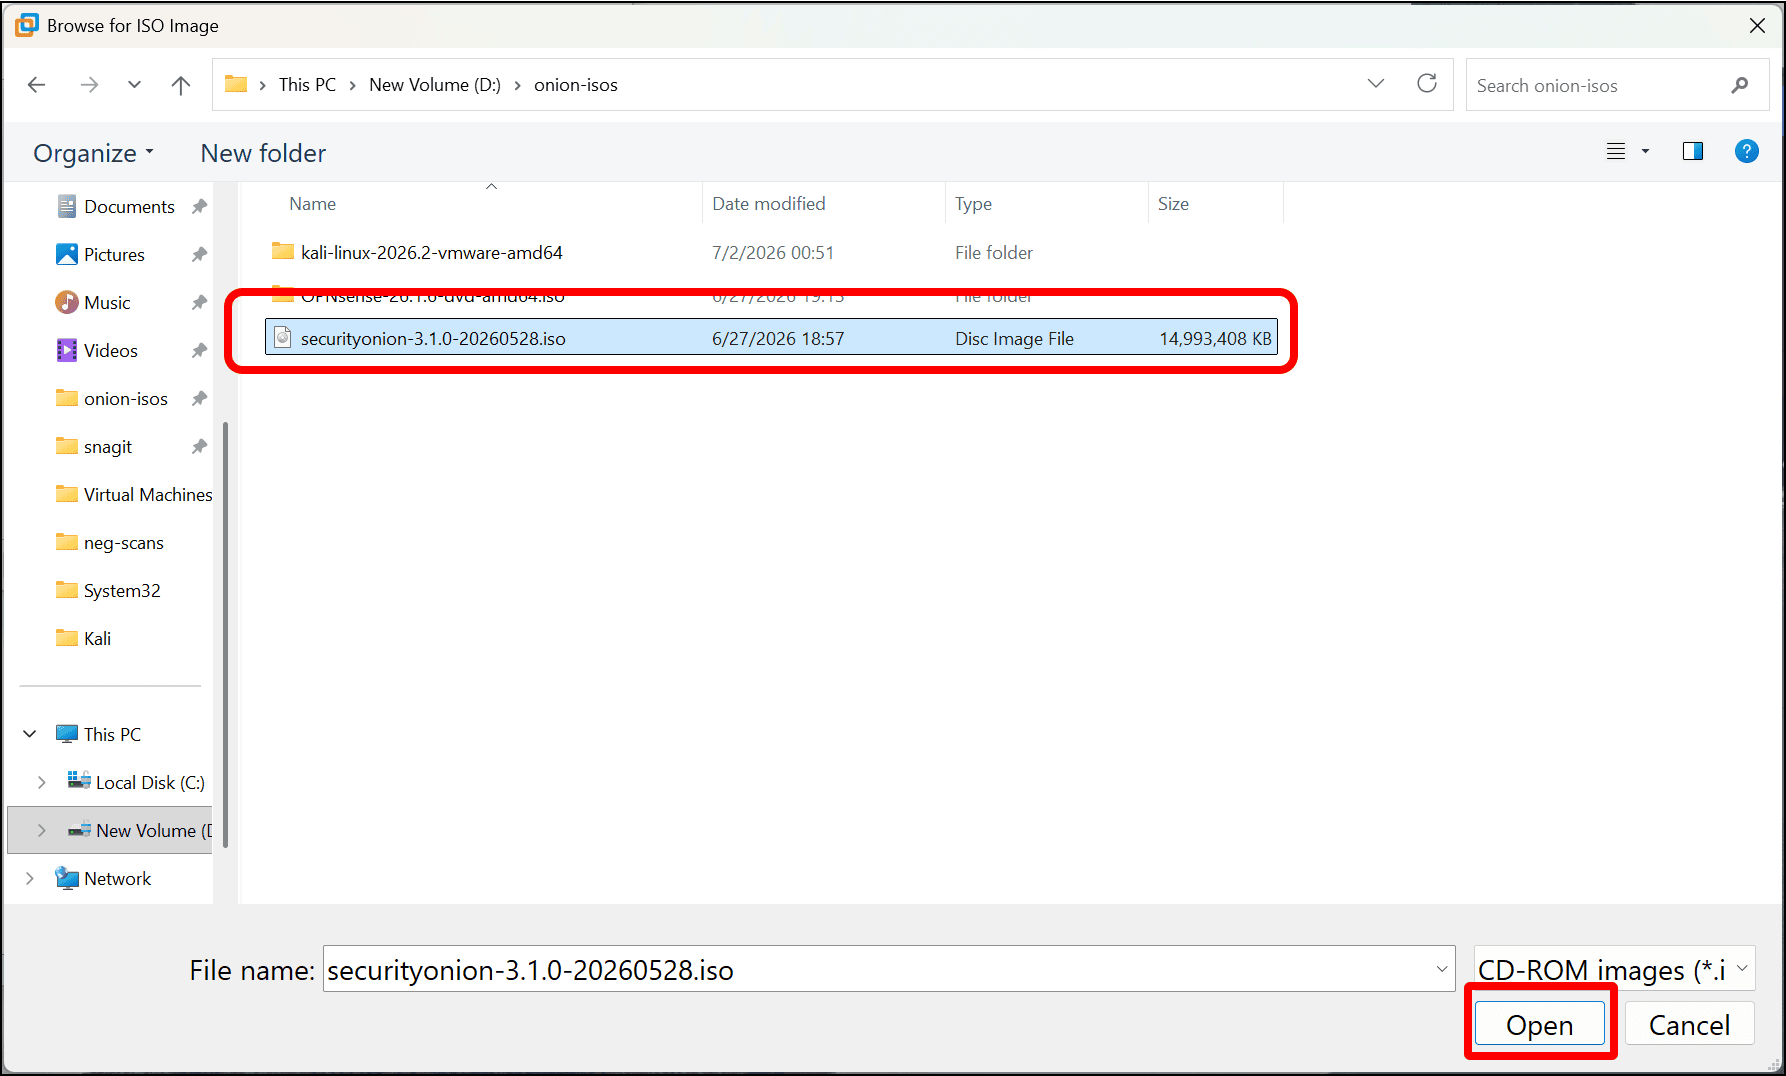
- In the Browse for ISO Image dialog, navigate to the Security Onion ISO that you downloaded earlier, select it, and click Open.
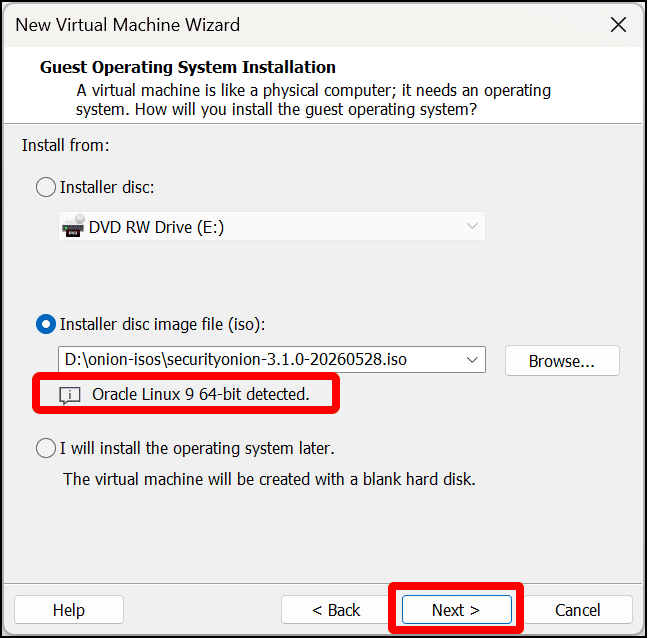
- VMware will detect the operating system type based on the ISO. Click Next.
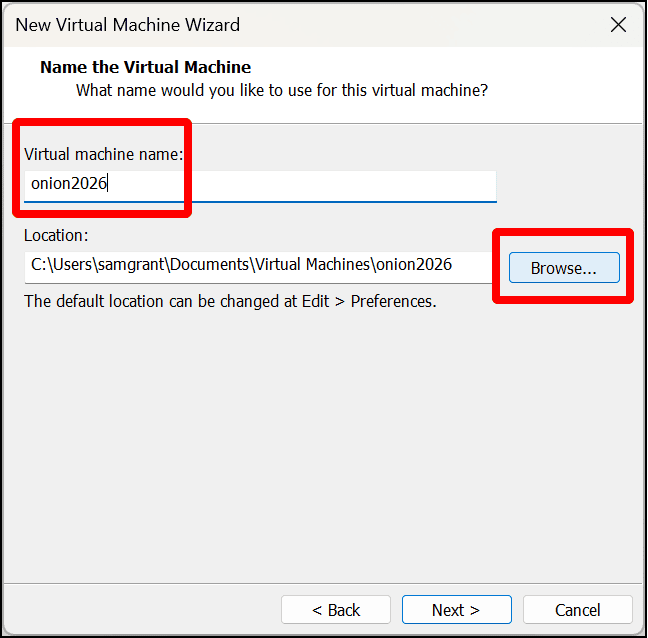
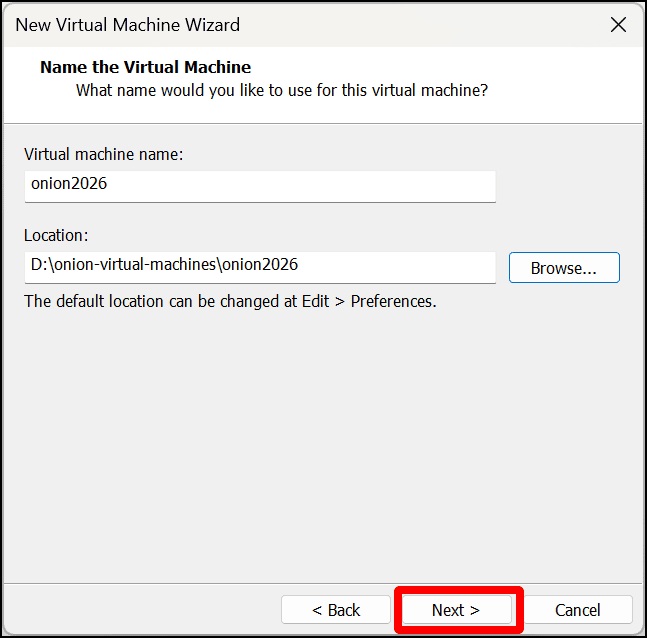
- On the Name the Virtual Machine screen, enter a name for the Security Onion VM. I named mine onion2026. Then click the Browse button to select the location where the VM and its files will be saved to and stored.
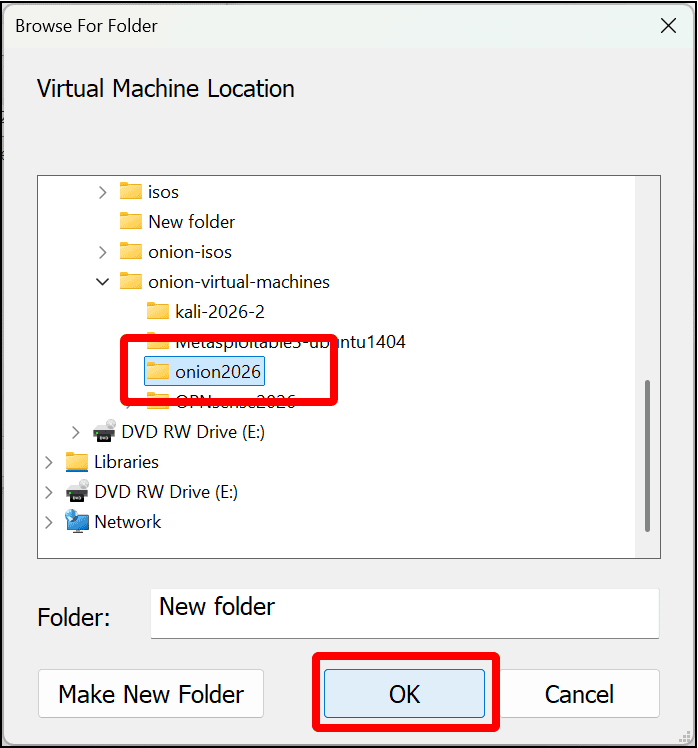
- Select the folder where VMware stores the collection of files and other data that make up the virtual machine. I have created a folder on my local drive called onion-virtual-machines. Within that, I created a new folder and gave it the same name as the VM, onion2026. Navigate to the location where you want the VM stored and click OK.
- Click Next.
-
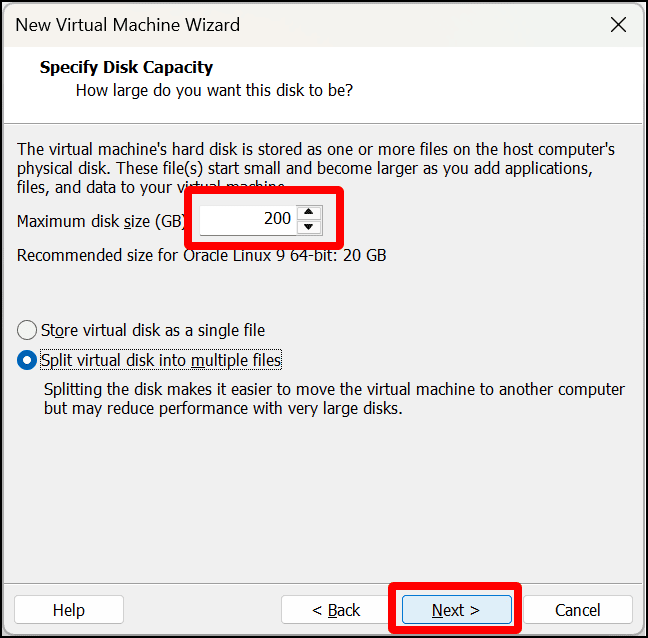
On the Specify Disk Capacity screen, increase the default Maximum disk size (GB) from 20GB to 200GB, which is the recommended disk size for Security Onion, which produces a lot of log data. Leave the Split virtual disk into multiple files radio button selected and click Next.
As of Security Onion version 3.1.0 in mid-2026, the recommended storage/disk size for a Standalone Security Onion deployment is 200 GB.
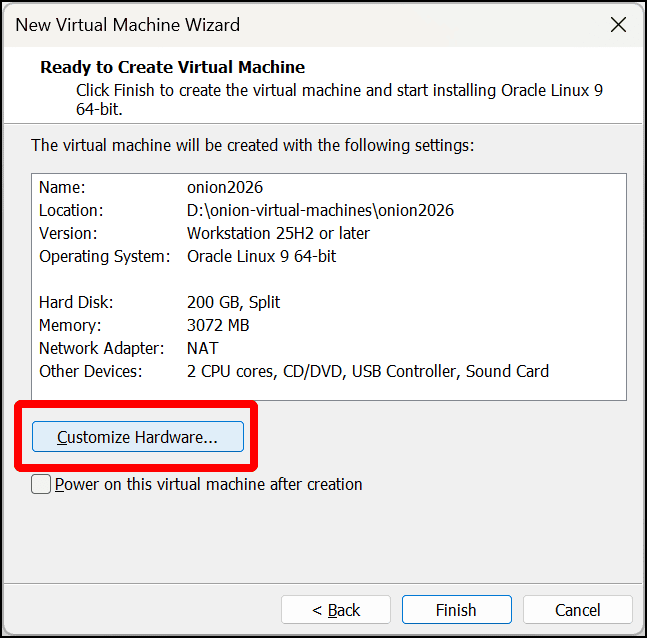
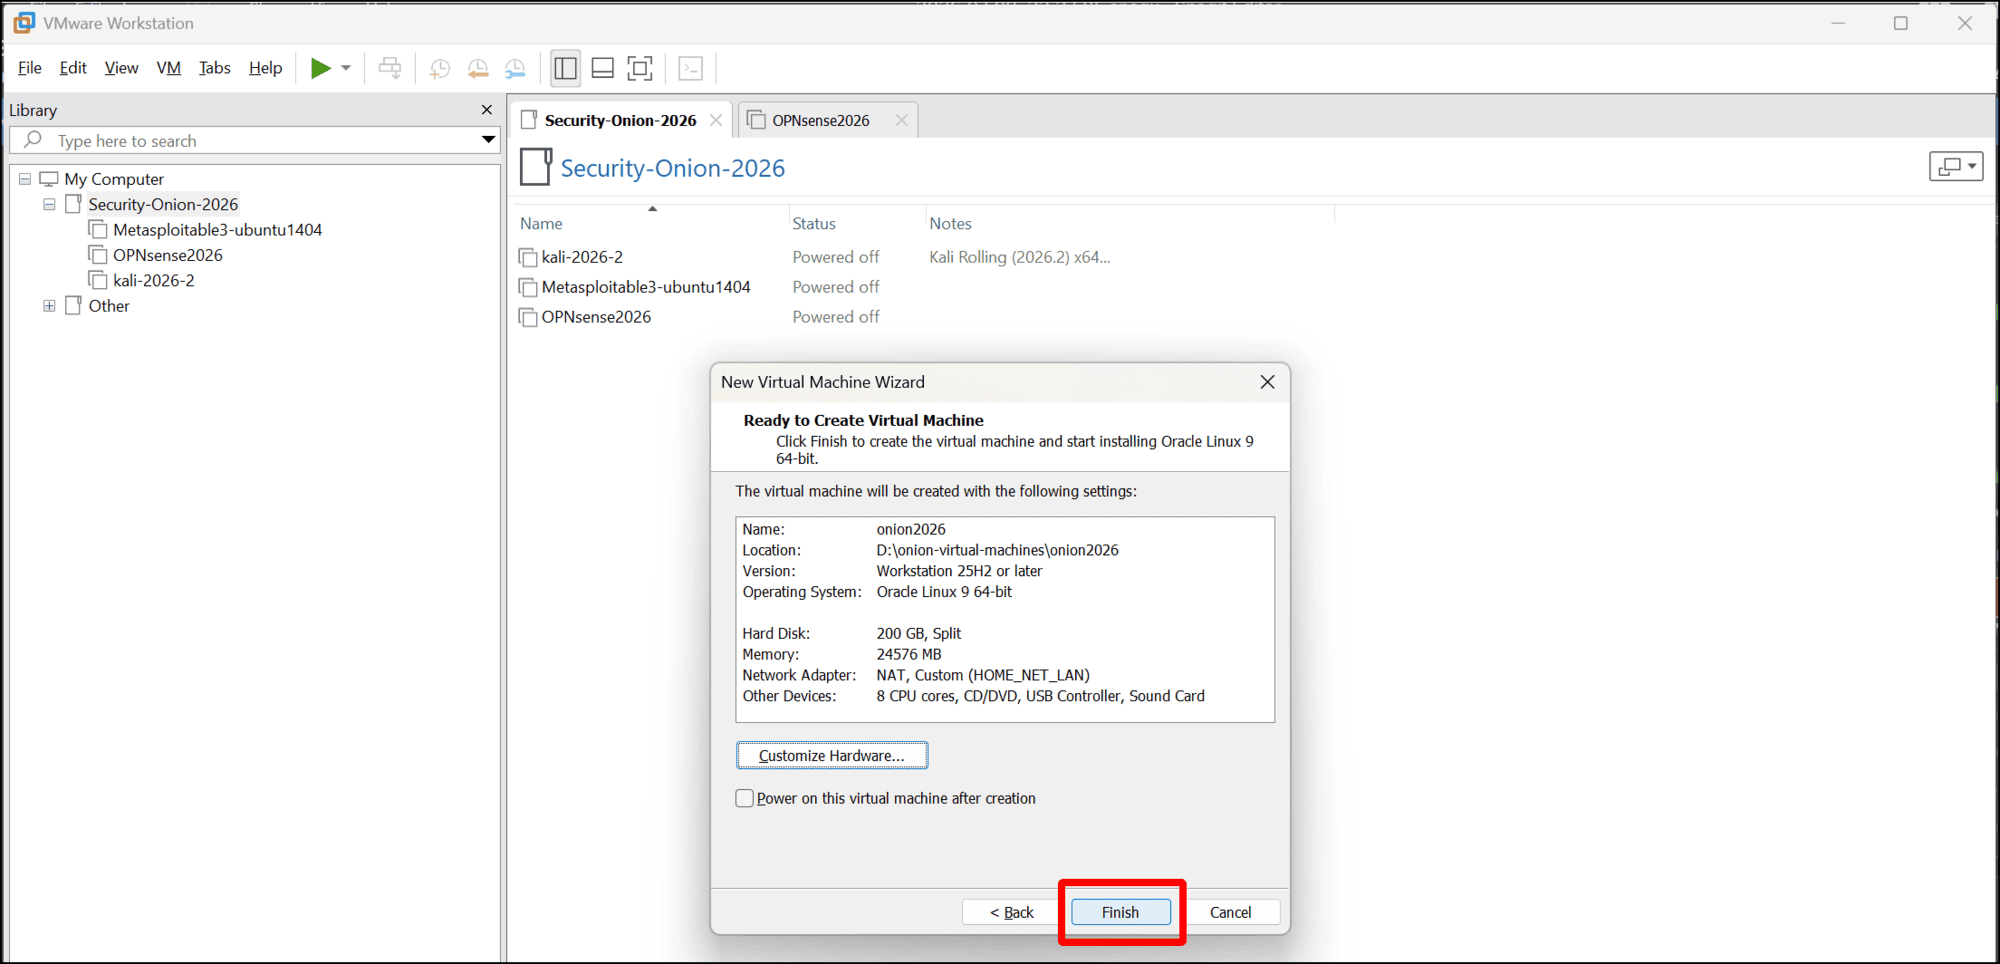
- The Ready to Create Virtual Machine screen displays a summary of the VM’s properties. Click Customize Hardware.
-
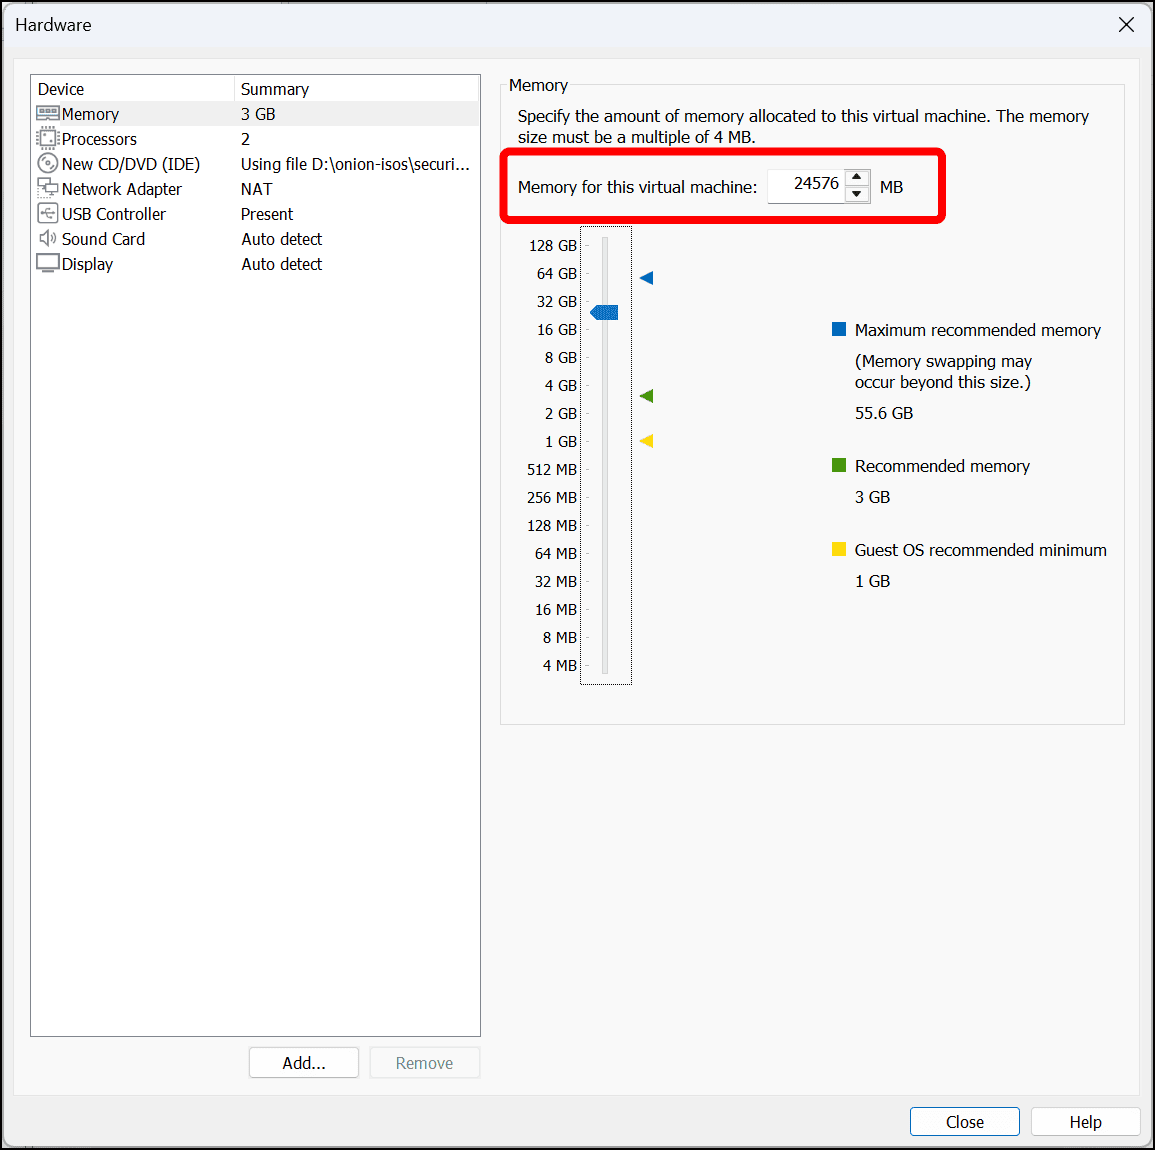
The Hardware dialog opens. Click Memory. Security Onion needs a lot of RAM for a personal computer. Increase Memory for this virtual machine to 24GB of memory (24,576MB in computer math).
As of Security Onion version 3.1.0 in mid-2026, the minimum required RAM/memory for a Standalone Security Onion deployment is 24GB.
-
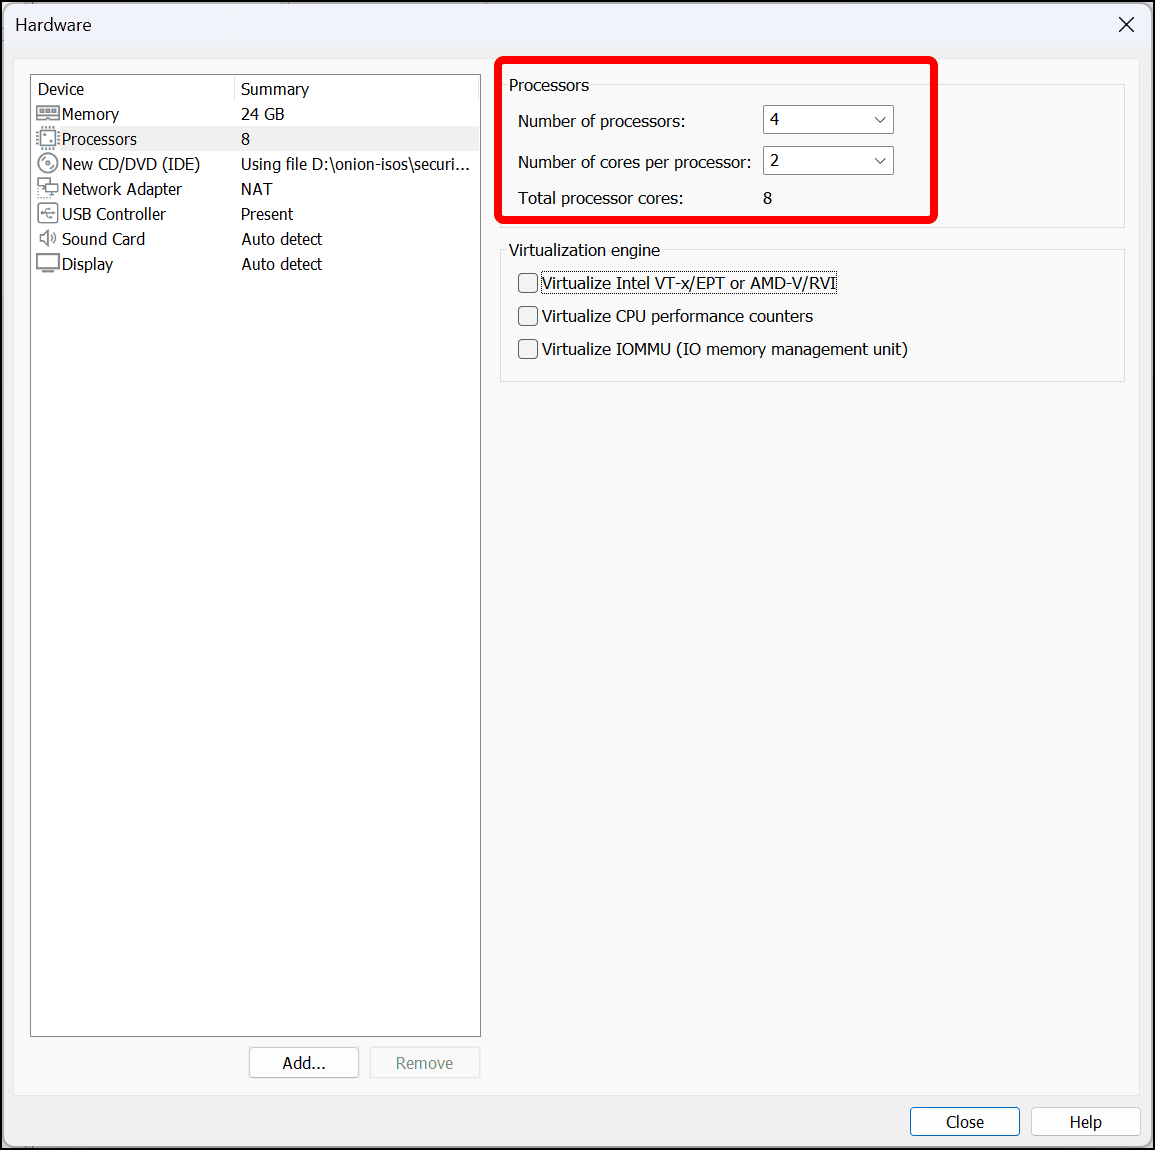
Next, click Processors. Click the Number of processors drop-down menu and select 4, then click the Number of cores per processor dialog and select 2 for Total processor cores: 8.
As of Security Onion version 3.1.0 in mid-2026, the number of CPU cores for a Standalone Security Onion deployment is 4 cores.
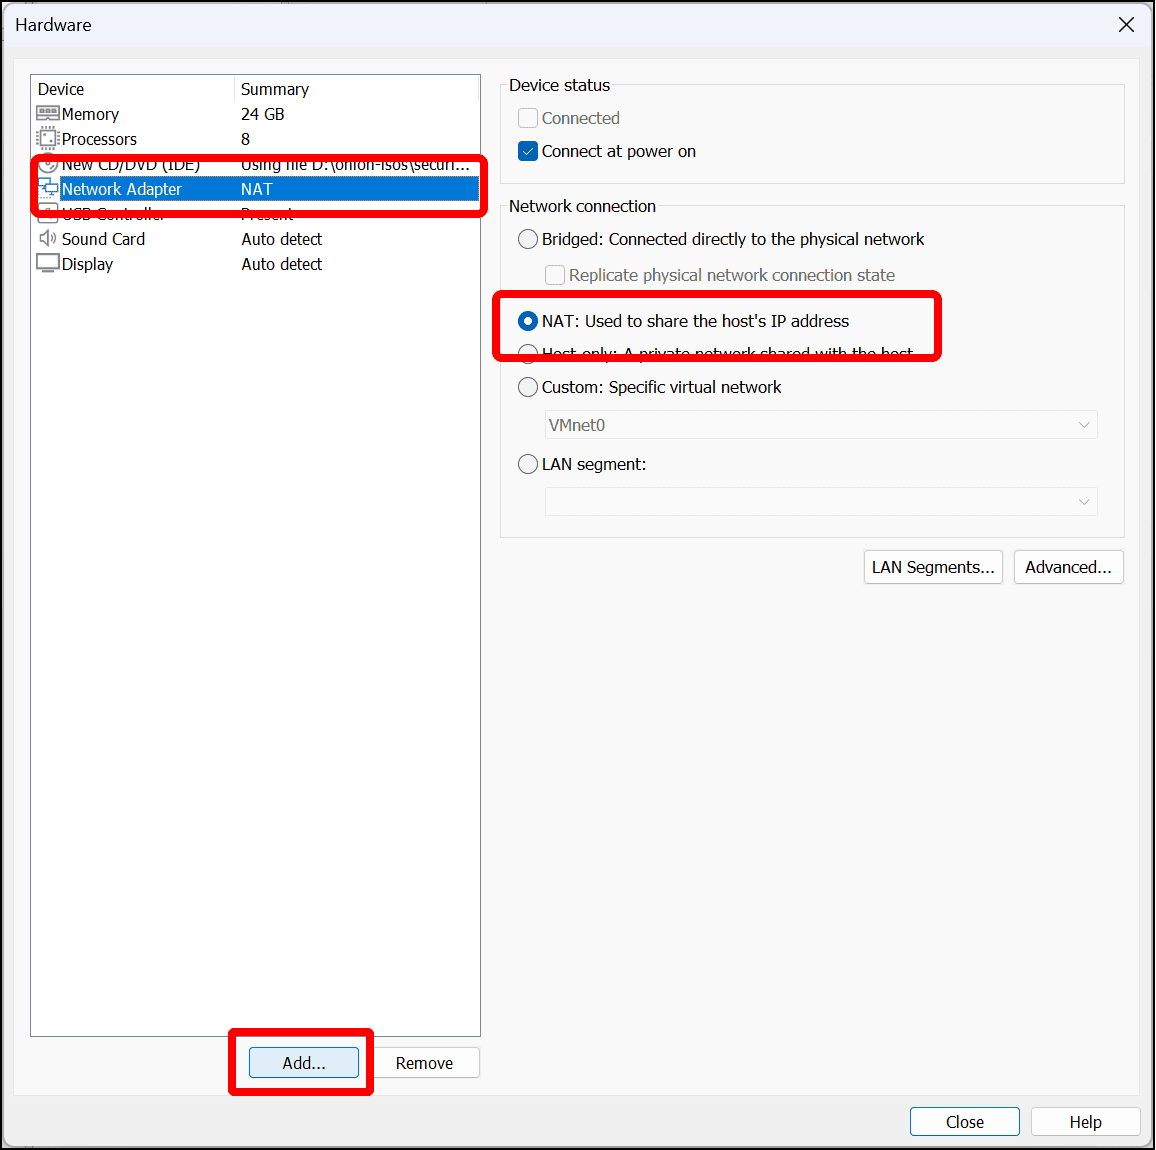
- Click Network Adapter in the sidebar. The virtual machine’s single network adapter already has a NAT connection. We’re going to use this as the management interface for the Security Onion VM. You need to add another network adapter that Security Onion will use to monitor network traffic, so click Add at the bottom of the sidebar.
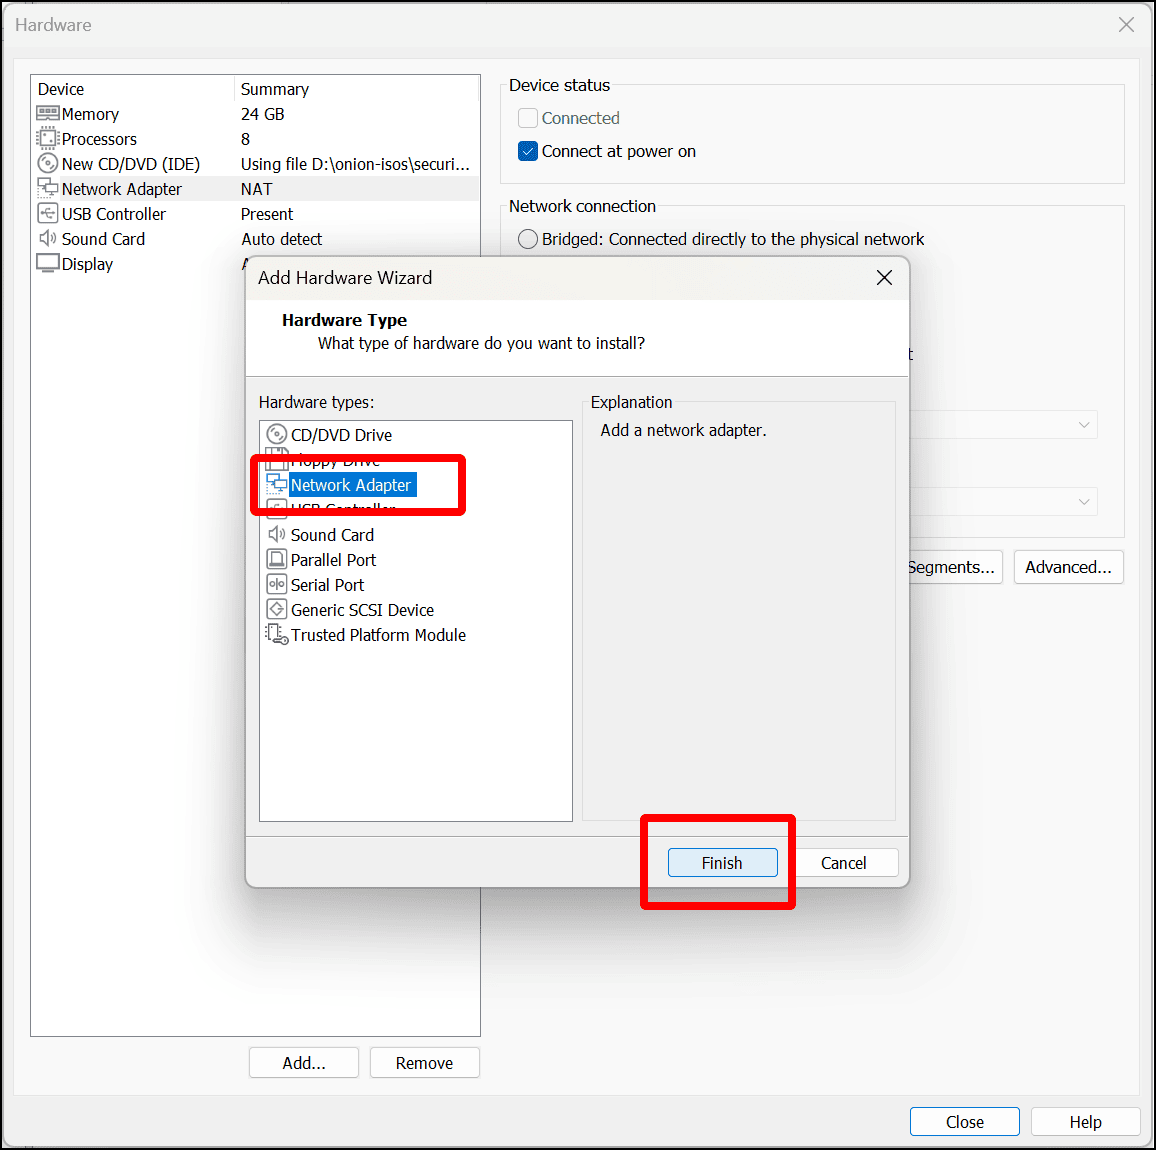
- When the Add Hardware Wizard displays, select Network Adapter and click Finish.
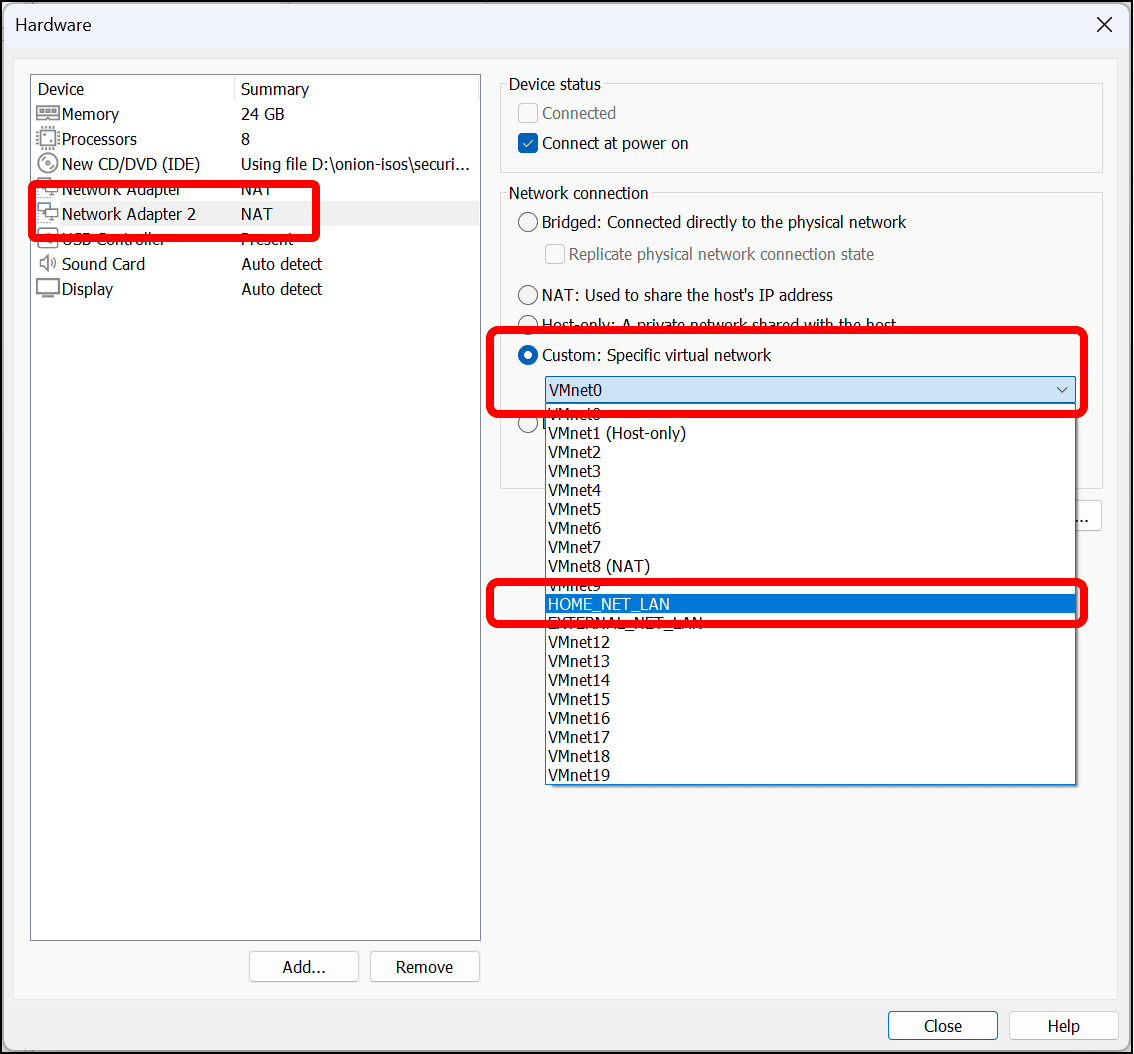
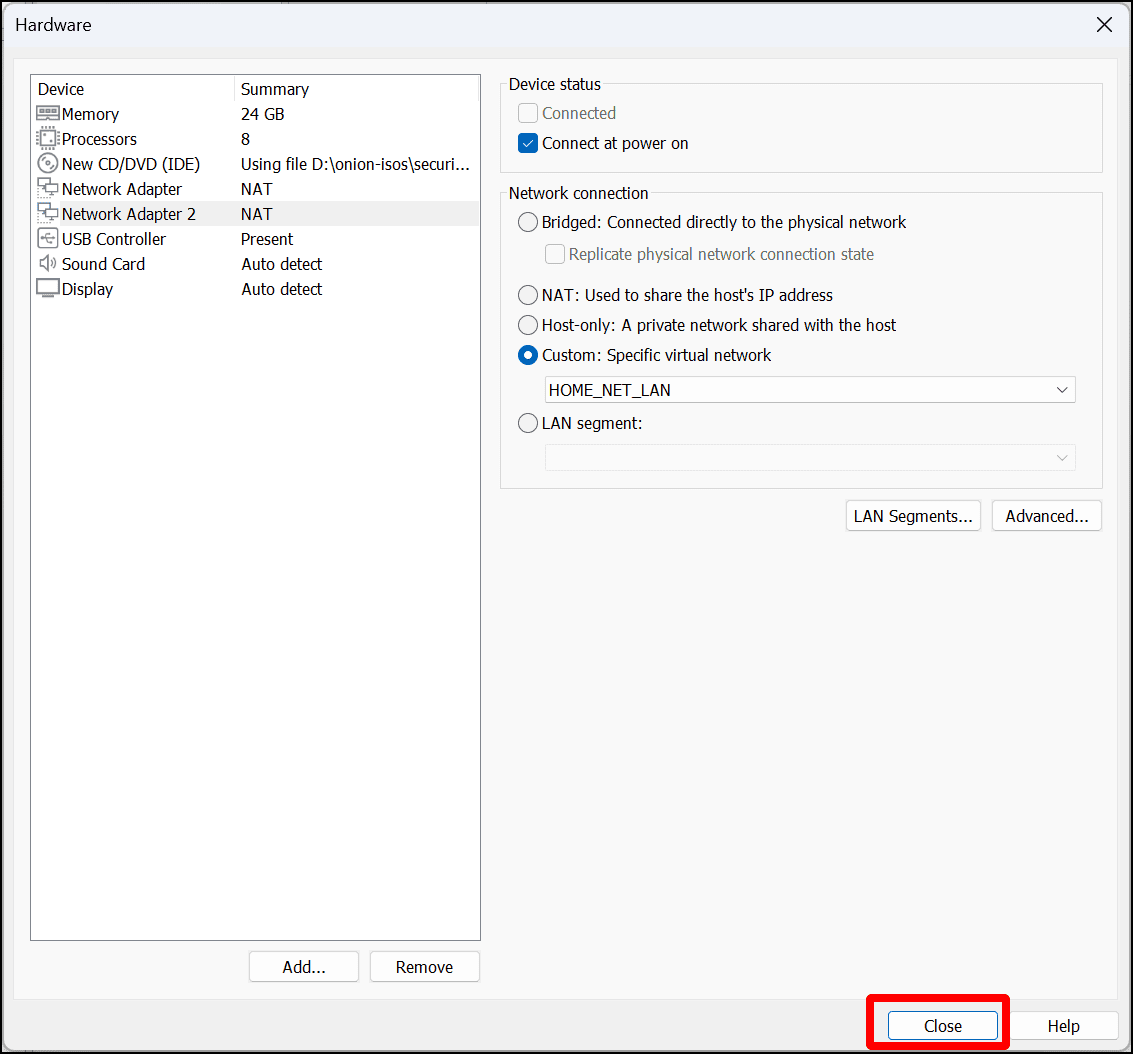
- Network Adapter 2 displays on the Device list. Click it and select the Custom: Specific virtual network radio button, then click the drop-down menu and select HOME_NET_LAN from the list of VMnets.
- You’re done adding hardware to the Security Onion VM. Click Close.
- Click Finish to close the New Virtual Machine Wizard and complete the creation of the Security Onion VM.
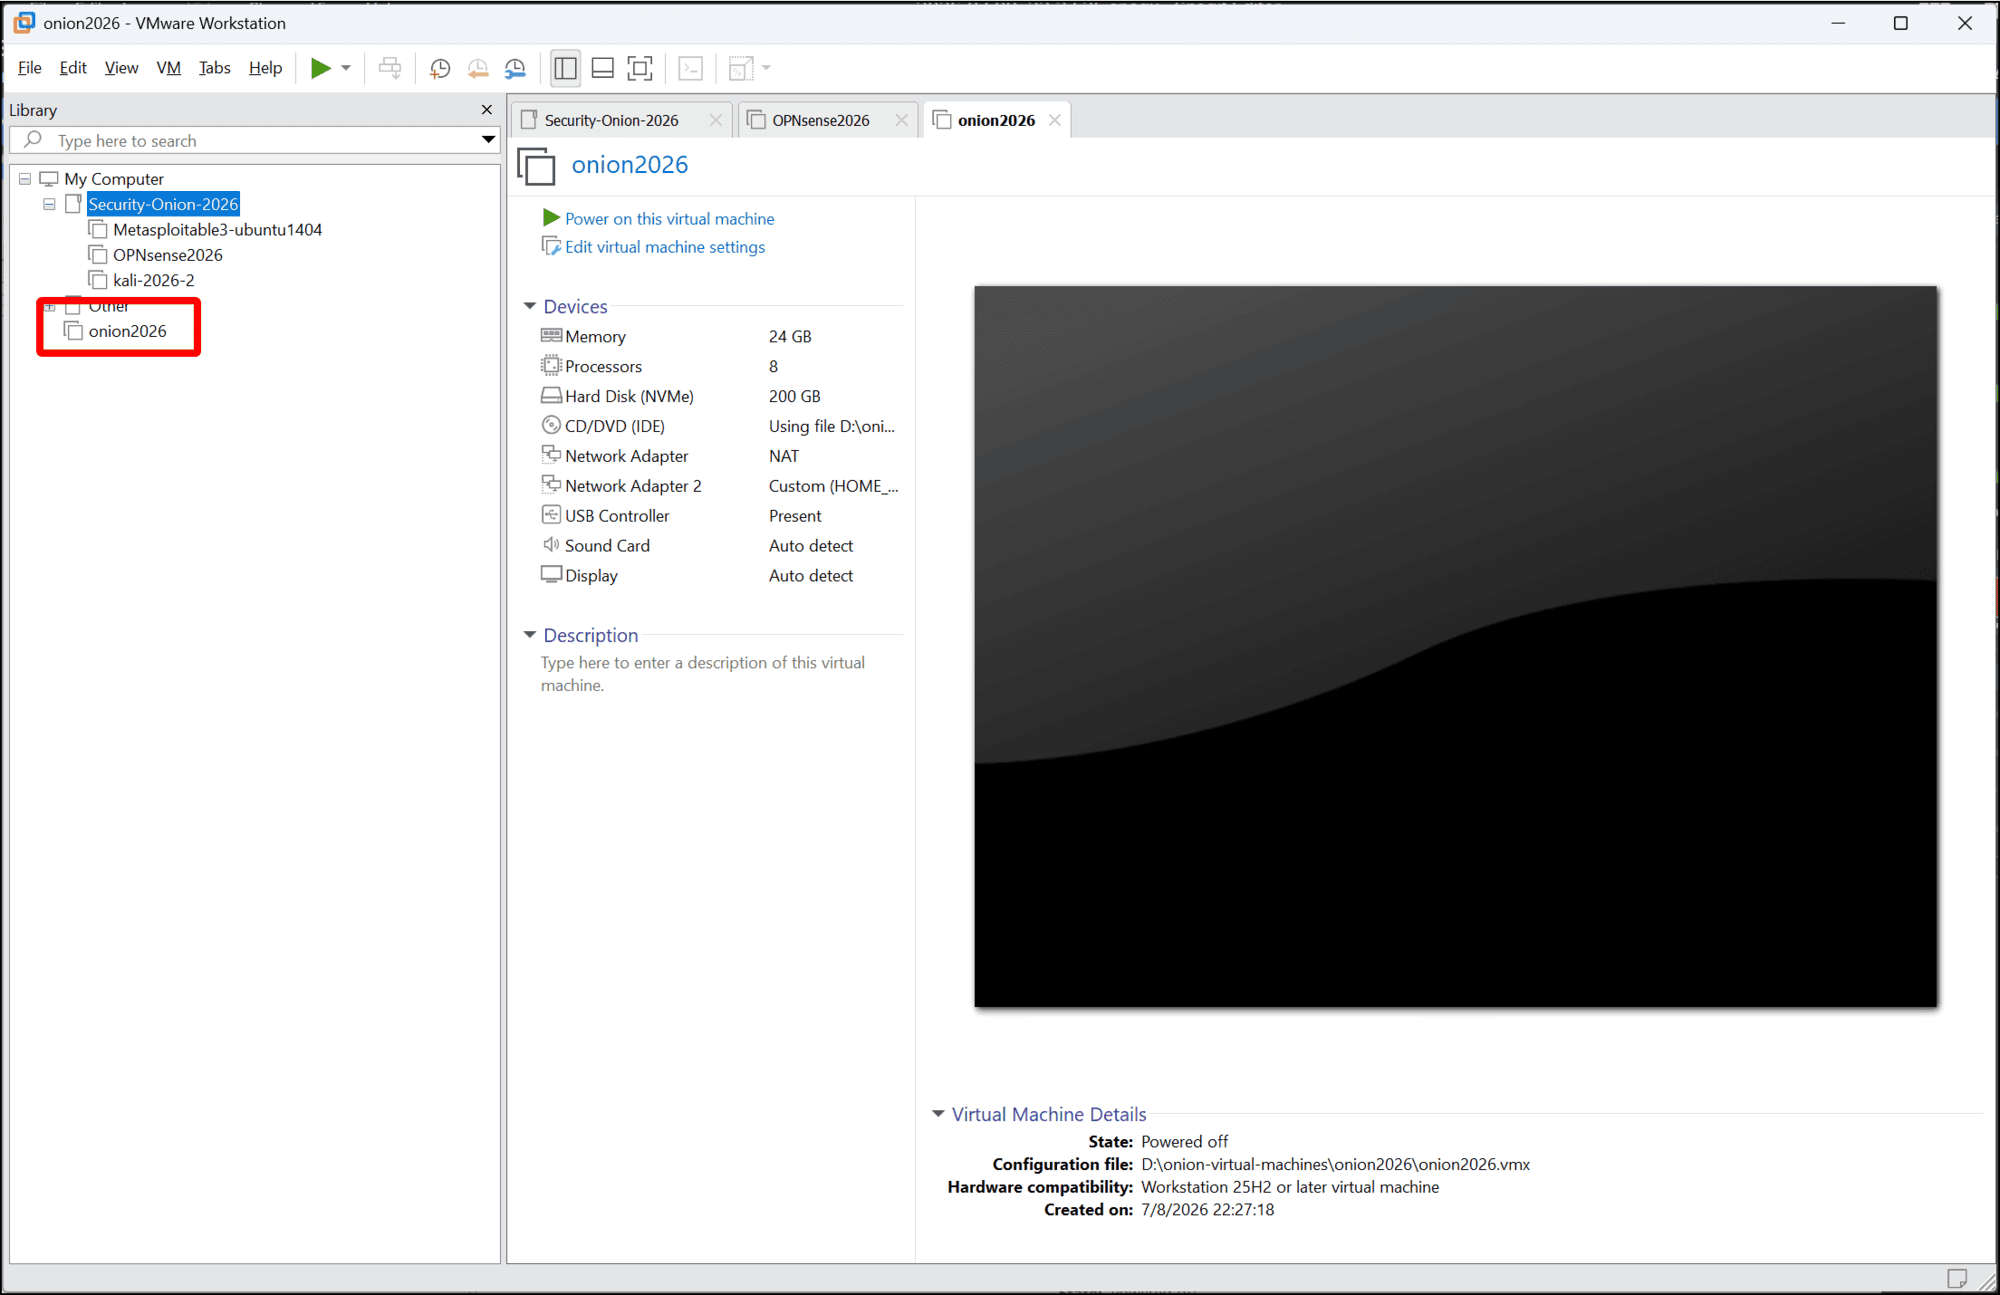
- The Security Onion VM appears in the left sidebar. Drag it into the Security-Onion-2026 folder.
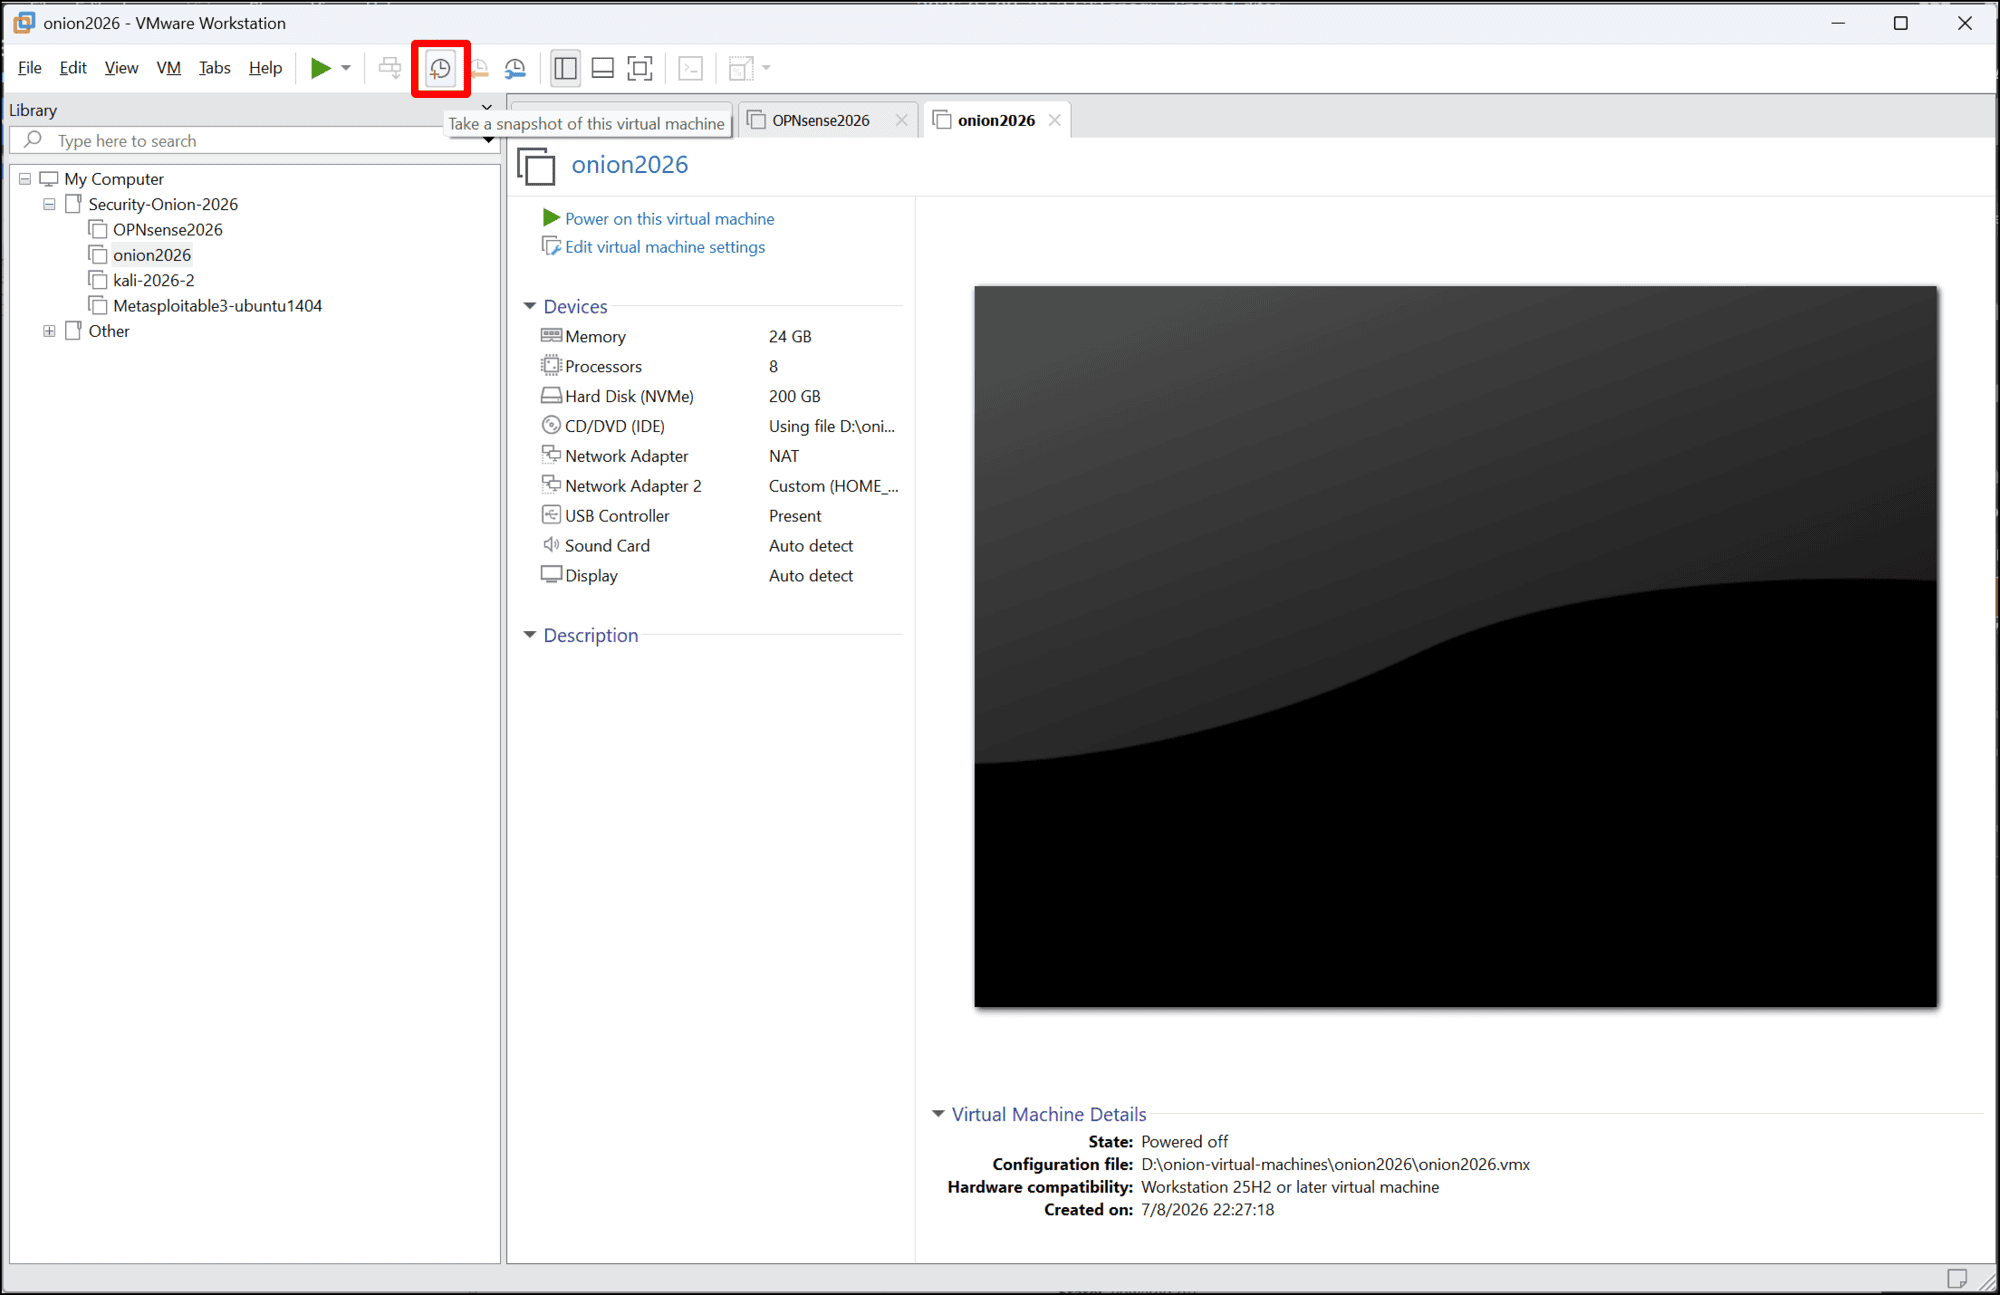
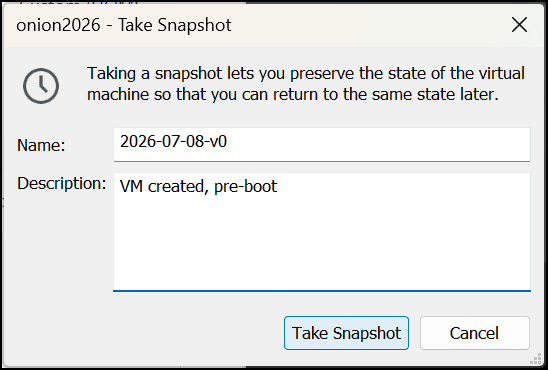
- Create a snapshot of the VM so that you can revert to this state if something goes wrong in the future. Look for the clock icon with the red plus sign in the menu bar to Take a snapshot of this virtual machine.
- In the Take snapshot dialog, enter a Name and Description for the snapshot and click Take Snapshot.
- You are now ready to start your Security Onion VM, install it, and configure it to handle the traffic for your local lab.