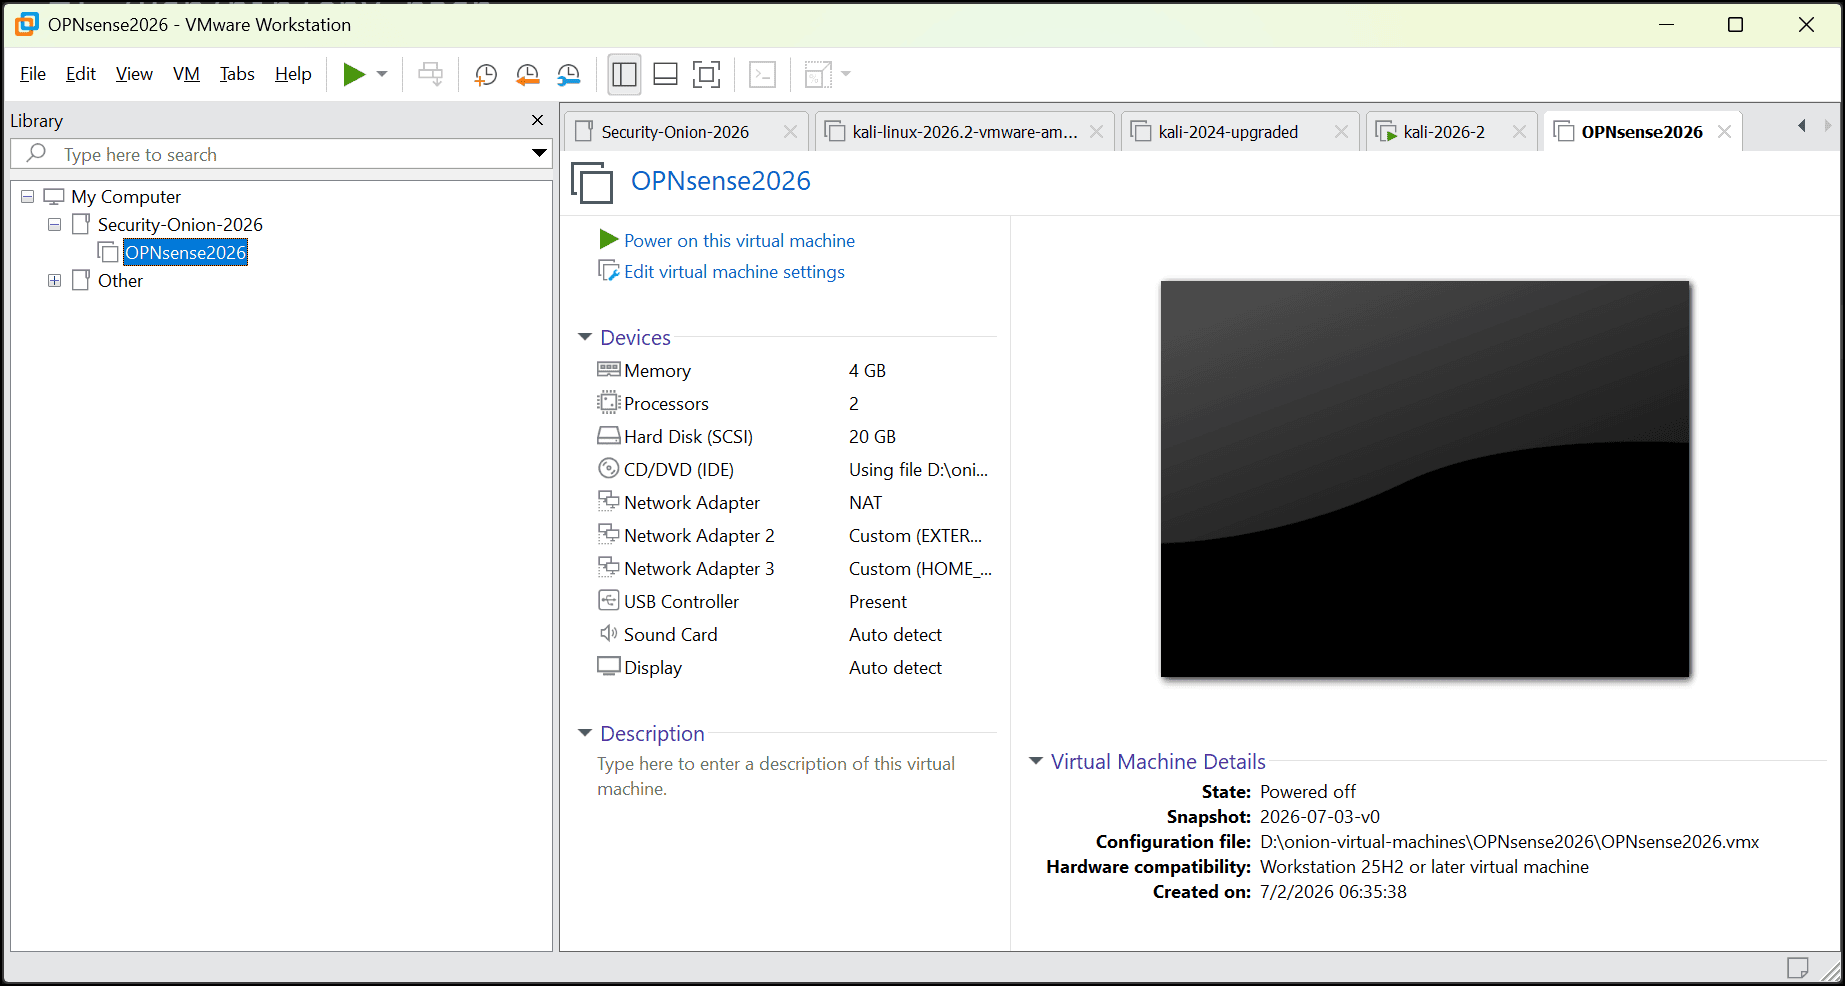
Create the OPNsense Virtual Machine
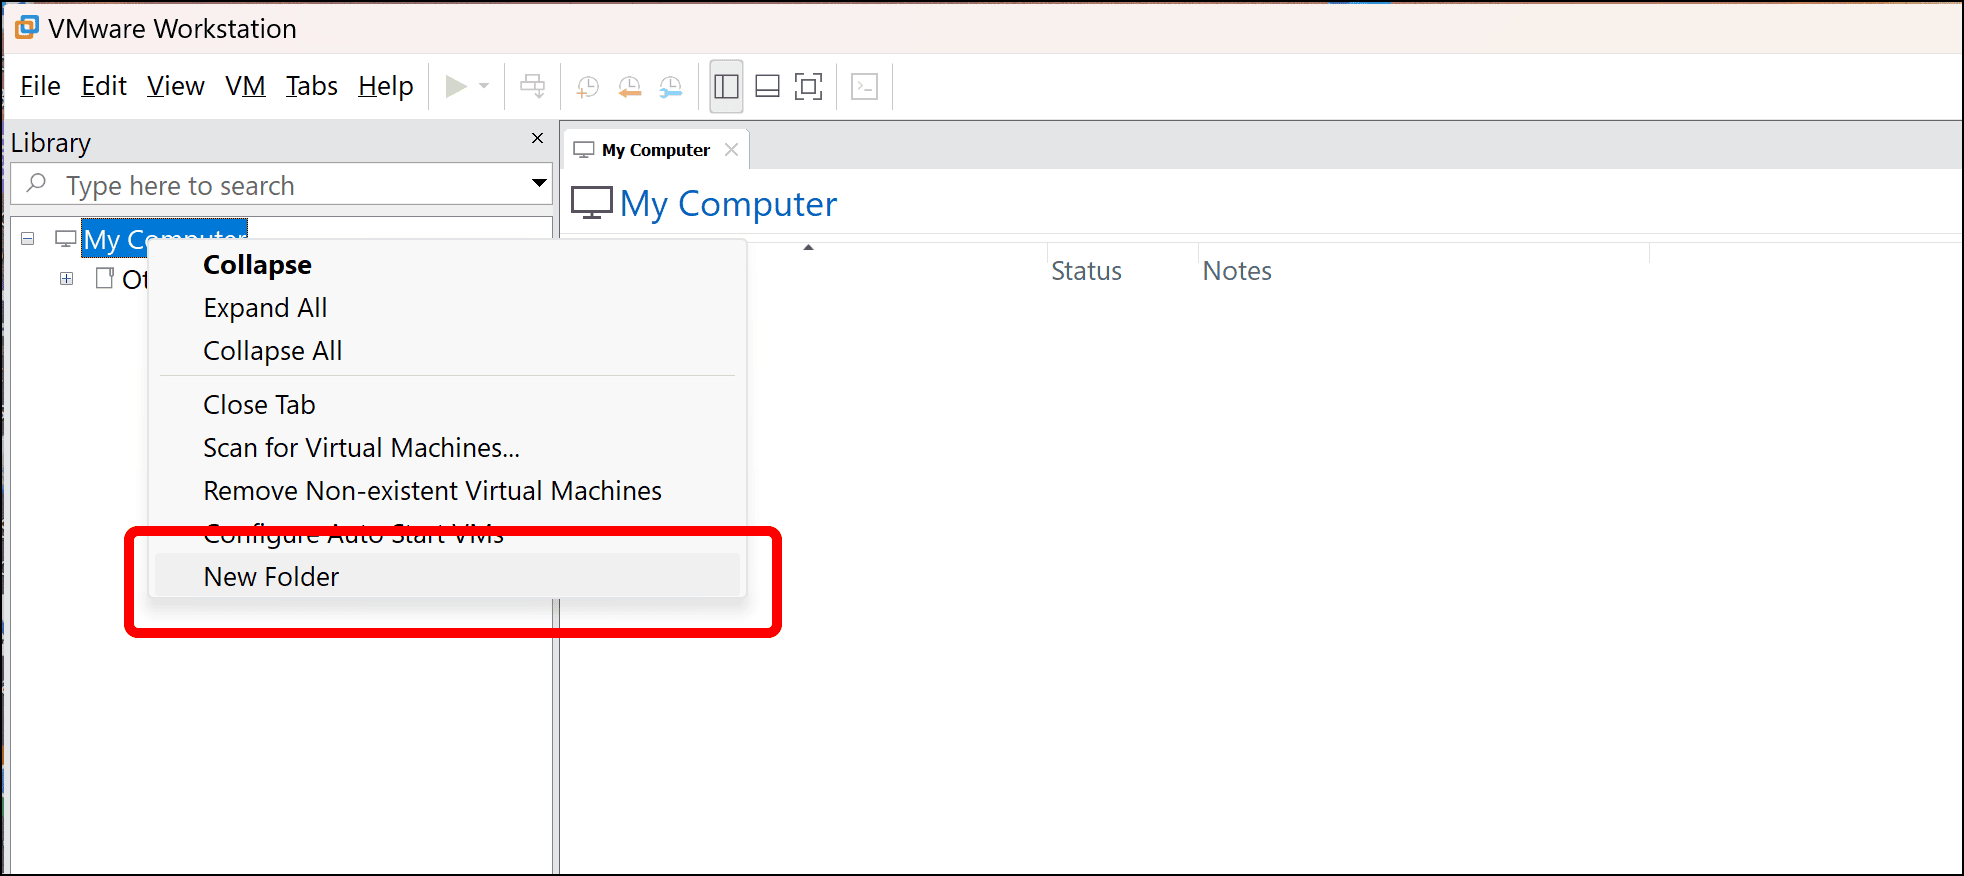
- For this tutorial, I will create my virtual machines (VMs) in a folder called Security-Onion-2026. In the left sidebar of VMware Workstation, right-click My Computer and select New Folder.
- Right-click the name of the new folder in the sidebar, select Rename… and type in a name for your folder and press
Enter.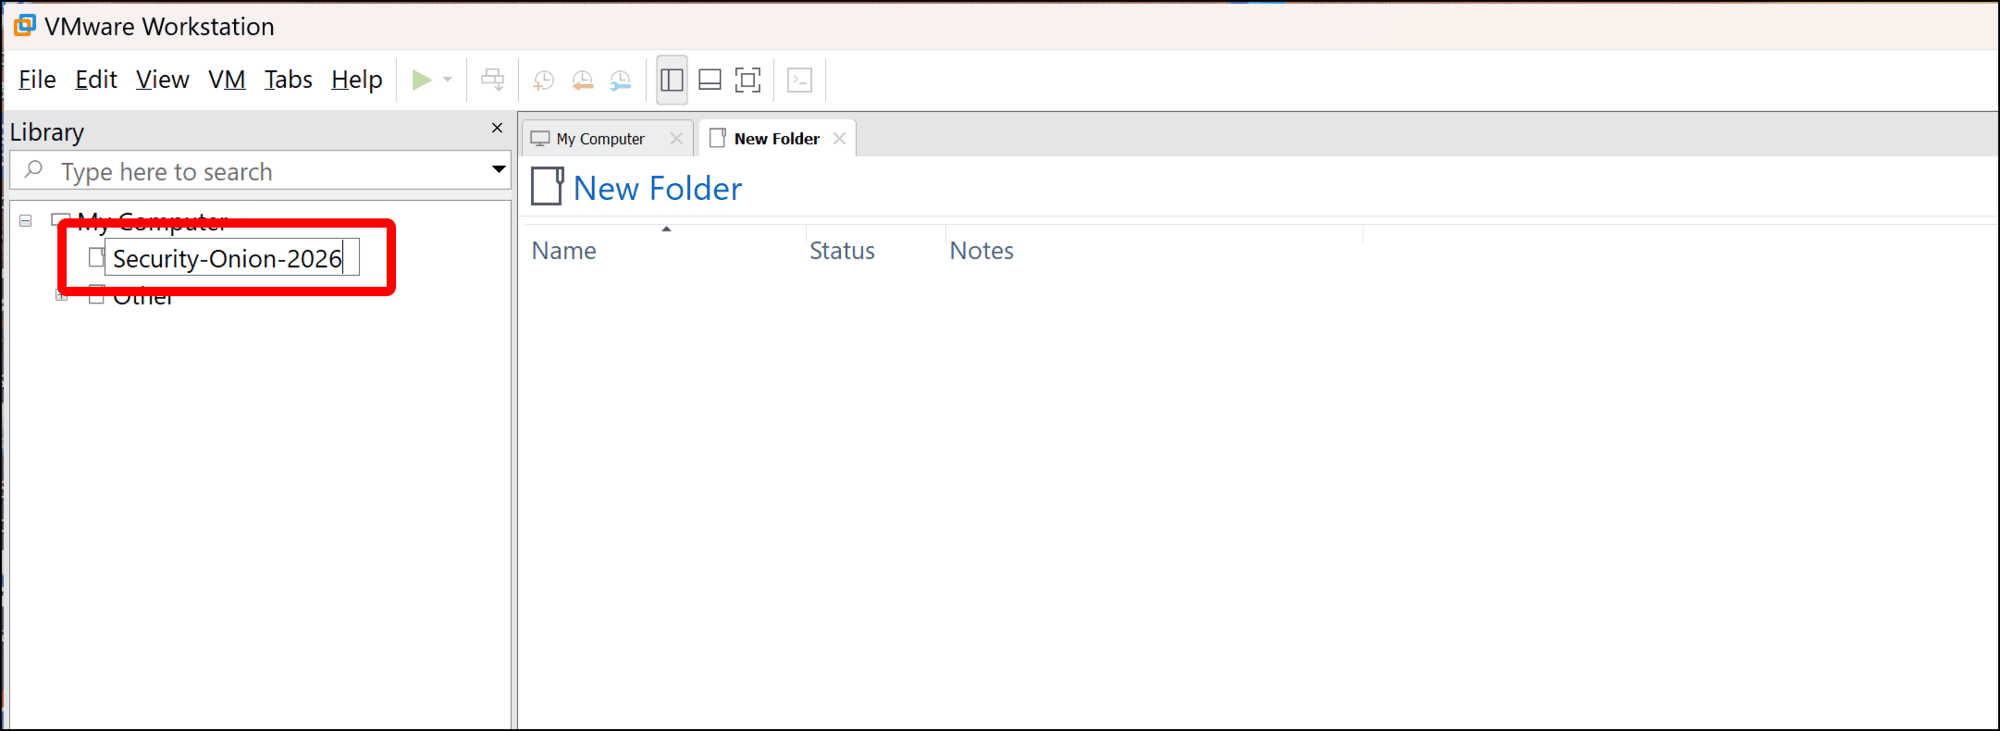
- Click the File menu and then click New Virtual Machine.
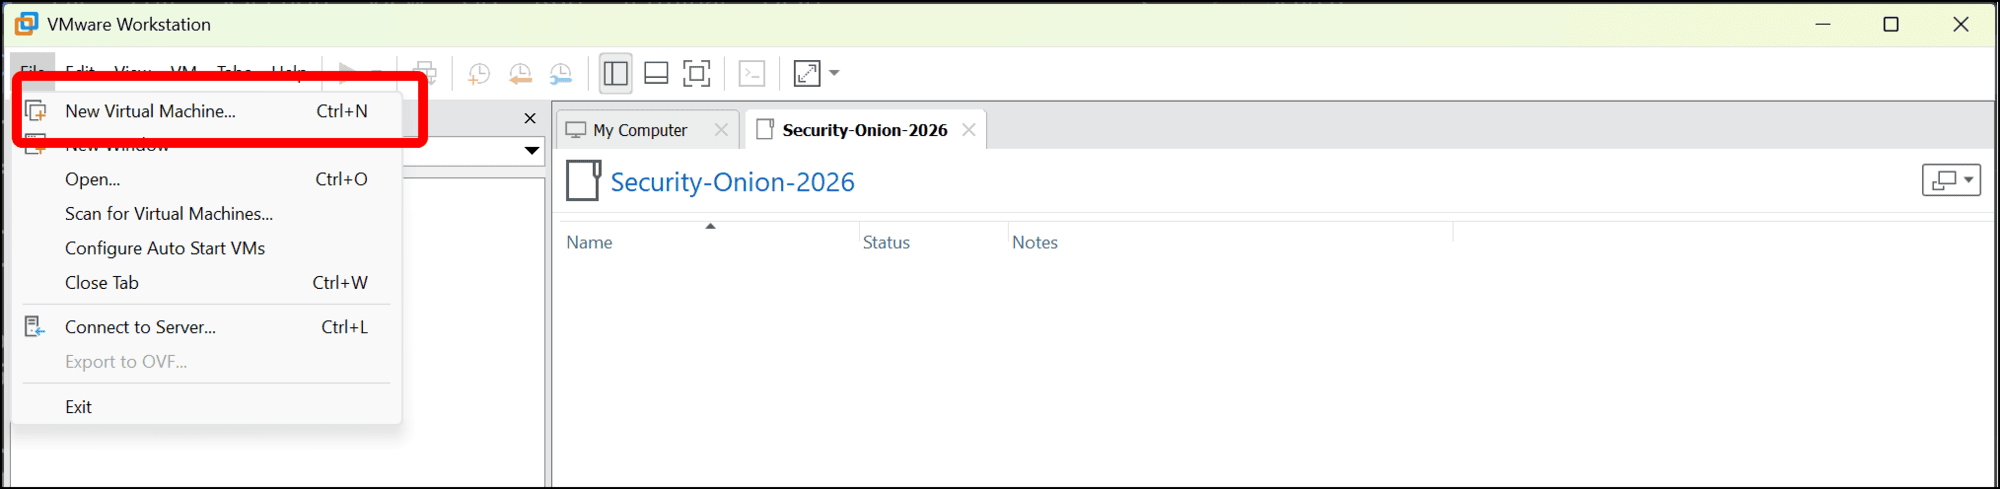
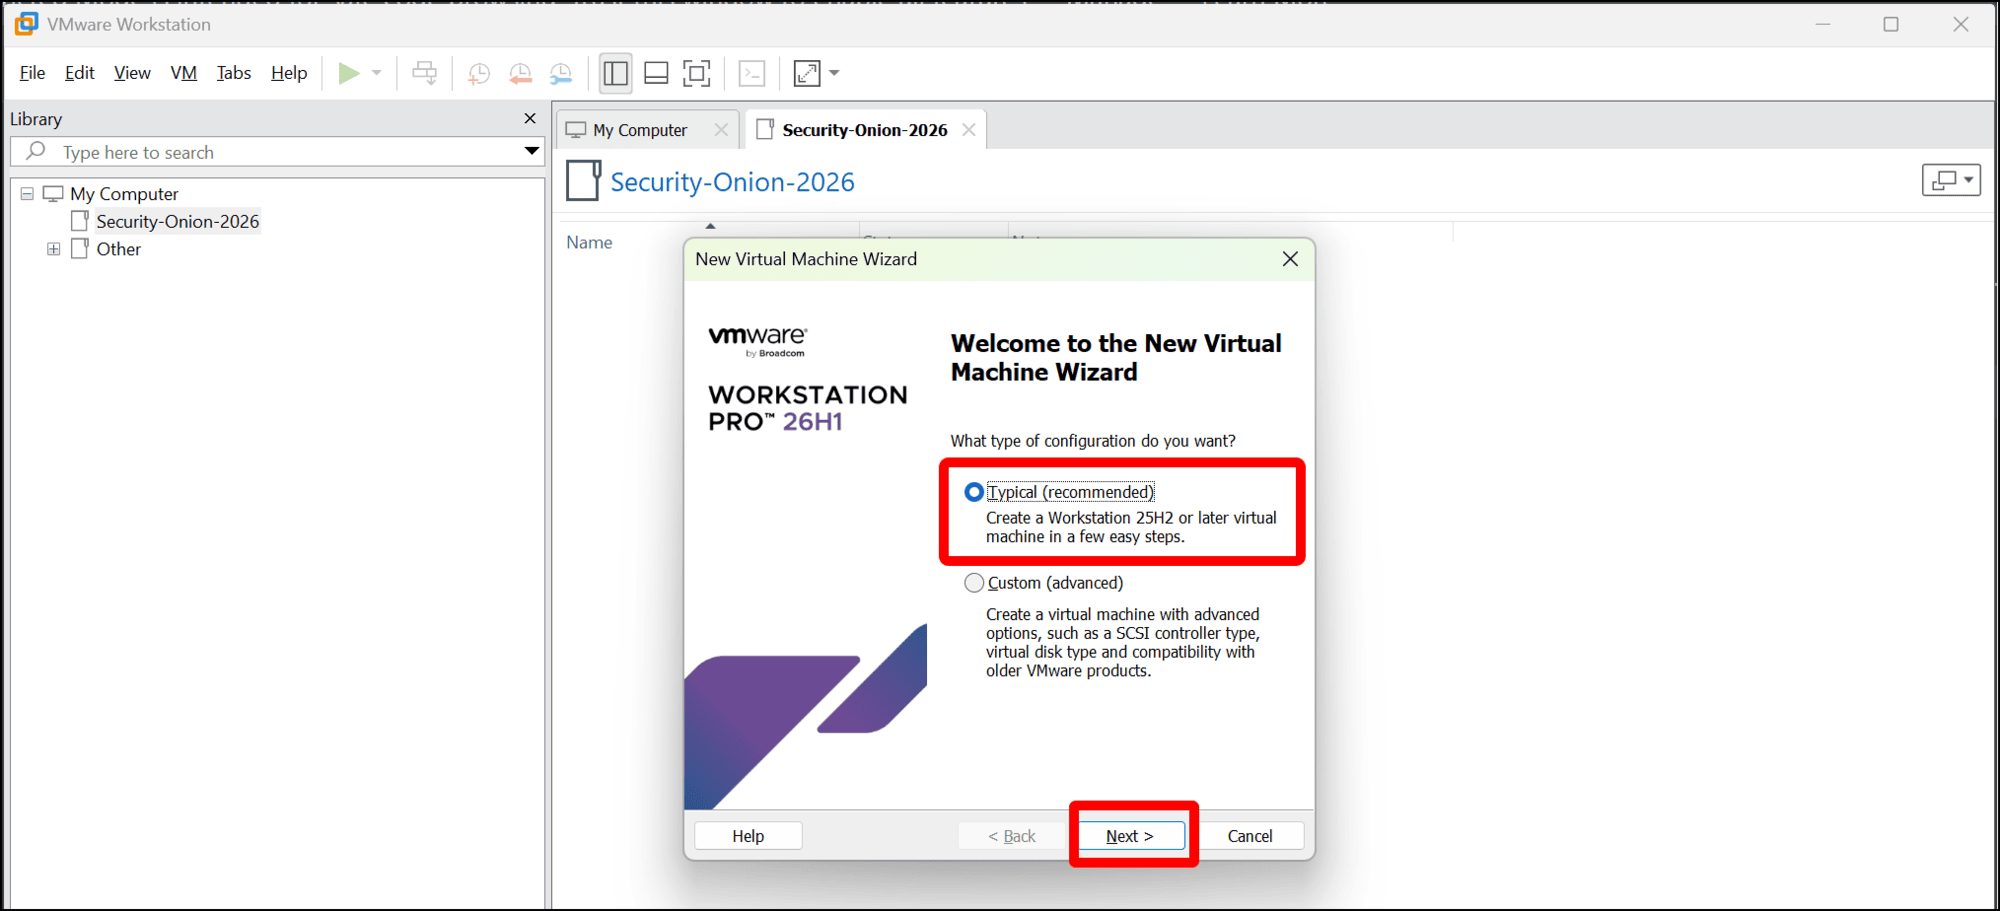
- When the New Virtual Machine Wizard opens, leave the Typical (recommended) radio button selected and click Next.
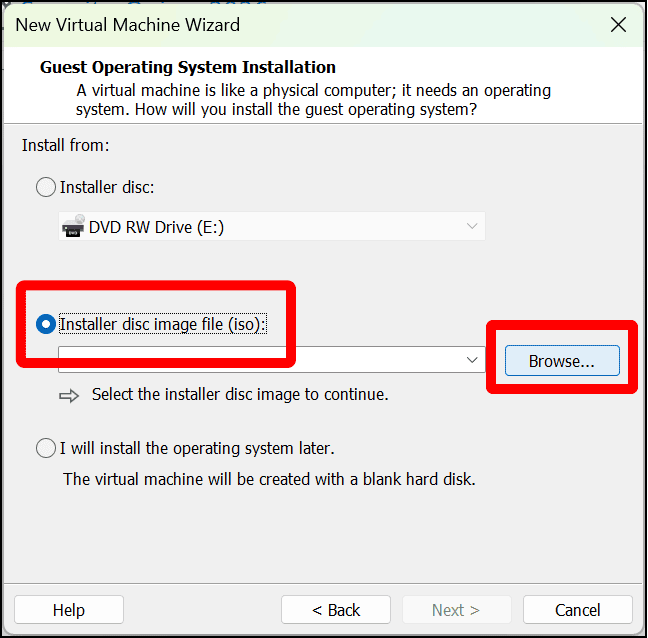
- On the Guest Operating System Installation screen, select Installer from disk image (iso) and click Browse underneath it.
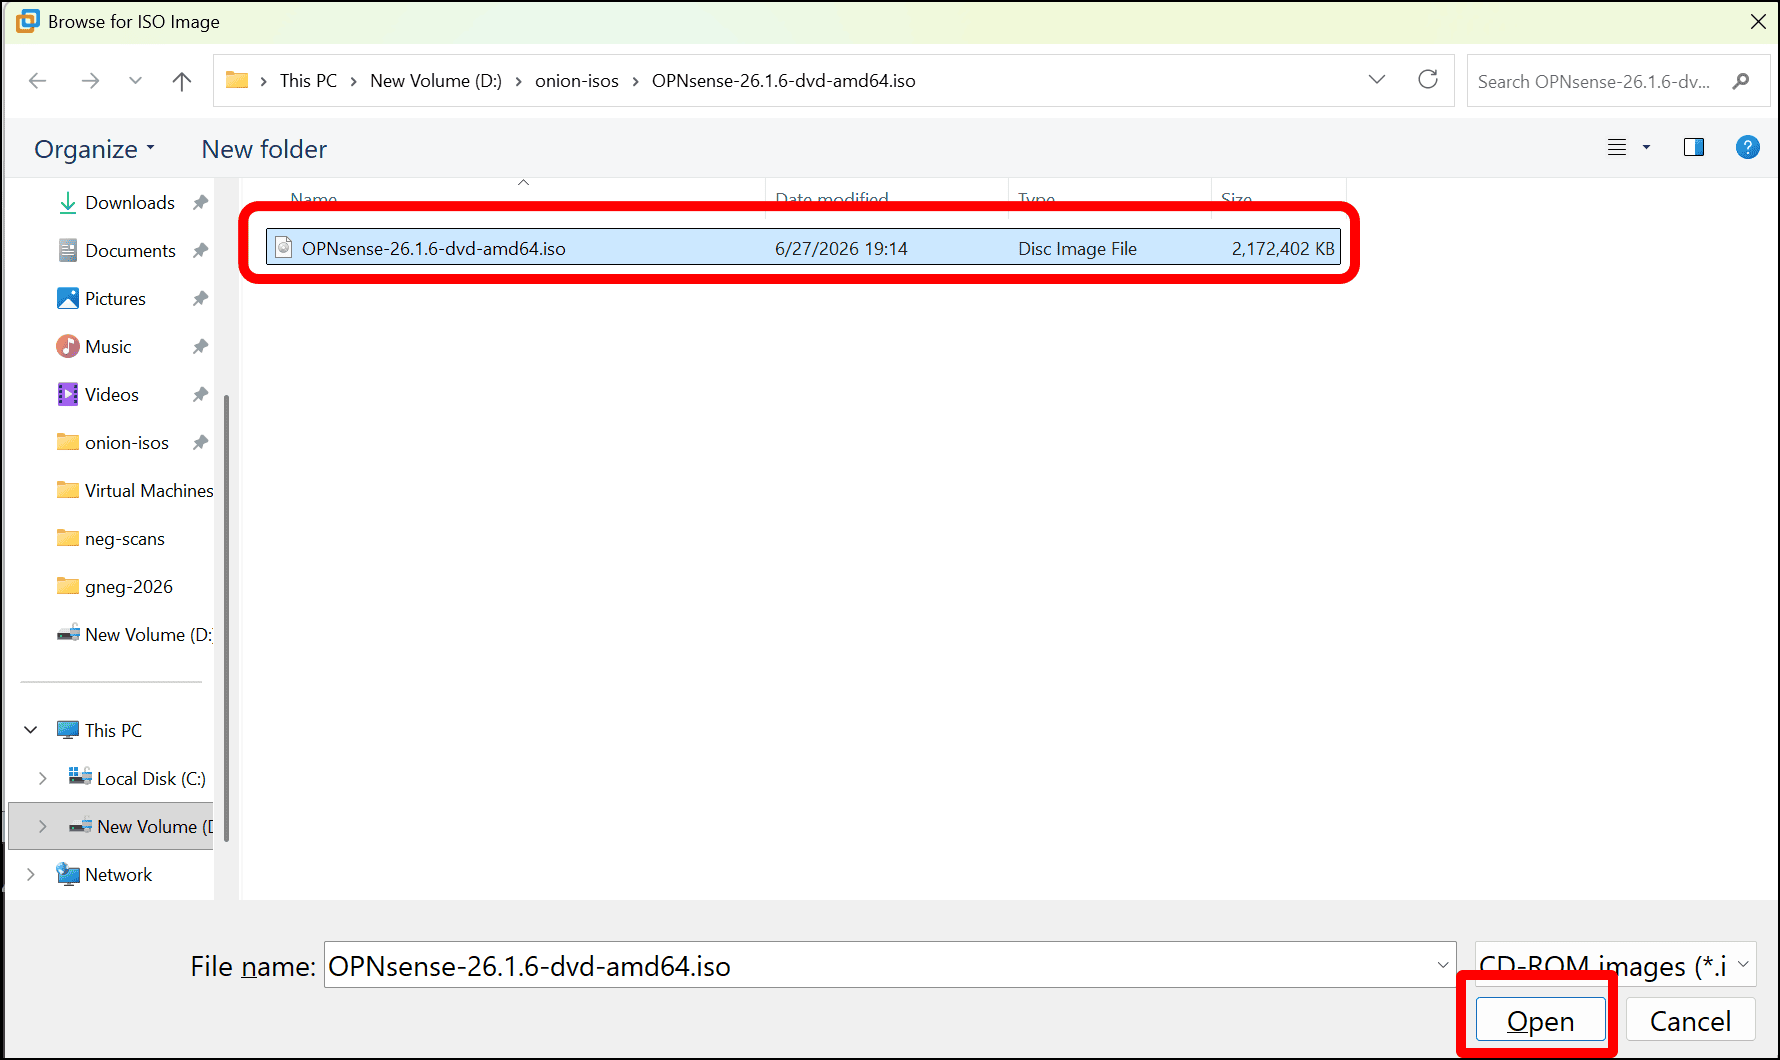
- In the Browse for ISO Image dialog, navigate to the OPNsense ISO that you extracted earlier, select it, and click Open.
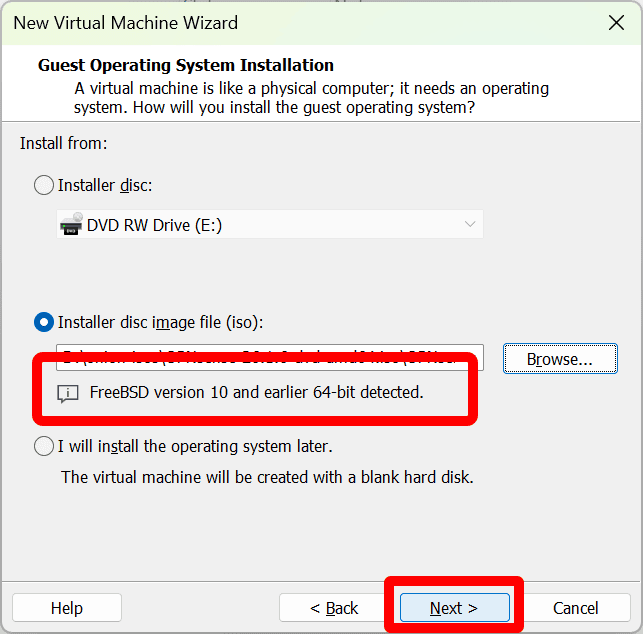
- VMware will detect the operating system type based on the ISO. Click Next.
- On the Name the Virtual Machine screen, enter a name for the OPNsense VM. I named mine OPNsense2026. Then click the Browse button to select the location where the VM and its files will be saved to and stored.
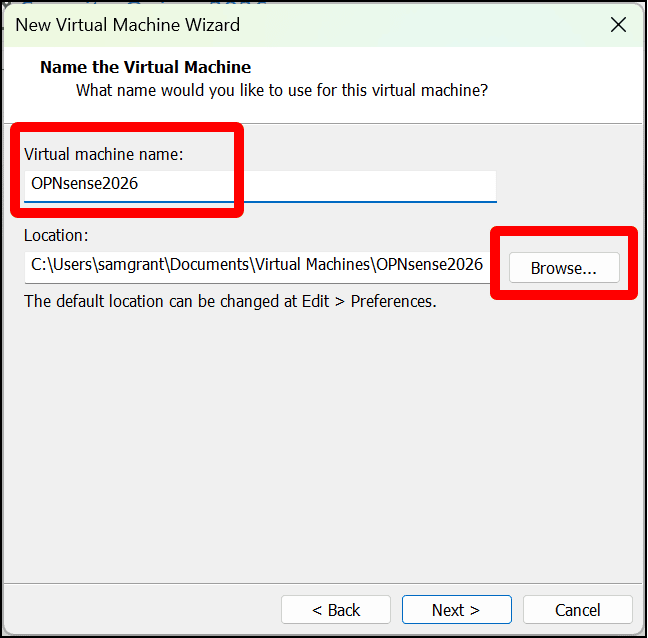
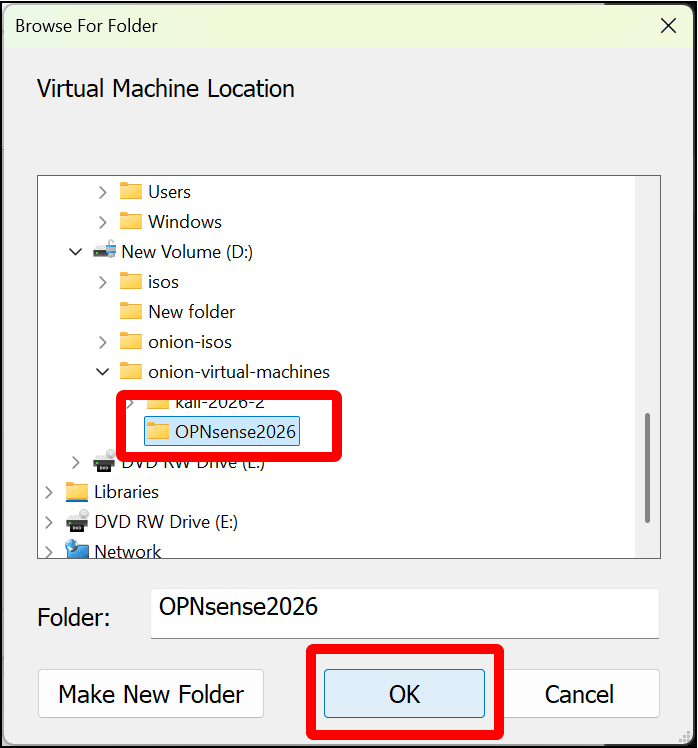
- When you create a virtual machine, VMware stores a collection of files and other data in a folder. I have created a folder on my local drive called onion-virtual-machines. Within that, I created a new folder and gave it the same name as the VM. Navigate to the location where you want the VM stored and click OK.
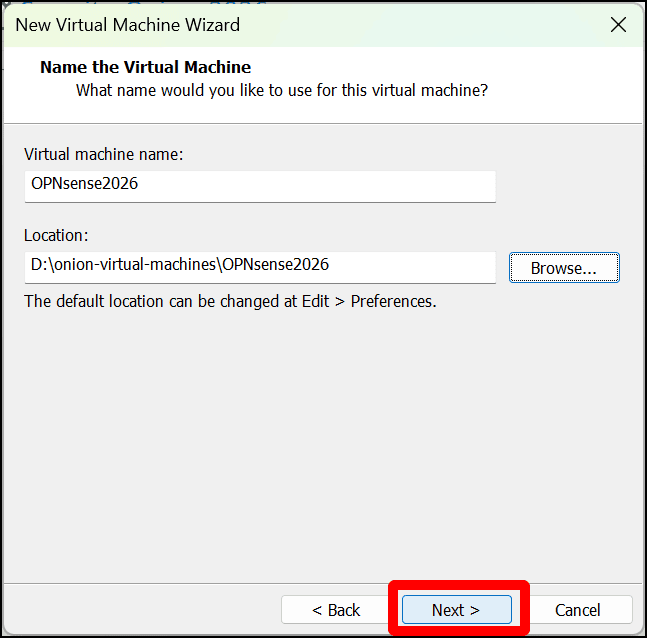
- Click Next.
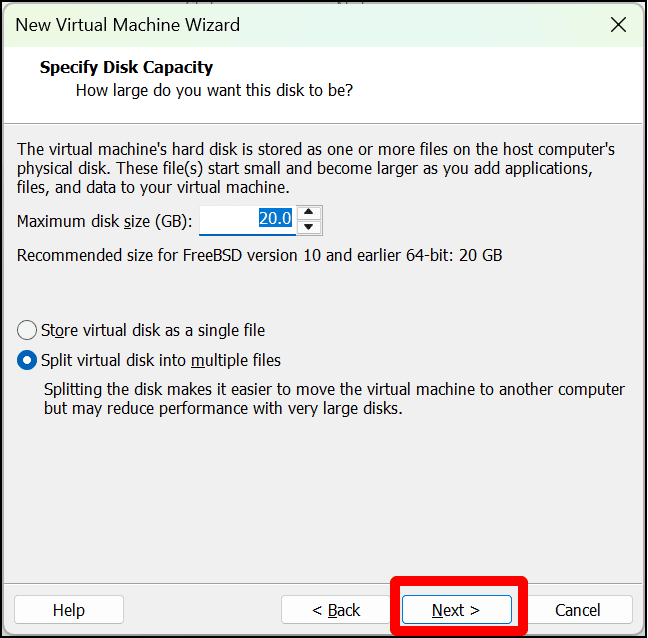
- On the Specify Disk Capacity screen, you can leave the default Maximum disk size (GB) at 20GB. Once created, the OPNsense router will not need much storage. Leave the Split virtual disk into multiple files radio button selected and click Next.
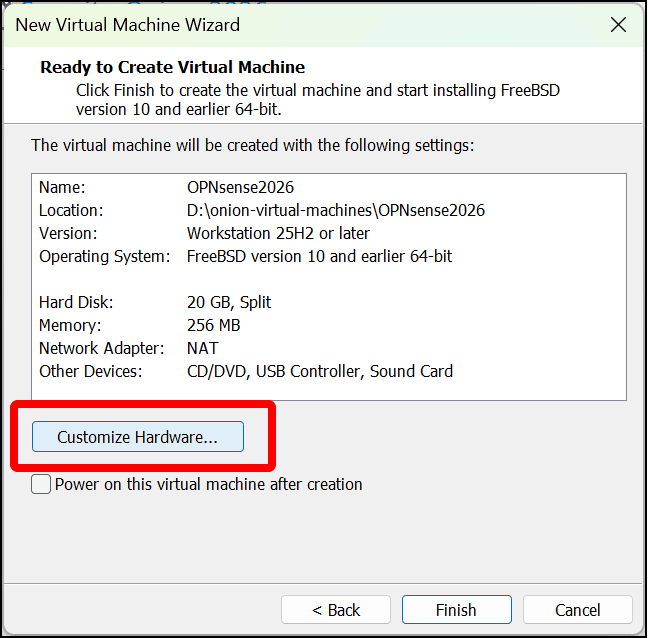
- The Ready to Create Virtual Machine screen displays a summary of the VM’s properties. Click Customize Hardware.
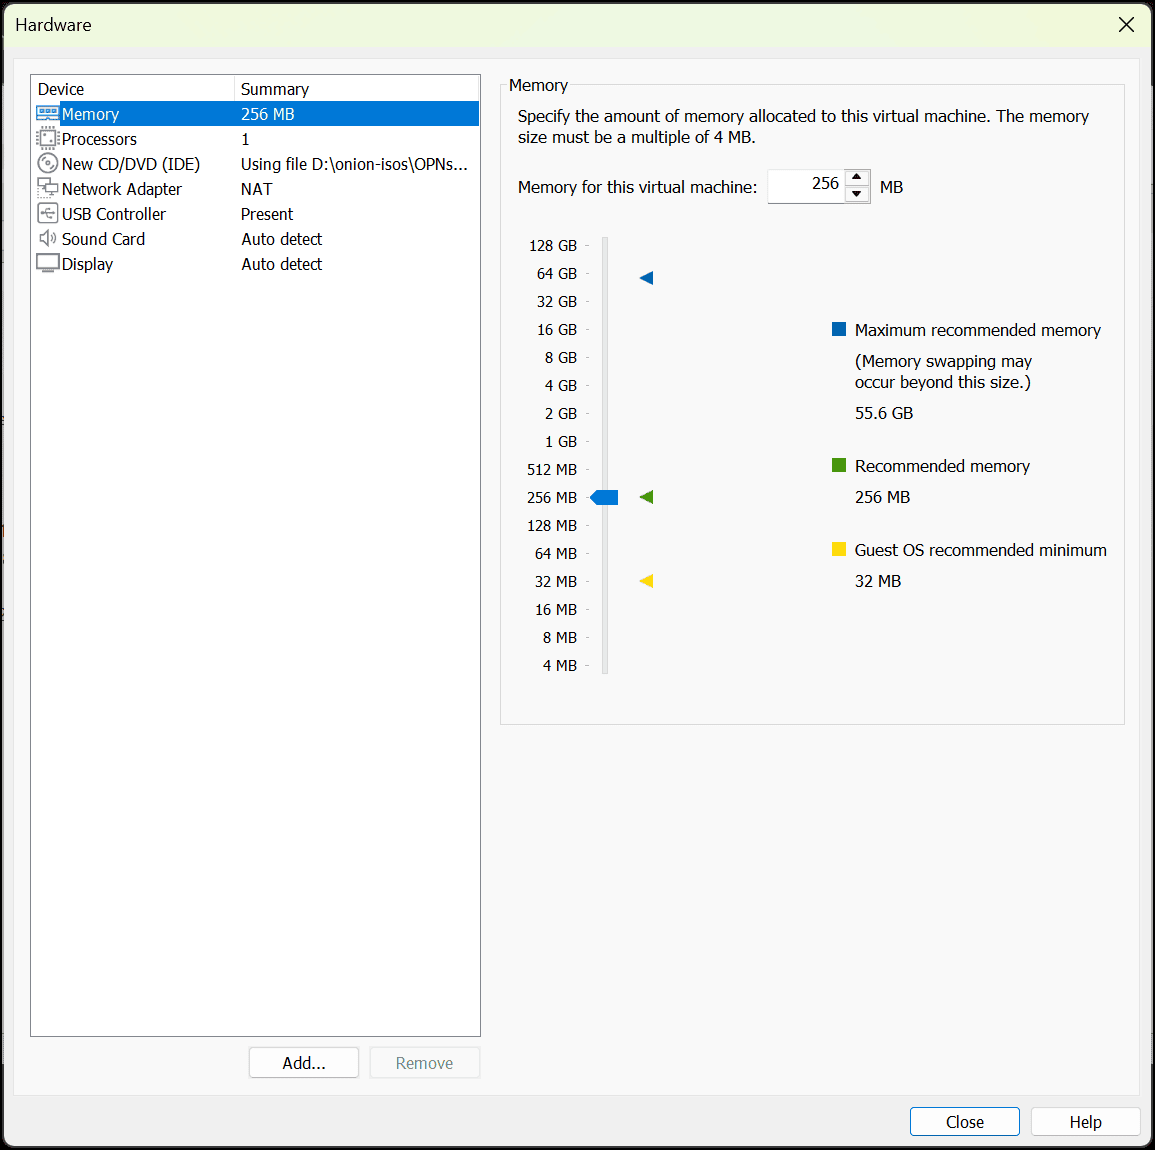
- The Hardware dialog opens. This is where you can add virtualized hardware to a virtual machine, or change the specifications and resources for that hardware.
-
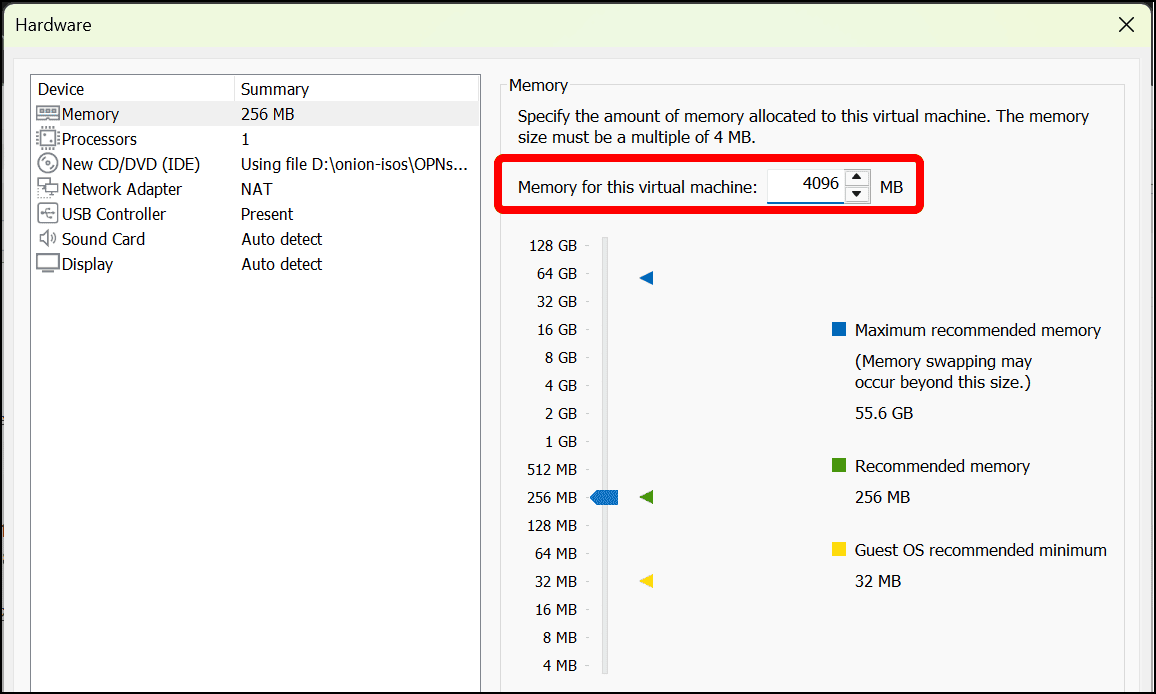
The first thing to change is Memory. VMware defaults to 256MB. Since I started using OPNsense to create these virtual labs, OPNsense has increased its resource requirements significantly. I’m going to increase Memory for this virtual machine to 4GB of memory (4,096MB in computer math), which is a lot, but I may decrease it later after creating and configuring the virtual machine.
As of OPNsense version 26 in mid-2026, the minimum required RAM/memory for an OPNsense host is 3GB.
-
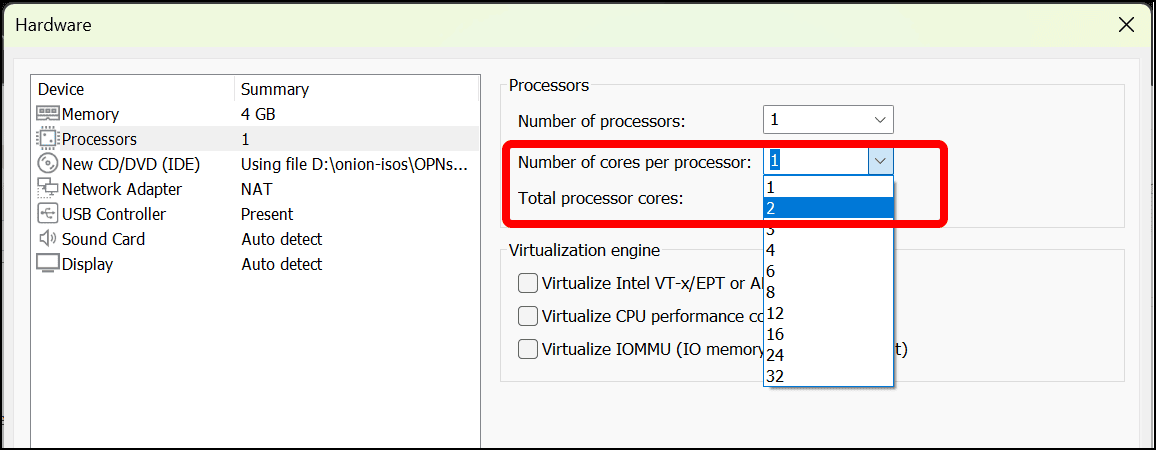
Next, click Processors. OPNsense should be good with a single virtualized processor for the amount of traffic we will be creating, but I do want to make it a dual-core processor. Click the Number of cores per processor dialog and select 2.
As of OPNsense version 26 in mid-2026, the minimum processor requirement for an OPNsense host is a single dual-core processor (“1 GHz dual-core CPU0”).
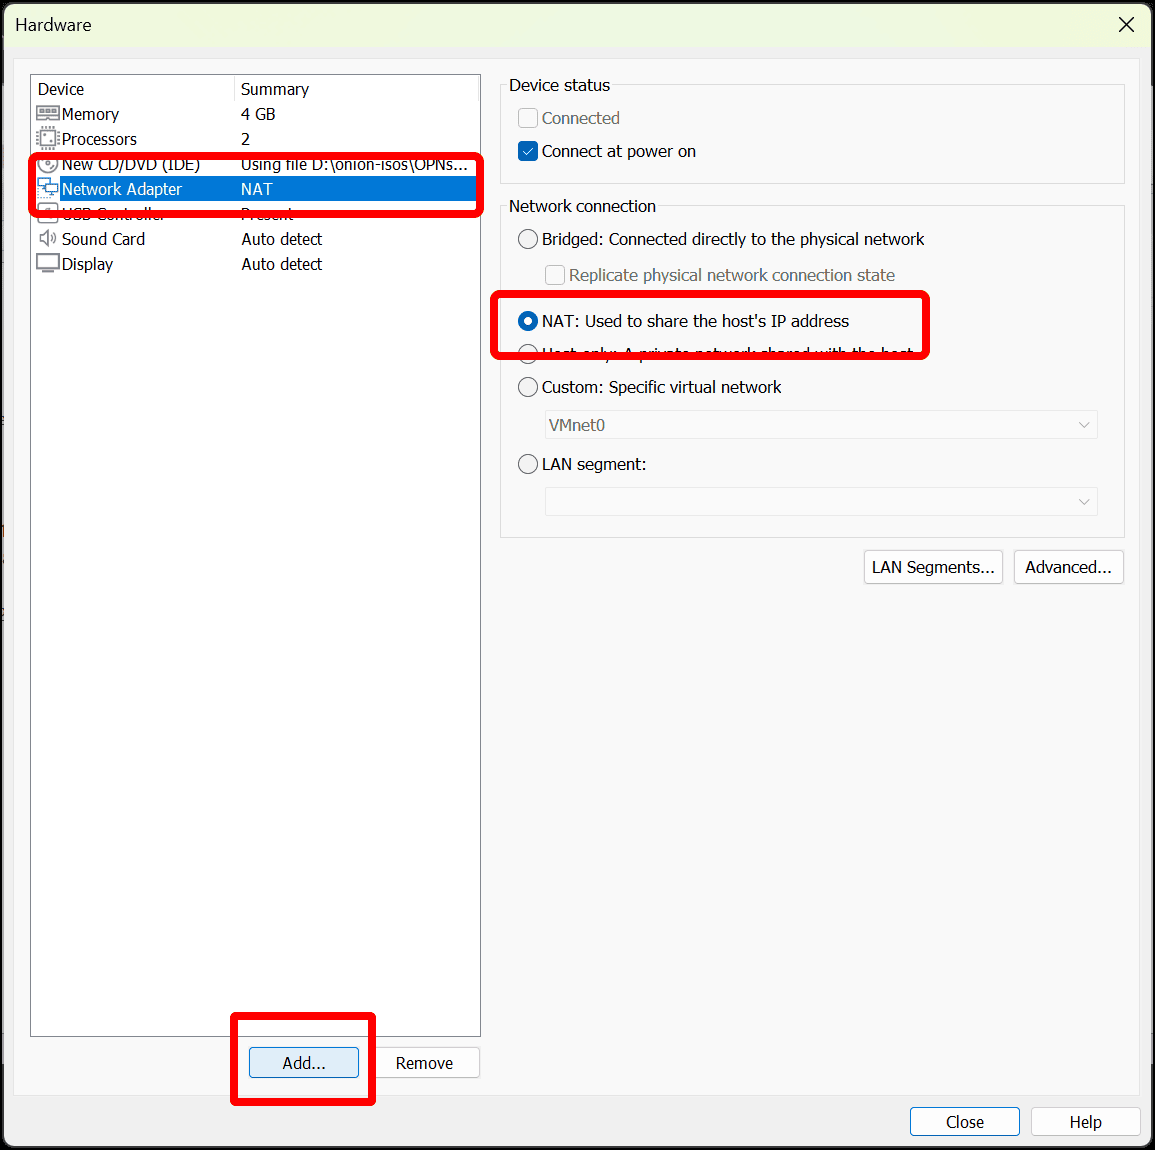
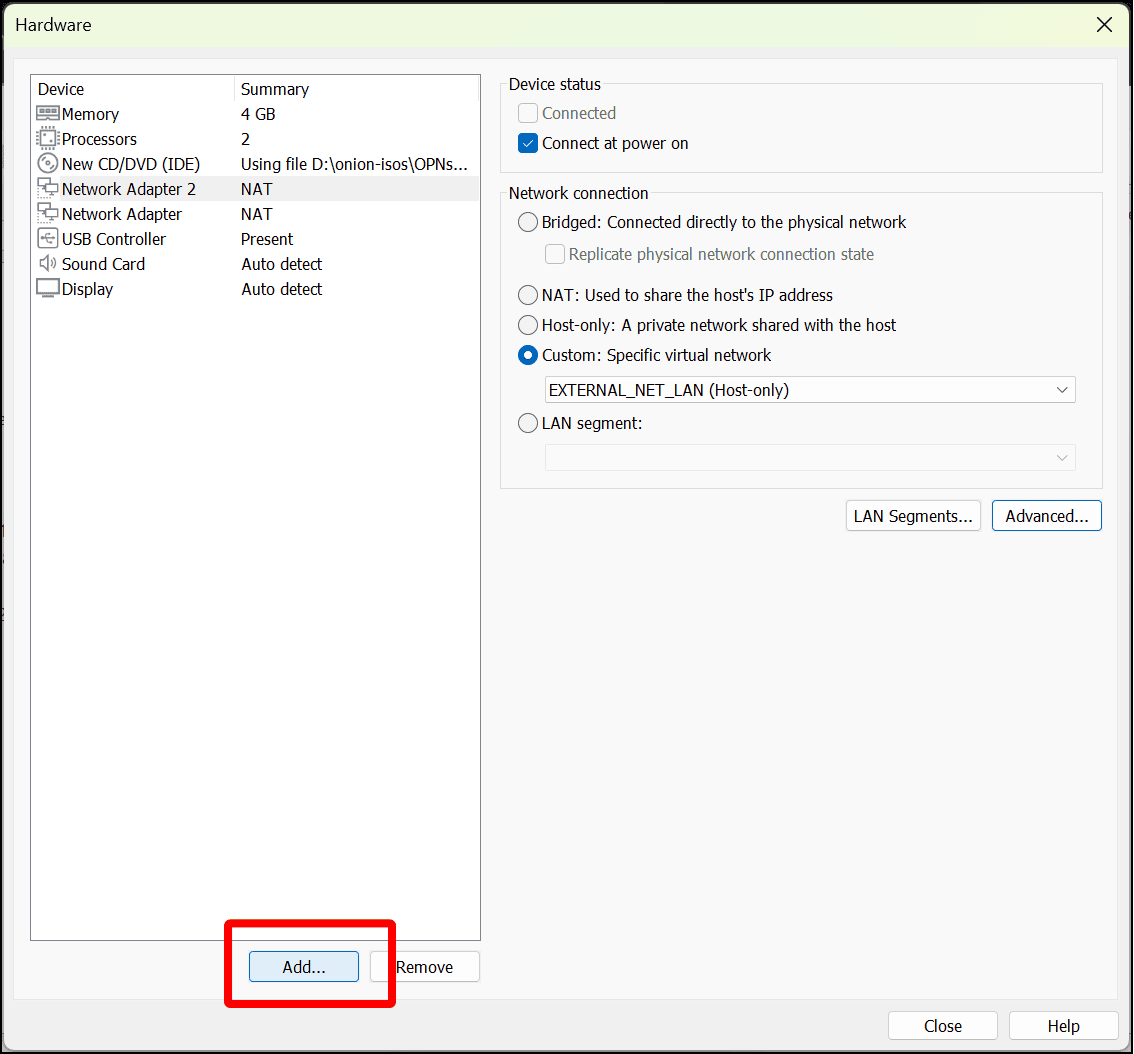
- Click Network Adapter in the sidebar. By default, a virtual machine has one network adapter, a virtualized network interface card (NIC). And by default, this adapter is given a NAT connection. With Network Address Translation, or NAT, VMware uses the host PC’s IP address to allow virtual machines to connect to other networks and hosts, including the public internet. Leave this network adapter as is, but you need to create two more to connect the OPNsense VM to the two virtual private networks you created. So click Add at the bottom of the sidebar.
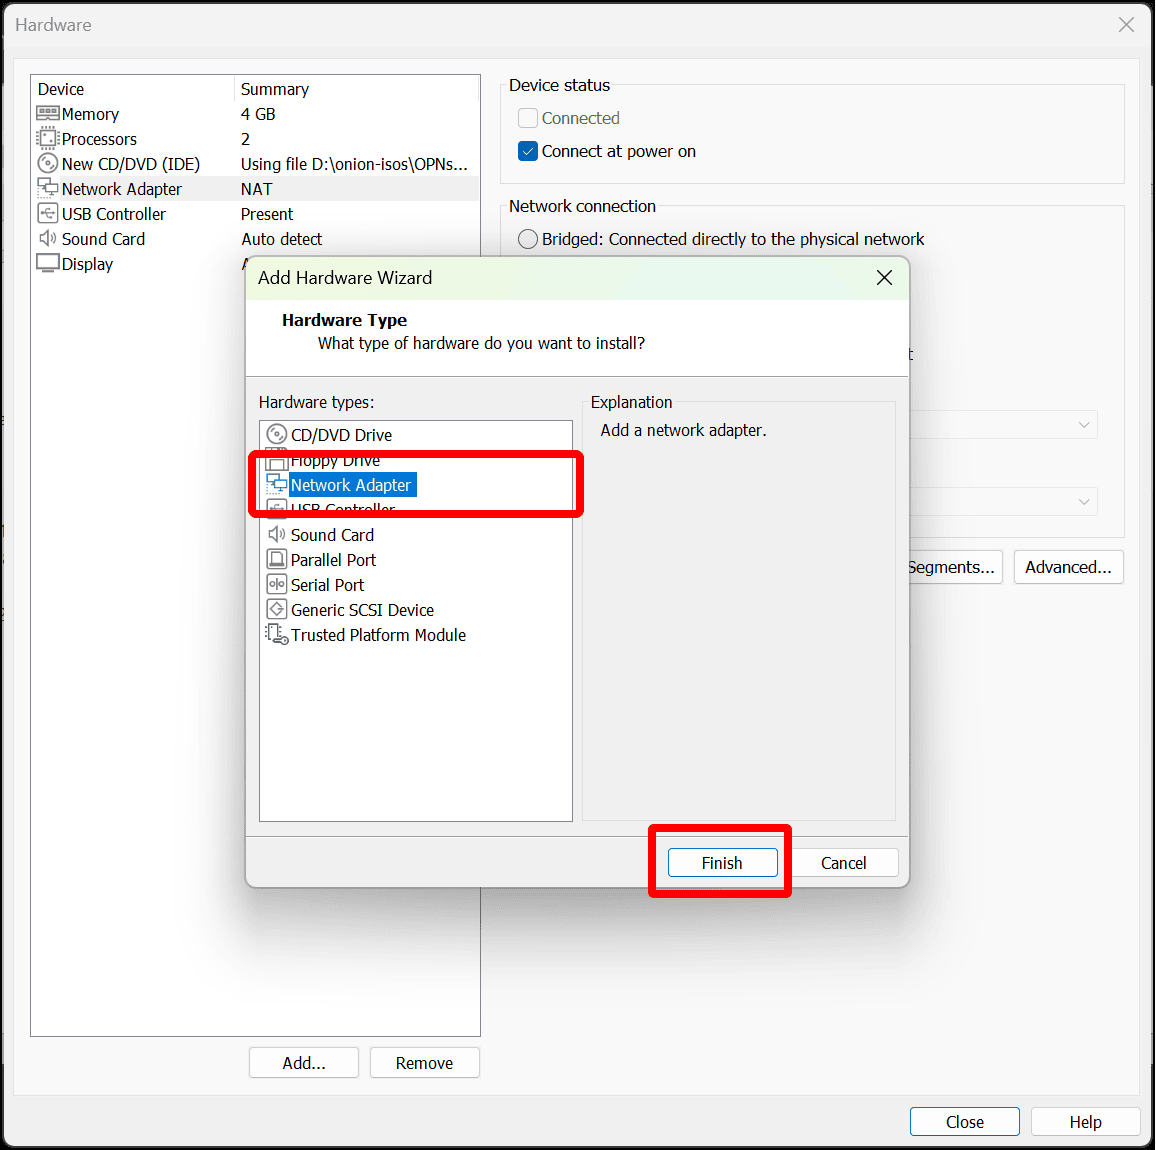
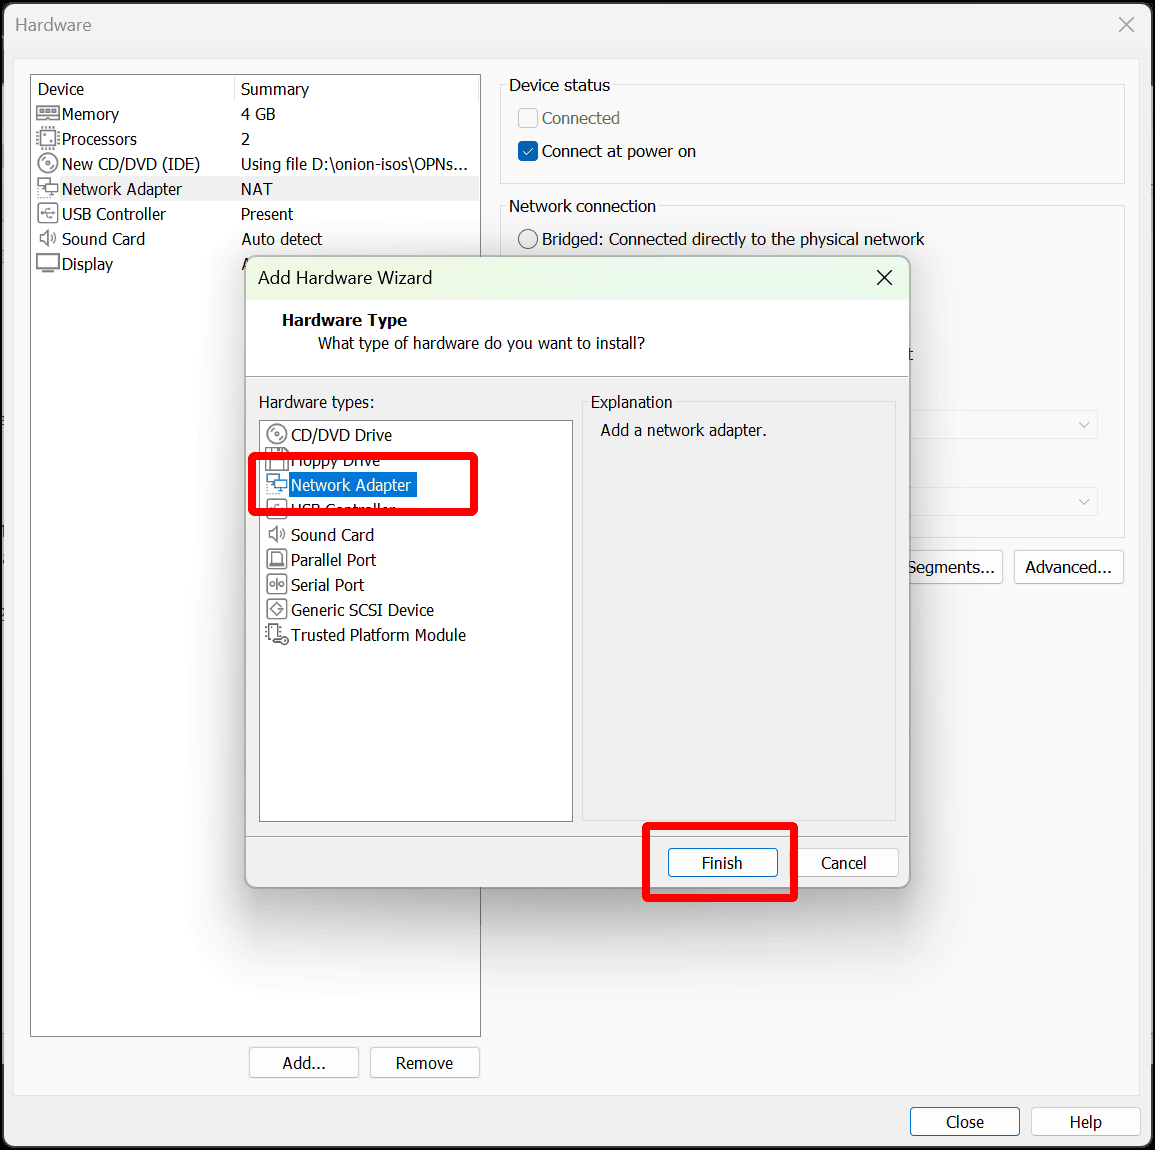
- When the Add Hardware Wizard displays, select Network Adapter and click Finish.
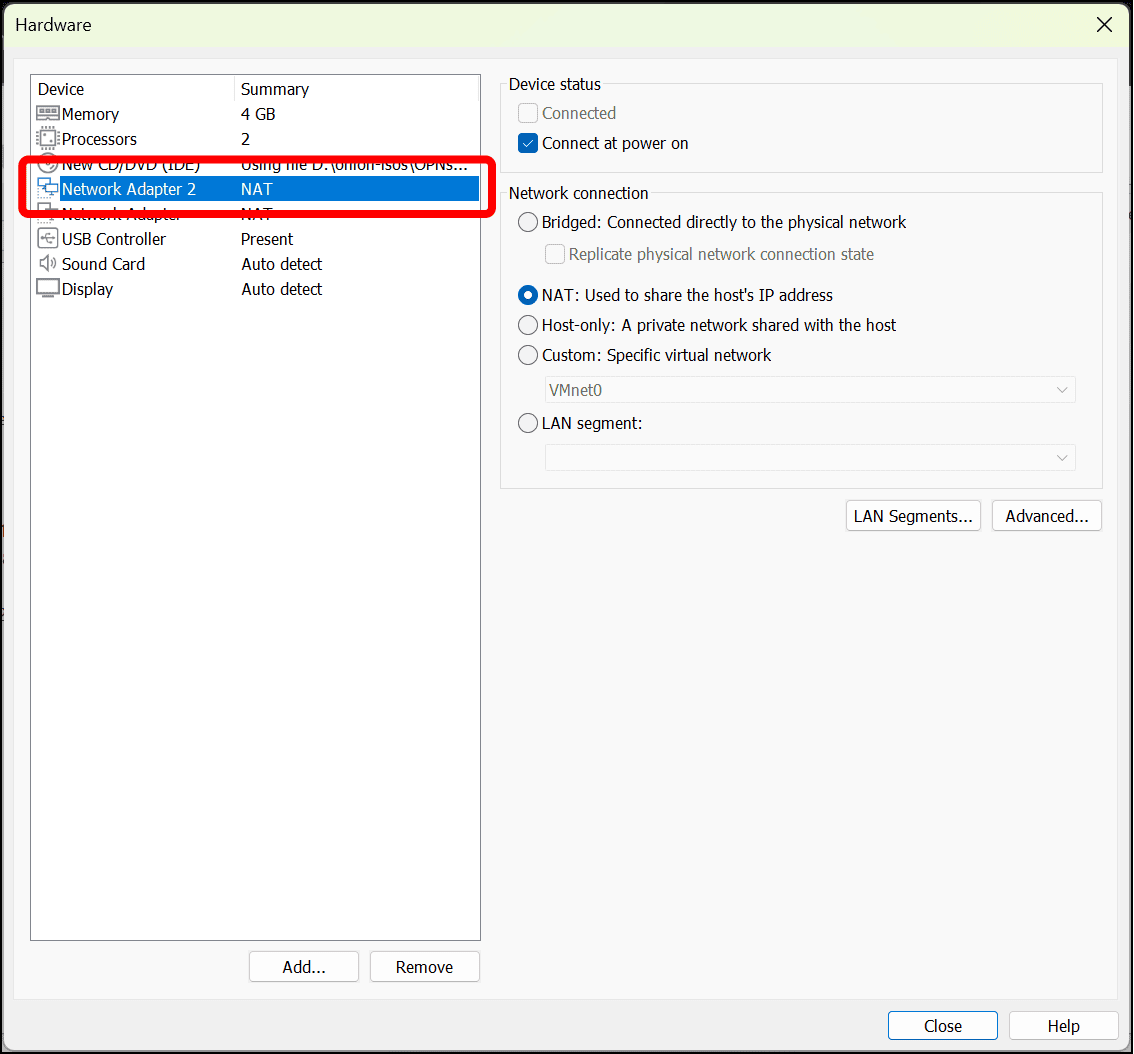
- Network Adapter 2 displays on the Device list. Click it.
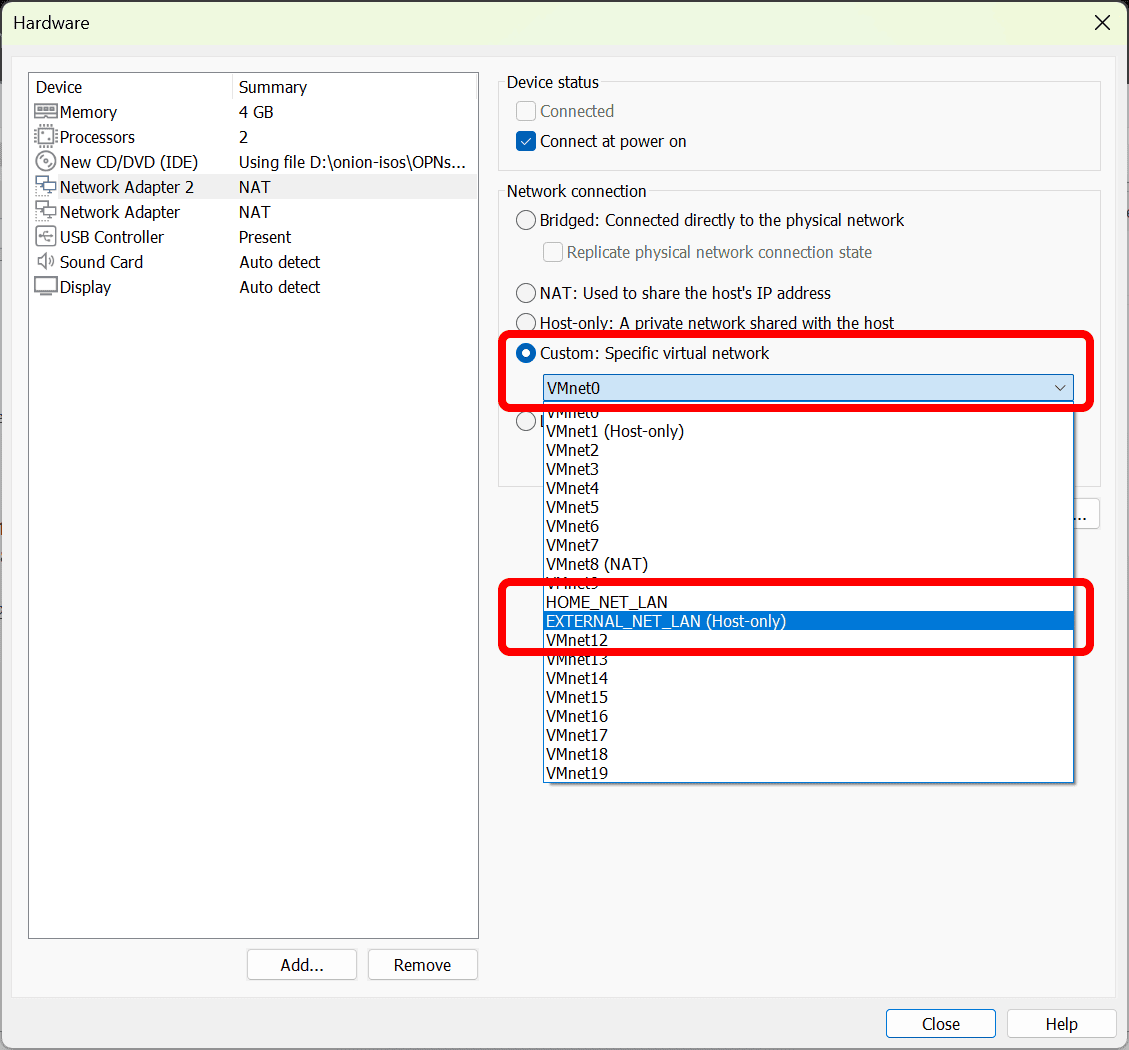
- Select the Custom: Specific virtual network radio button, then click the drop-down menu and select EXTERNAL_NET_LAN from the list of VMnets.
- Click Add again to add a third network adapter to the OPNsense VM.
- Repeat the steps to add a network adapter through the Add Hardware Wizard.
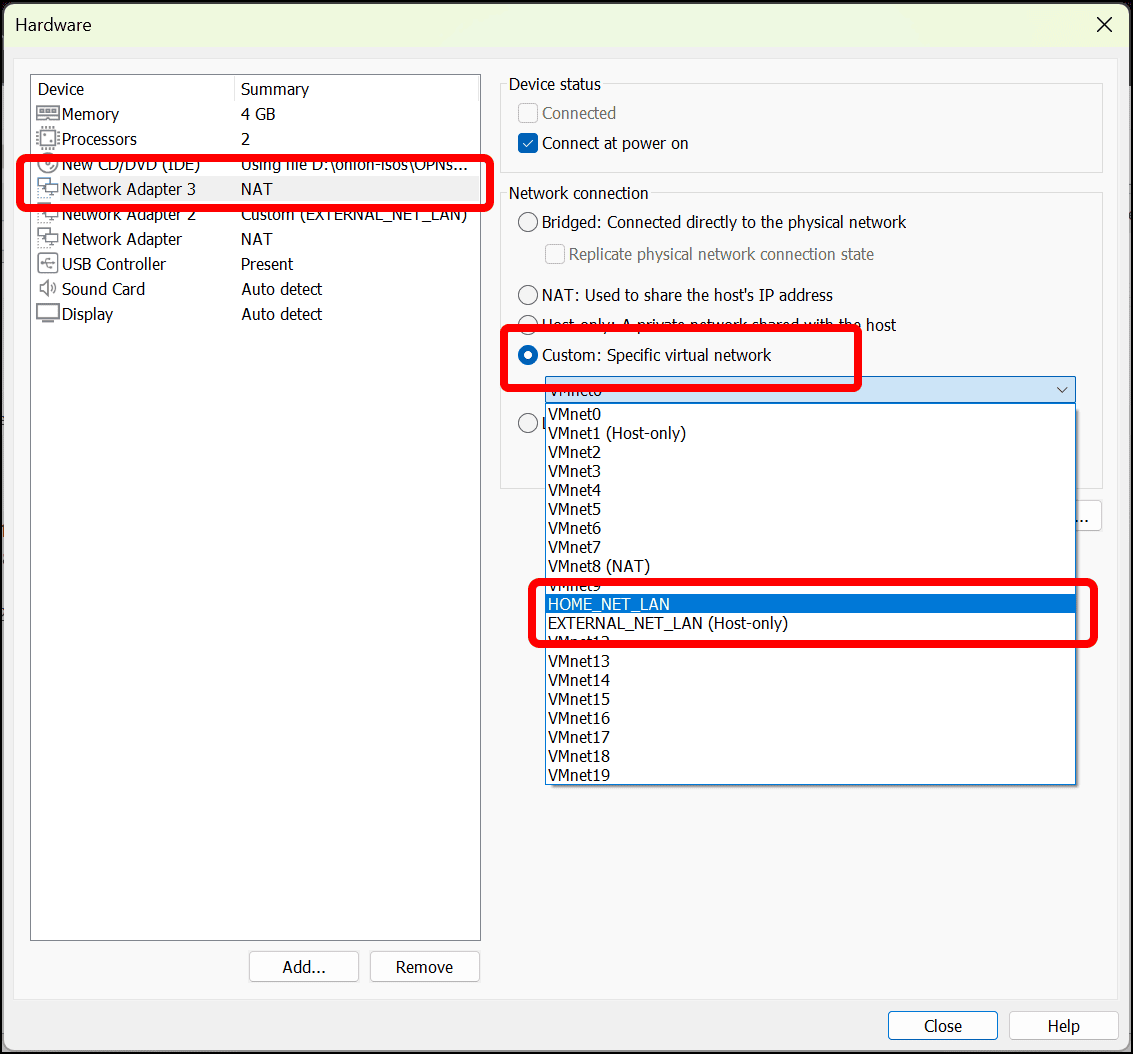
- After creating Network Adapter 3, select it in the Device list, and then the Custom: Specific virtual network radio button and select HOME_NET_LAN from the list of VMnets.
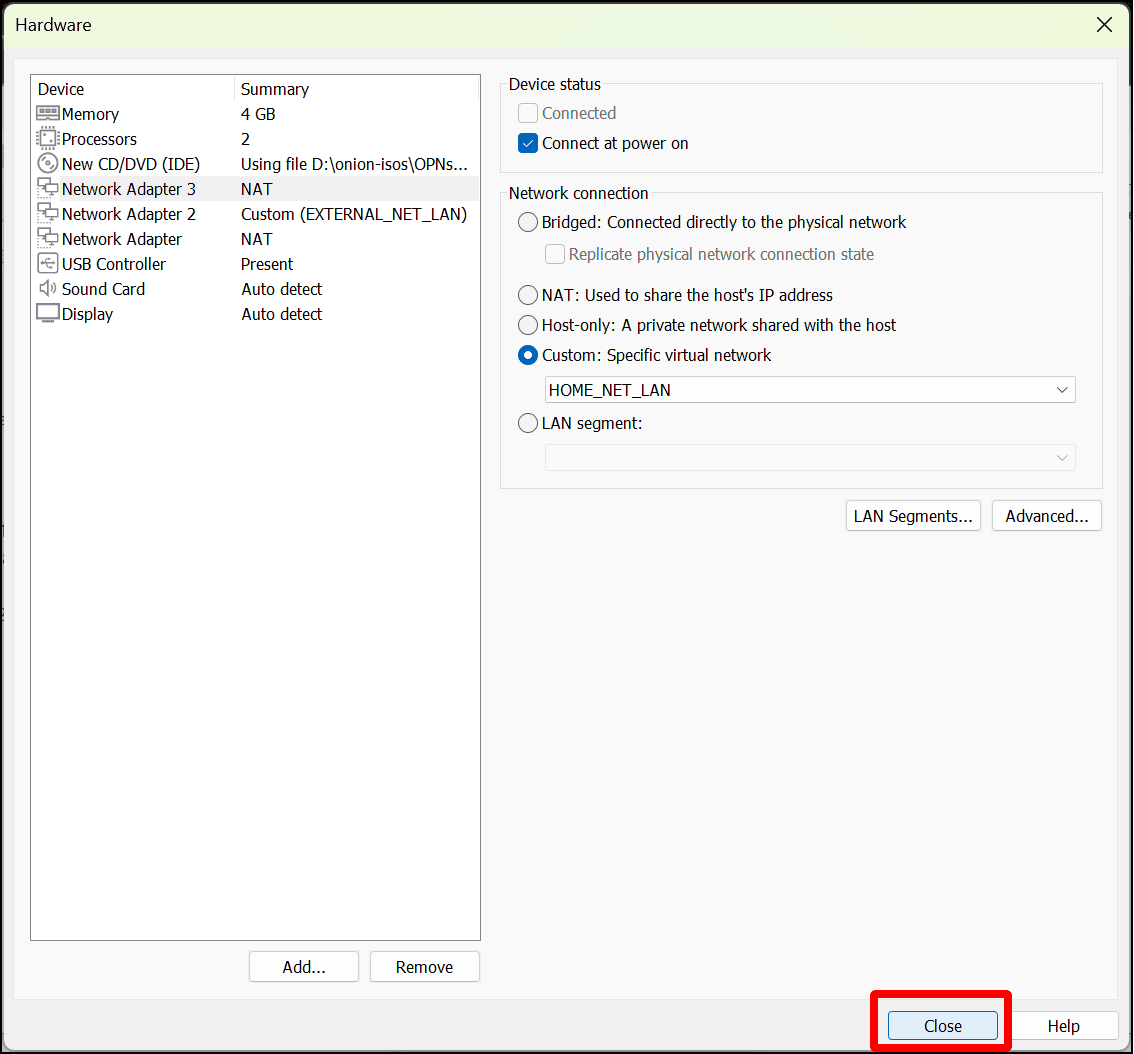
- You’re done adding hardware to the OPNsense VM. Click Close.
- Click Finish to close the New Virtual Machine Wizard and complete the creation of the OPNsense VM.
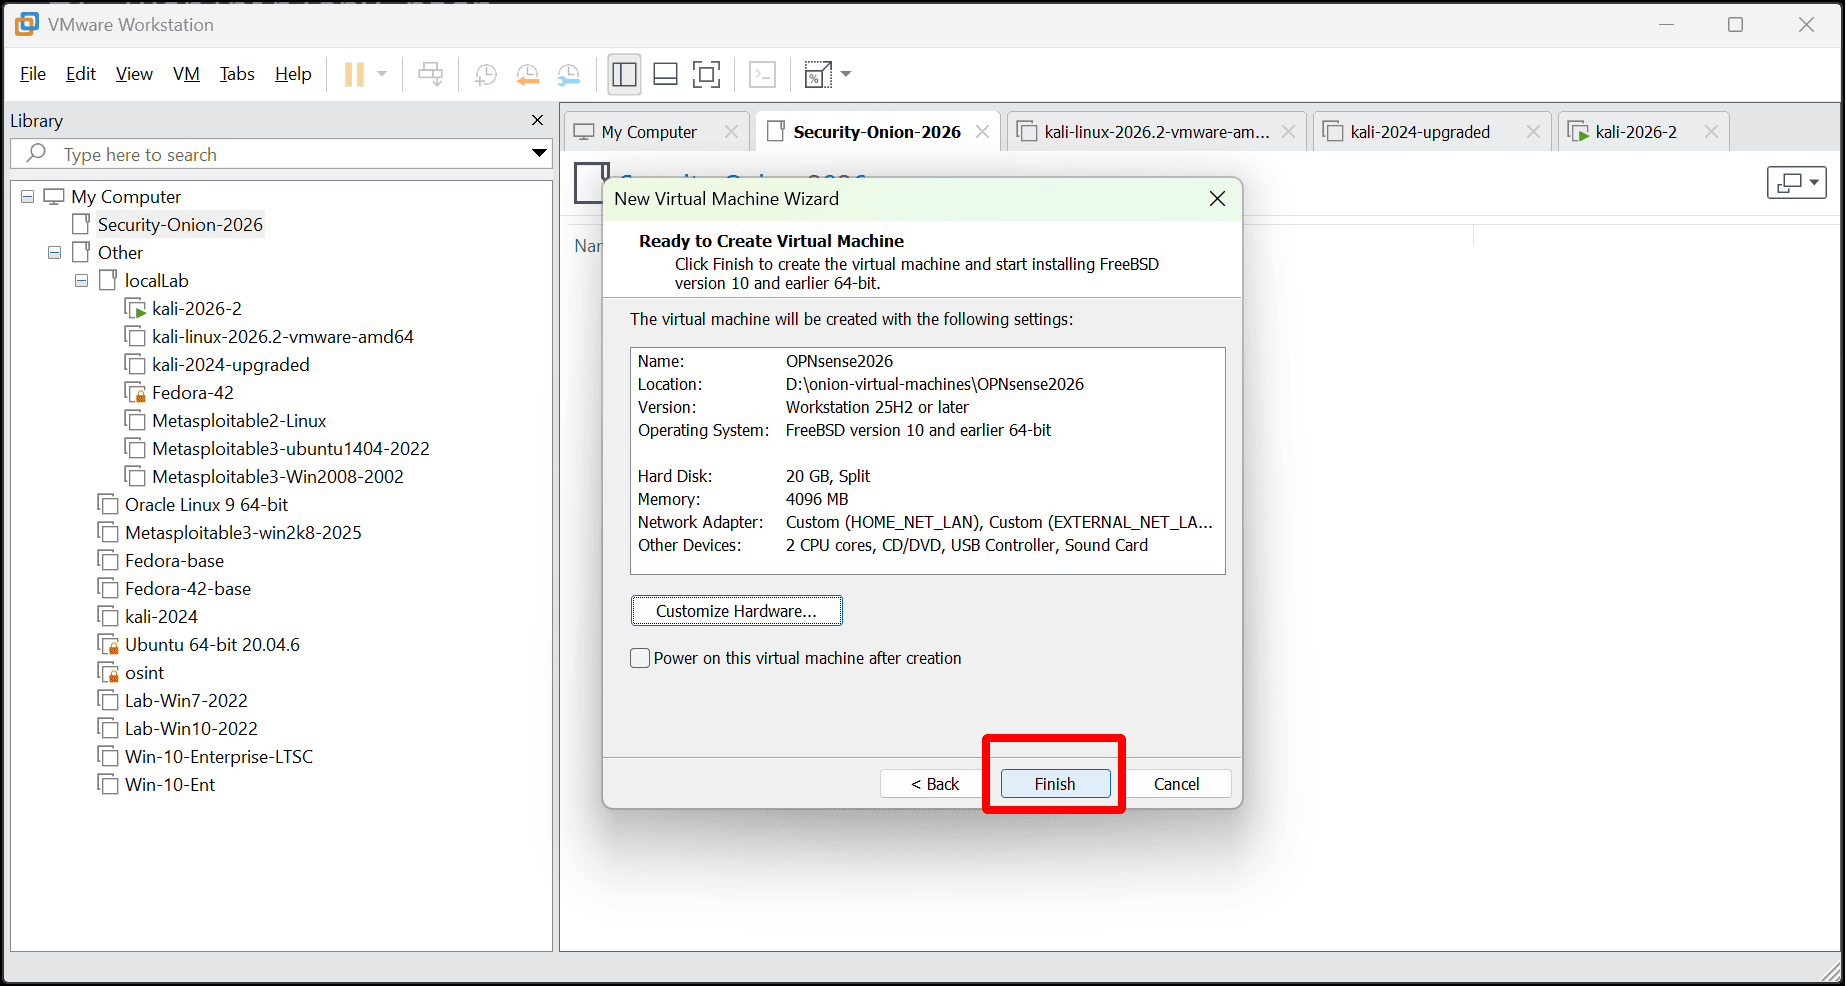
- The OPNsense VM appears in the left sidebar. Drag it into the Security-Onion-2026 folder.
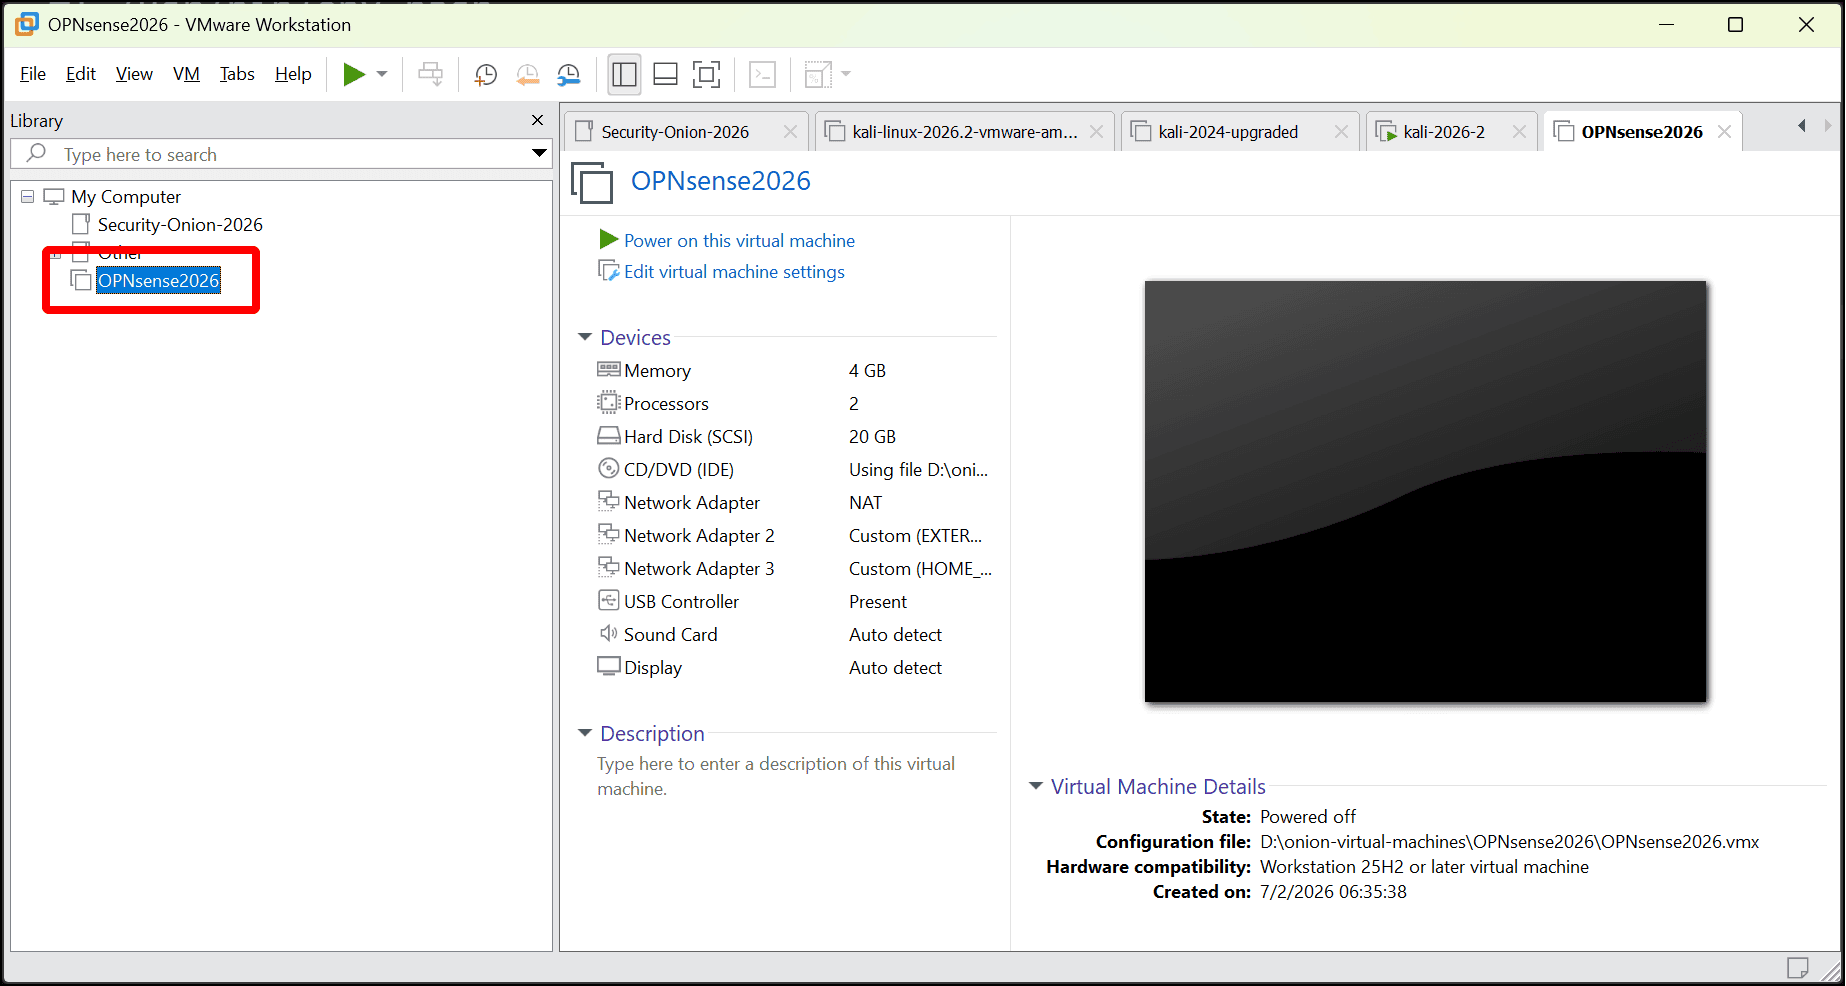
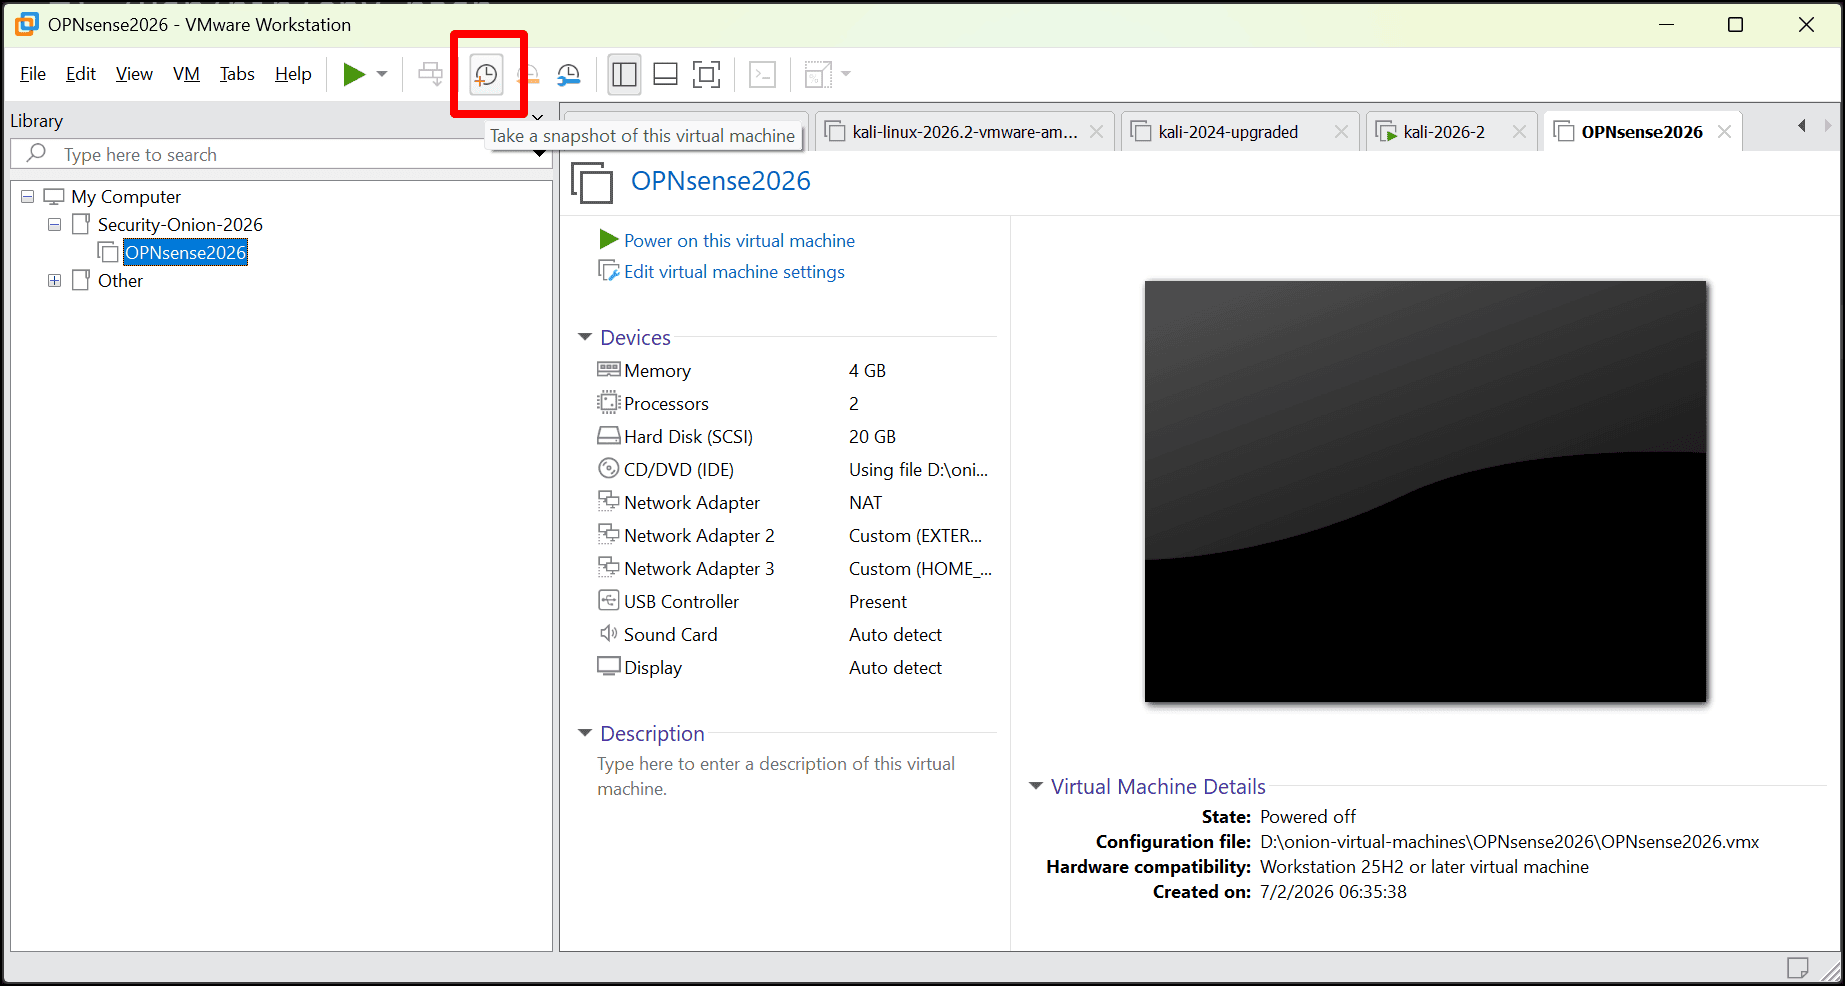
- Create a snapshot of the VM so that you can revert to this state if something goes wrong in the future. Look for the clock icon with the red plus sign in the menu bar to Take a snapshot of this virtual machine.
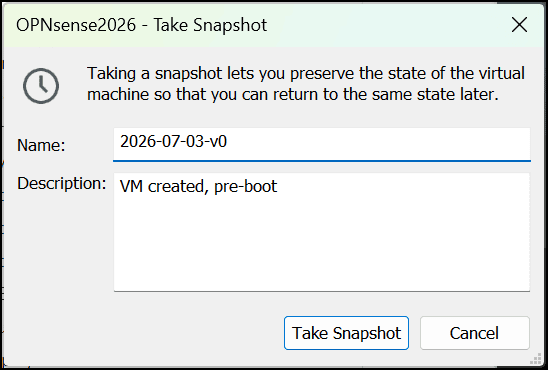
- In the Take snapshot dialog, enter a Name and Description for the snapshot and click Take Snapshot.
- You are now ready to start your OPNsense VM, install it, and configure it to handle the traffic for your local lab.