Create VMware Private Virtual Networks for the Security Onion Environment
These steps detail how you can use VMware Workstation Pro’s networking capabilities to create two VMware private virtual networks. You will connect your different virtual machines (VMs) to these networks so that the VMs can interact with one another, and, if necessary, reach out to the public internet to download updates, browse the internet, etc.
Per VMware’s documentation, “private virtual networks (vmnet) configurations… only allow communication between virtual machines and the host system.”
Private Virtual Network Overview and Topology
In this scenario you use VMware’s Virtual Networking Editor feature to create two private virtual networks:
- EXTERNAL_NET_LAN: This will be a private virtual network that you will connect a Kali VM to. The Kali VM will access the management web user interface of the OPNsense router. It is also the network that will simulate a public wide area network (WAN) from which the Kali VM will reconnoiter and attack the network monitored by the Security Onion deployment. In this tutorial, you assign this network the EXTERNAL_NET_LAN network an IP address range of 10.10.9.0/24.
- HOME_NET_LAN: This private virtual network acts as the local-area network (LAN) that Security Onion will monitor. This network is assigned the IP address range of 10.10.10.0/24. You will use that same address range when configuring Security Onion. We will connect virtual machines like Metasploitable to this network, where they can act as targets monitored by Security Onion.
Once you have created the private virtual networks, you will attach the virtual network adapters of the various virtual machines to these networks.
A note on the network names: I got the names EXTERNAL_NET and HOME_NET from one of the most important parts of Security Onion, the Suricata intrusion detection system (IDS). Suricata signature-based detection rules (which are, in turn, based on Snort, an earlier IDS), use $EXTERNAL_NET and $HOME_NET to establish traffic directionality—what is on the network that you manage and are seeking to monitor and detect is $HOME_NET. What is outside of your network is everything else, $EXTERNAL_NET. In many cases, malicious traffic needs to either come from or go to $EXTERNAL_NET for it to match a Suricata rule, which is why you need to declare both networks to define the lab environment.
-
OPNsense router:
- Network Adapter: Connects to the host Windows PC using Network Address Translation or NAT. The OPNsense VM is assigned an IP address using VMware’s NAT network and can connect to the internet through the host operating system’s internet connection.
- Network Adapter 2: This will connect to the EXTERNAL_NET_LAN (10.10.9.0/24) subnet.
- Network Adapter 3: This will connect to the HOME_NET_LAN (10.10.10.0/24) subnet.
-
Security Onion network intrusion detection system:
- Network Adapter: Connect to the host Windows PC NAT so that you can access Security Onion via SSH and the Security Onion Console using the browser on your host Windows PC. Think of this as the “management network” connection.
- Network Adapter 2: This network adapter acts as a “sniffer” interface and will connect to the HOME_NET_LAN (10.10.10.0/24) subnet to monitor traffic.
-
Kali virtual machine:
- Network Adapter: This will connect to the EXTERNAL_NET_LAN (10.10.9.0/24) subnet. From here it can access the web management interface of OPNsense for network management, and also reconnoiter and launch attacks against hosts on HOME_NET_LAN.
-
Metasploitable virtual machines and other “targets:”
- Network Adapter: Any virtual machines that we want Security Onion to monitor will be connected to HOME_NET_LAN.
This diagram depicts the network components and topology that I am using in this scenario: 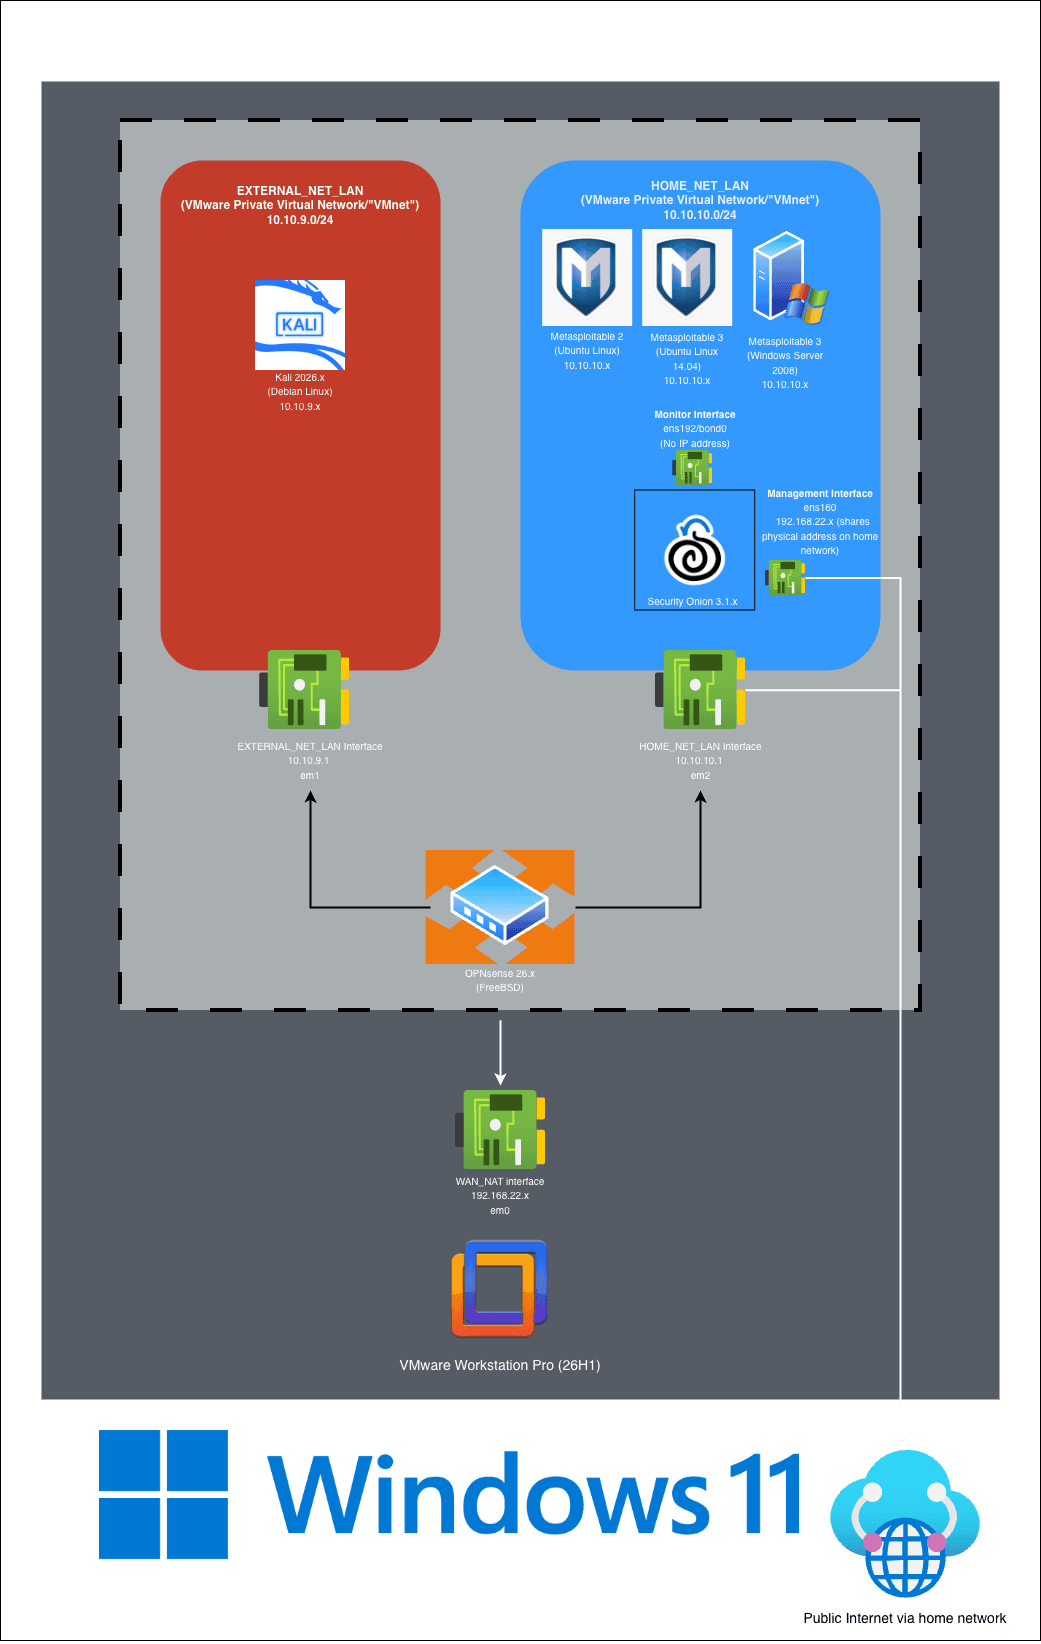
Create the Private Virtual Networks
-
Open VMware Workstation Pro, click the Edit menu, and select Virtual Network Editor.

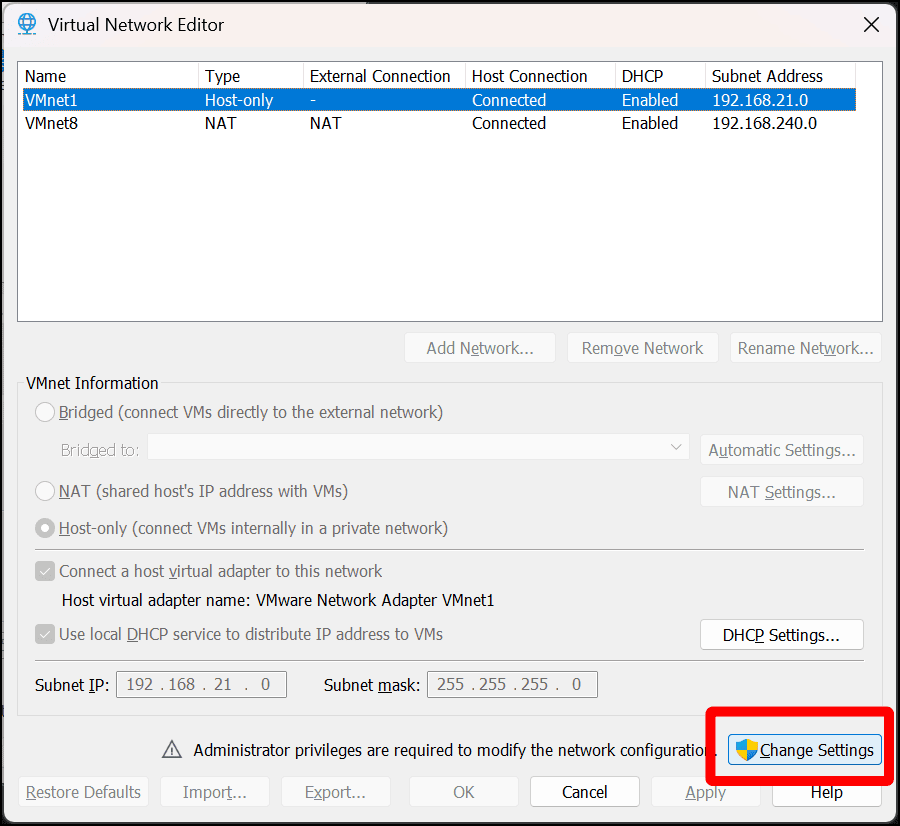
- The Virtual Network Editor opens as its own application within Windows. Click Change Settings.
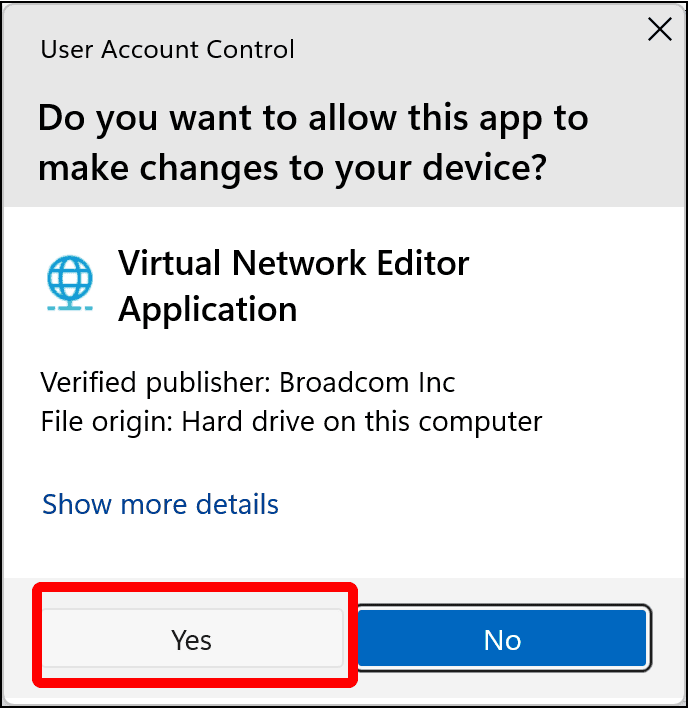
- When you click Change Settings, a Windows User Account Control screen displays and asks if you want to allow Virtual Network Editor Application to make administrative changes to the computer. Click Yes.
- Click Add Network.
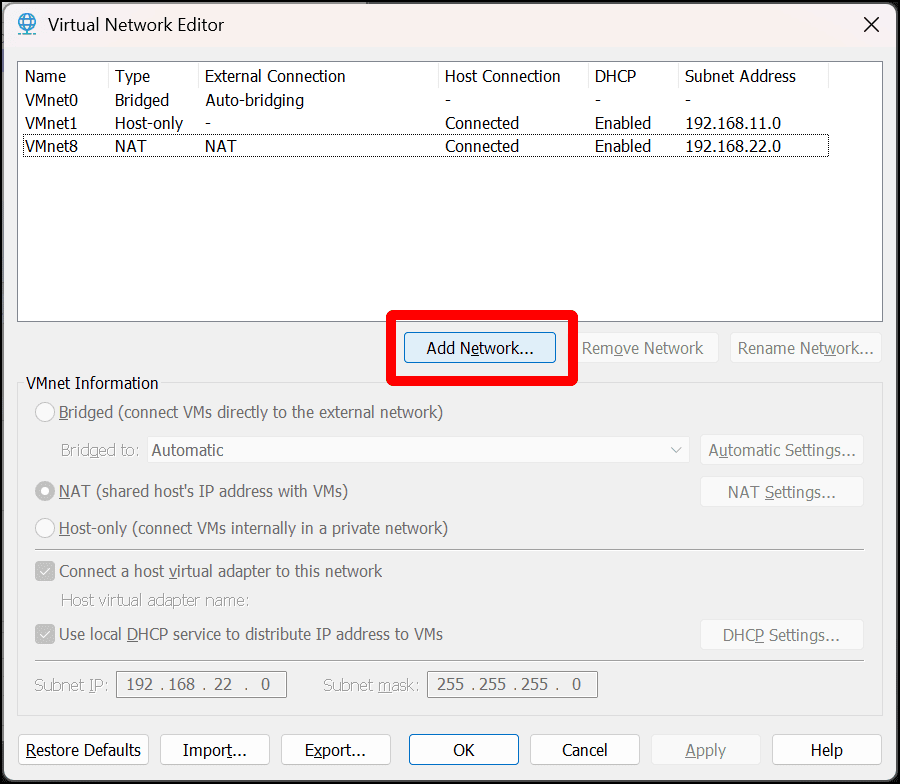
- An Add a Virtual Network dialog opens. Click the select a network to add drop-down menu and select one of the VMnets. I am starting by selecting VMnet10.
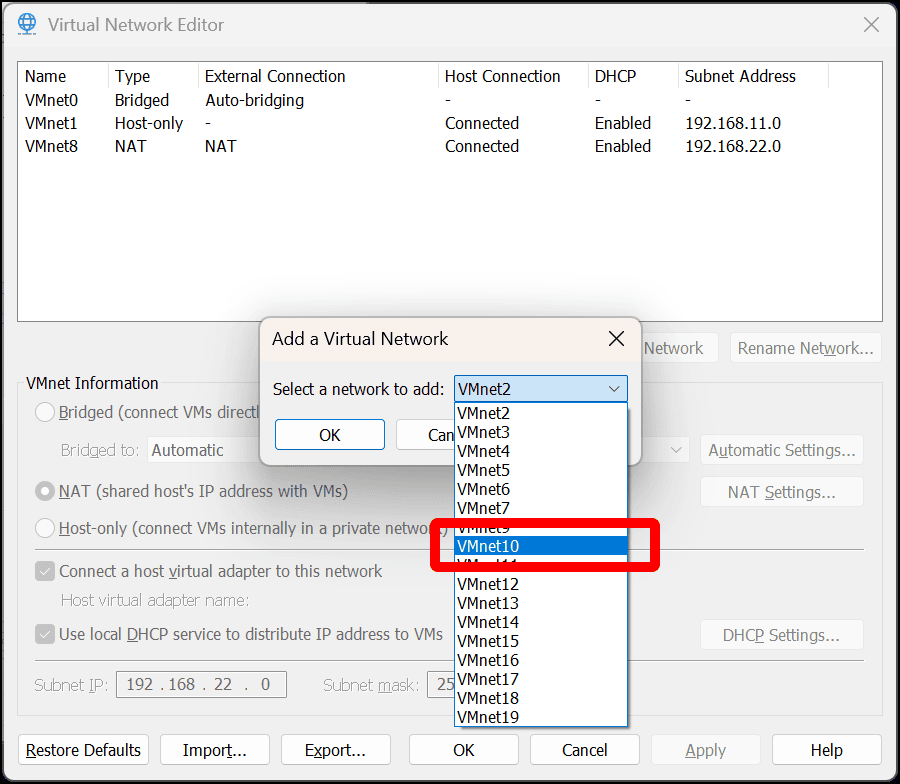
- Click OK.
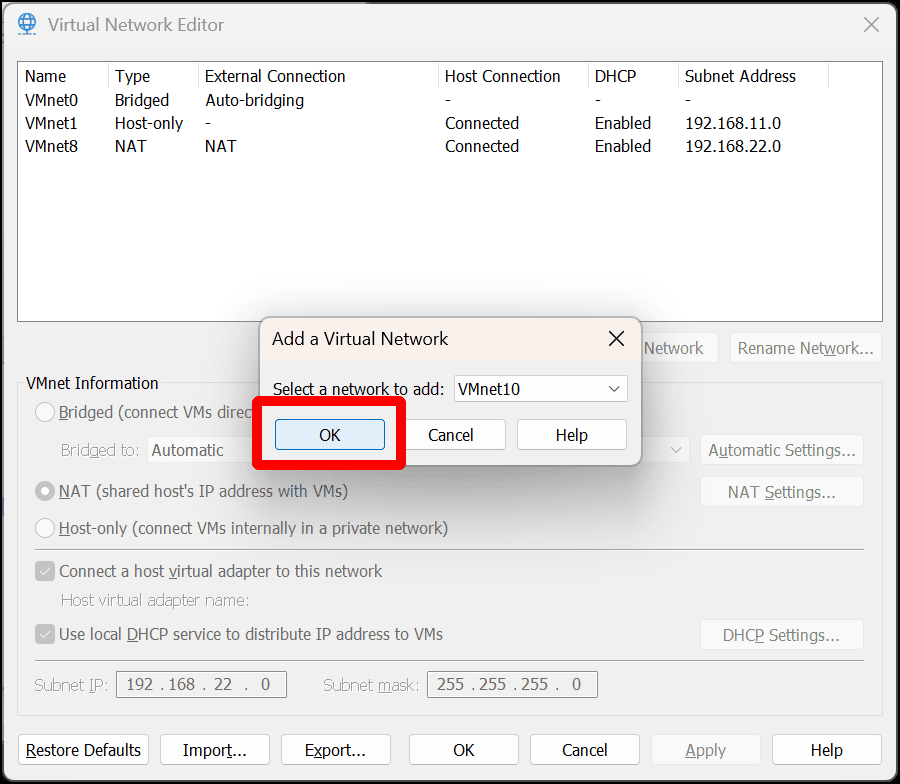
- The new VMnet appears on the list of networks. Select it and click Rename Network.
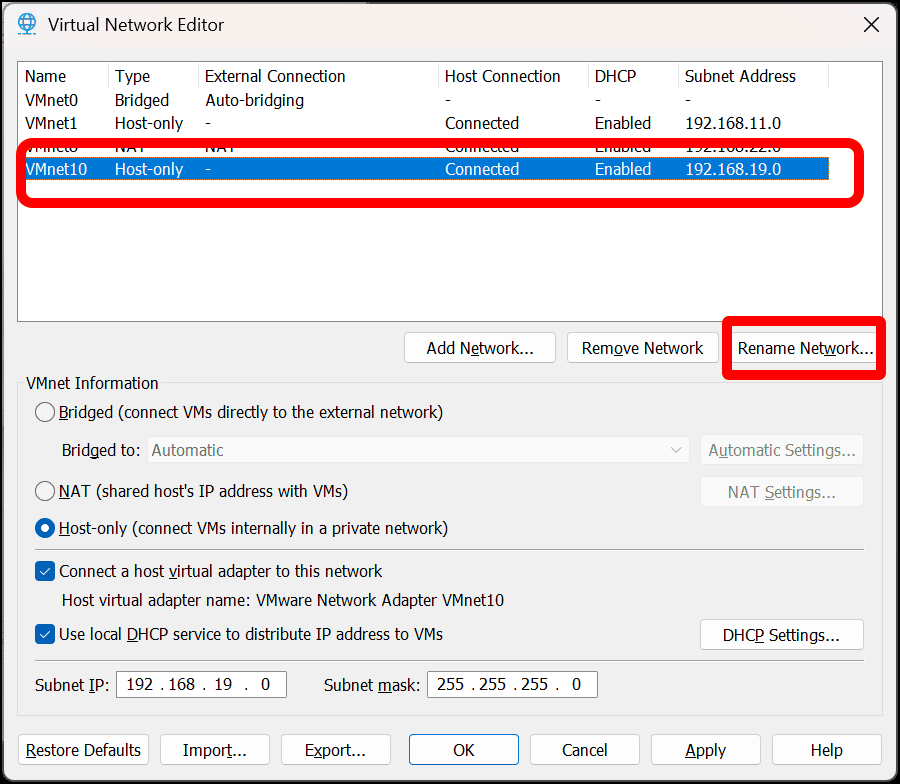
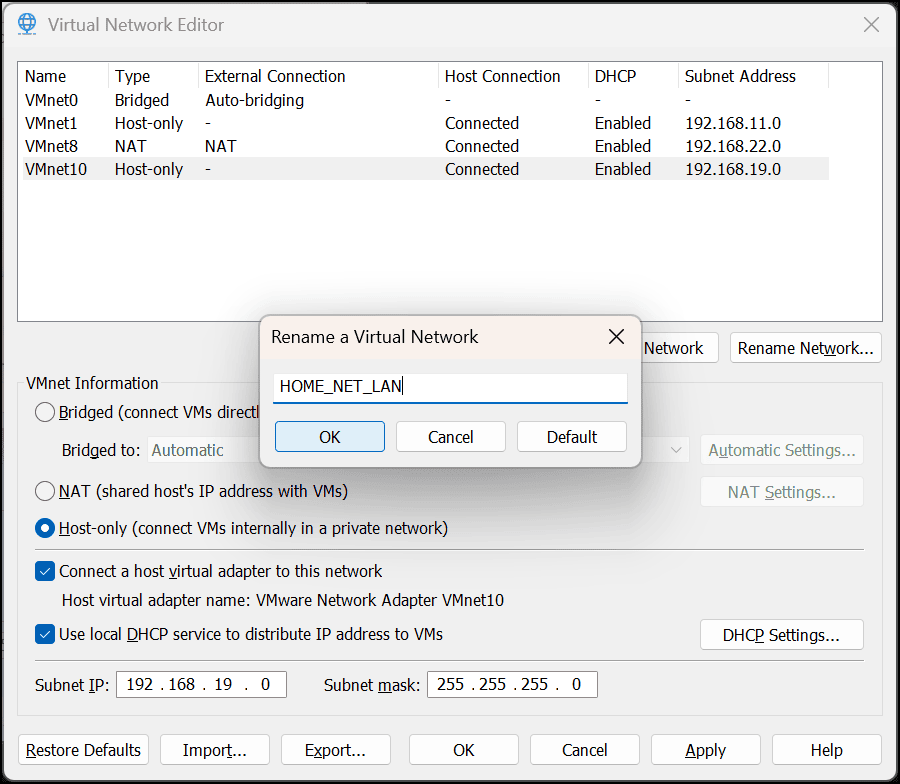
- Enter HOME_NET_LAN in the dialog and click OK.
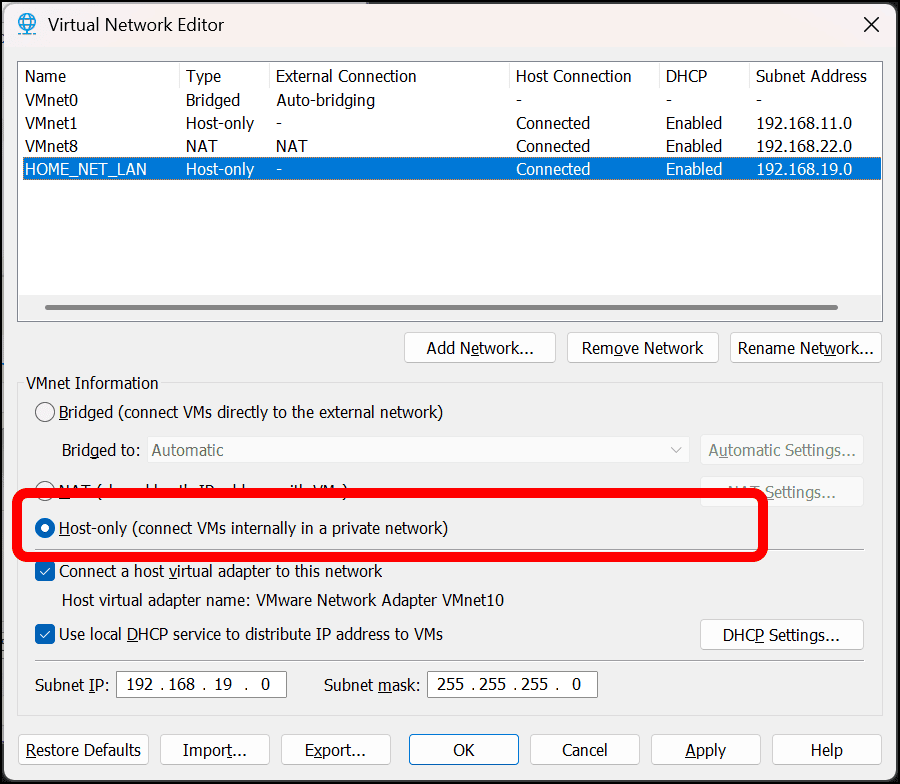
- When you create a new virtual network, it defaults to Host-only (connect VMs internally to a private network) under VMnet Information. This is what you want. Leave the Host-only radio button selected.
-
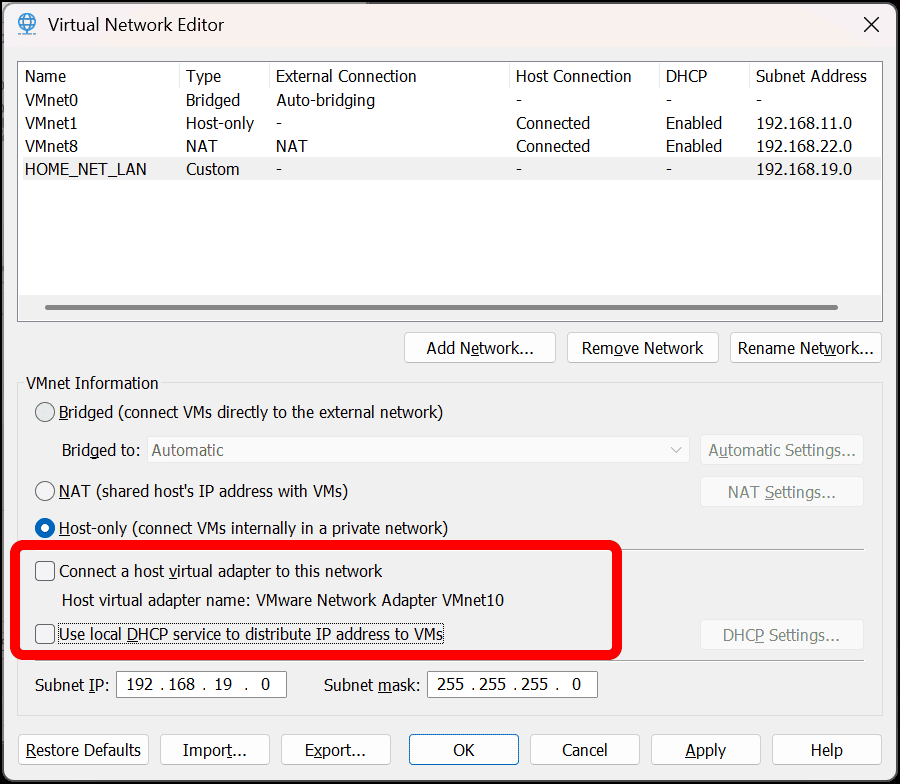
Clear these two checkboxes:
- Connect a host virtual adapter for this network: This adds your host machine (the PC we are running VMware on) to the network. You don’t need this.
- Use local DHCP service to distribute IP address to VMs: You are going to use OPNsense to provide routing and DHCP for your lab, so you do not need this DHCP service.
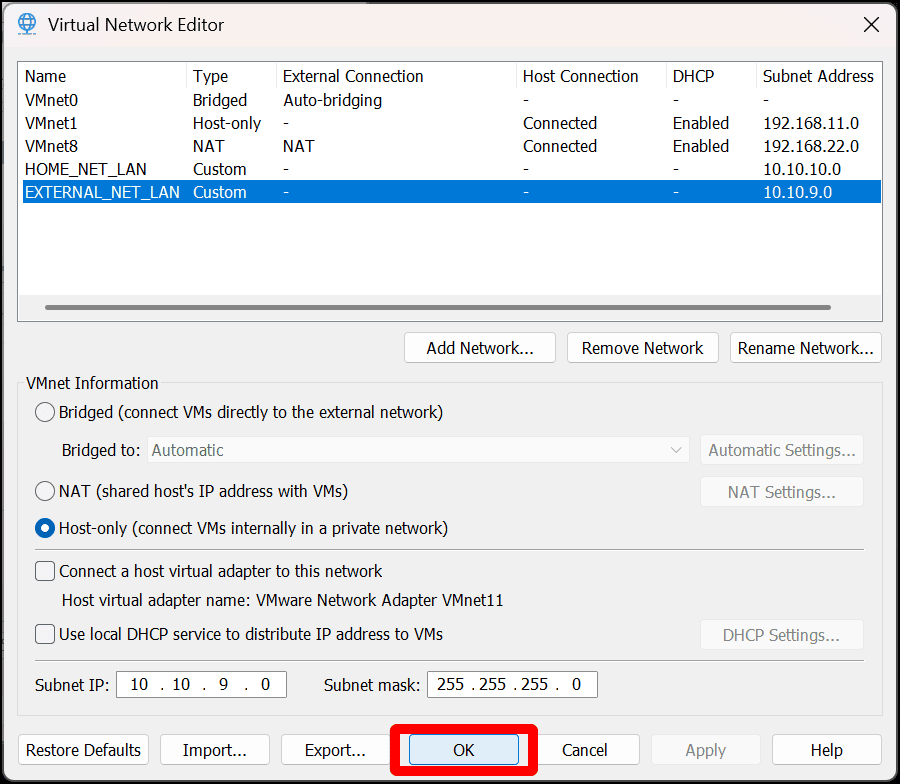
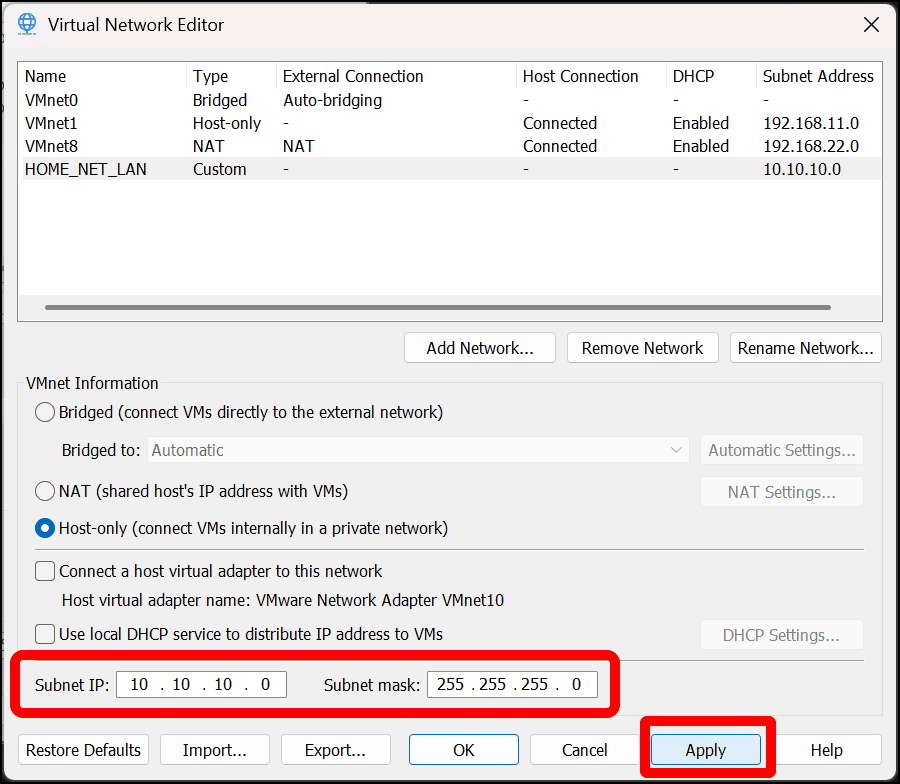
- Enter a Subnet IP. I am using 10.10.10.0. Leave the Subnet Mask as 255.255.255.0 (the equivalent of /24 in CIDR notation) and click Apply.
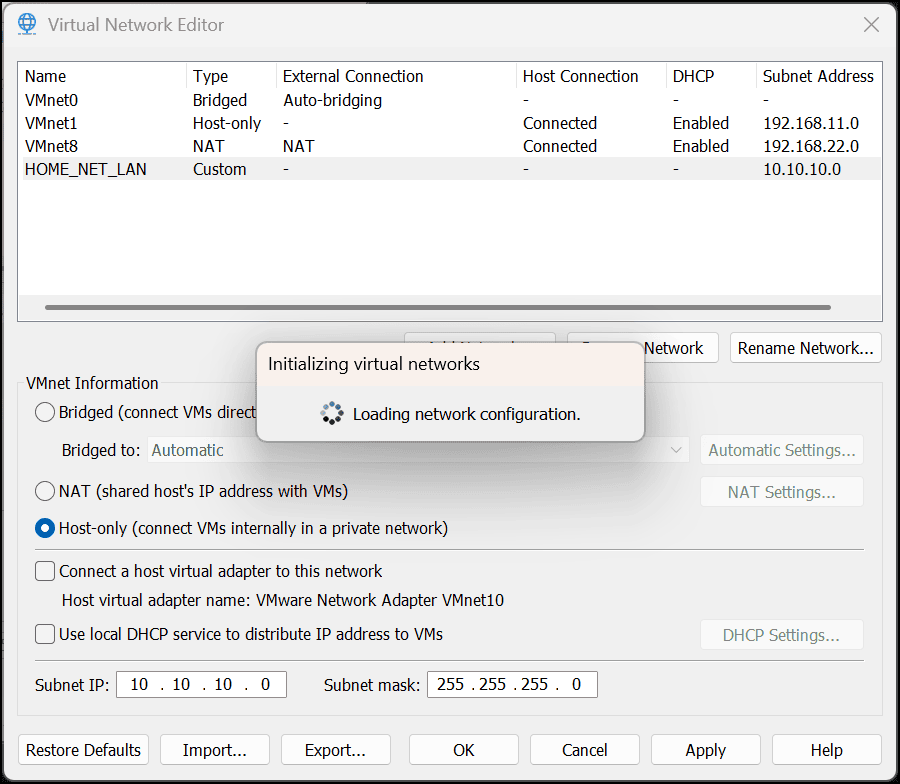
- You will see an Initializing virtual networks dialog displaying the actions the Virtual Network Editor is taking to set up the network..
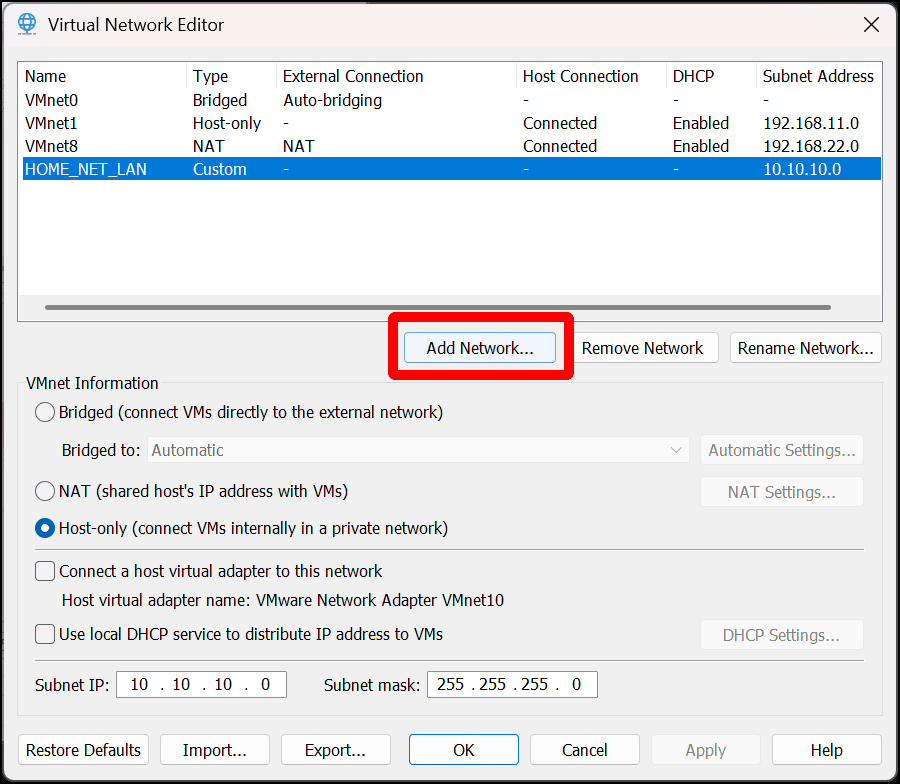
- Now you are going to create your second network. Click Add Network.
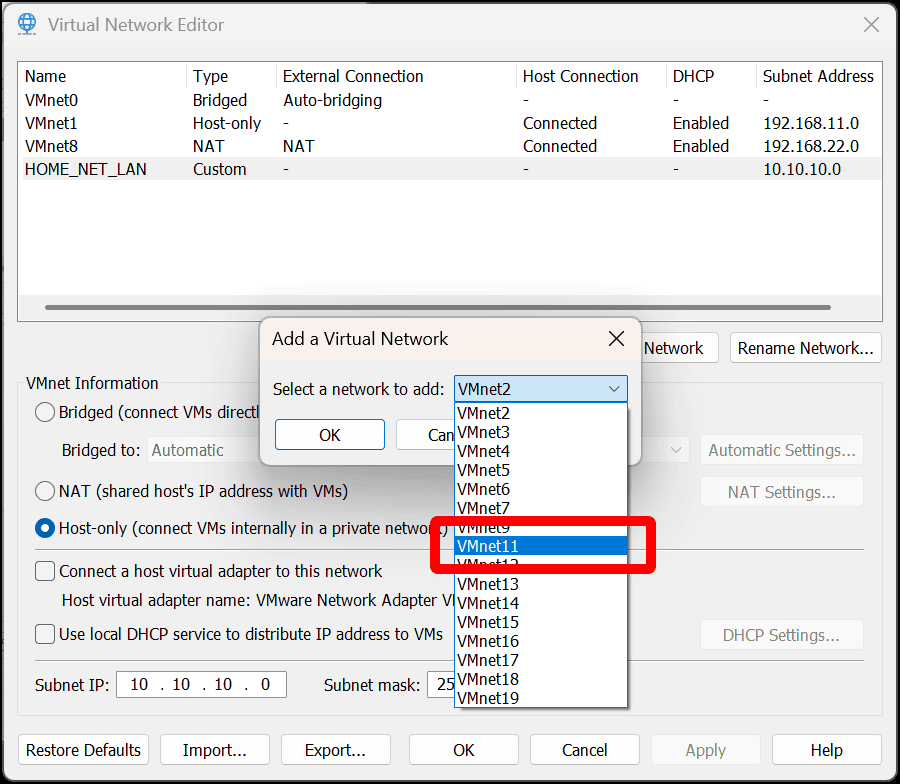
- Select a virtual network. Select VMnet11 and click OK.
- Click the Rename Network… button and change the name of the new virtual network to EXTERNAL_NET_LAN, then click OK.
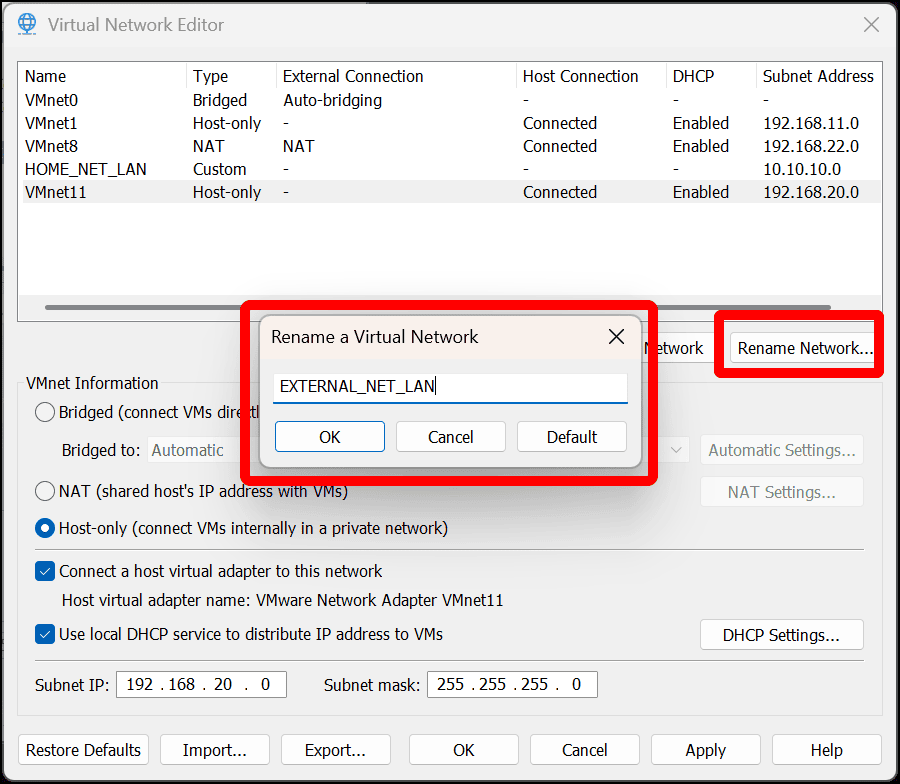
- Leave the Host-only radio button selected and clear the checkboxes for Connect a host virtual adapter for this network and Use local DHCP service to distribute IP address to VMs:.
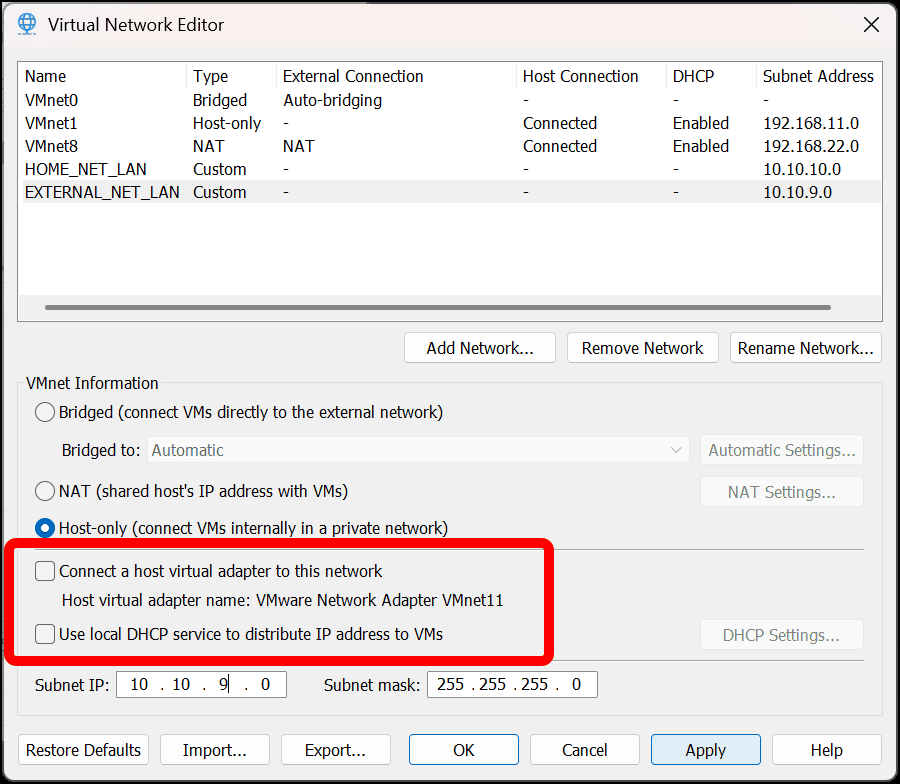
- Enter a Subnet IP. I am using 10.10.9.0. Leave the Subnet Mask as 255.255.255.0 and click Apply.
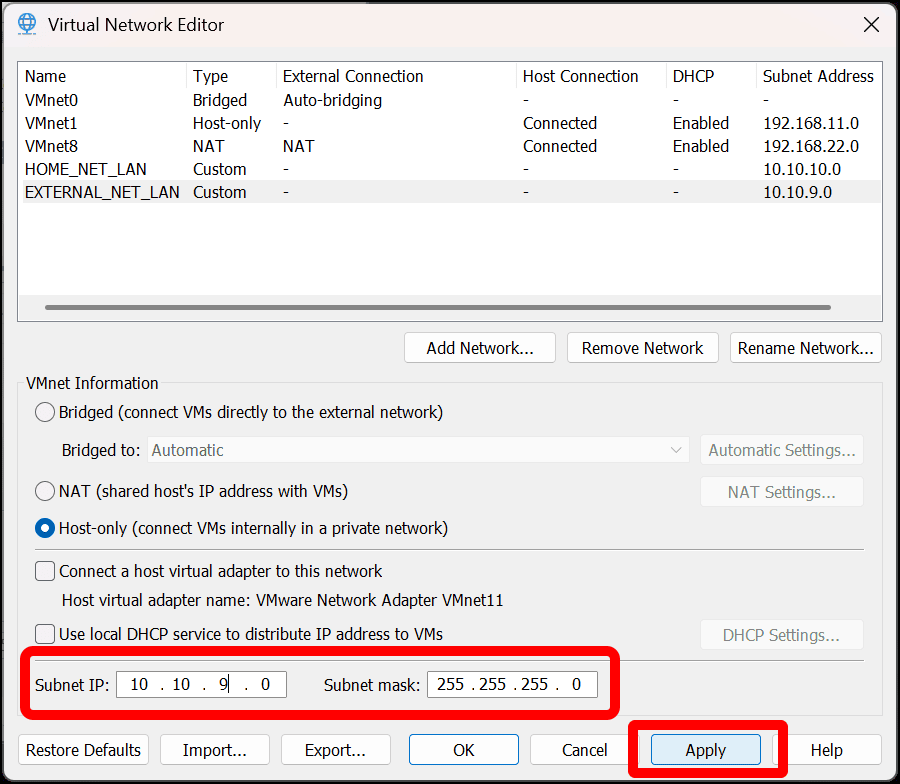
- When the new virtual network is created, you are done. Click OK to close the Virtual Network Editor.