Automating the Build and Deployment of Your Jekyll Site
Overview
In the previous pieces of this tutorial, I showed you how to start, develop the content for, organize, and “build” your Jekyll static site. Now I will show you how to take that to the next level by syncing your local content with a GitHub repository and integrating that GitHub repository with several Amazon Web Services (AWS) products and services to create a CI/CD pipeline that will automate the publishing of your Jekyll site to an AWS S3 bucket that will host the website.
Storing Your Repository in GitHub
To create this website, I work locally and track my changes in a Git repository. Then I integrate my local Git repository with a repository on my GitHub account. (Git and GitHub are two different entities.) Although I will not go into the details here, I do this by adding an SSH public key to GitHub through the website, add the SSH private key to my GitHub configuration, and test that integration. This allows me to securely and privately “pull,” or download, repos from my online GitHub account and “push,” or upload, repos and their files to GitHub.
I can sync my local Git installation of the “tech-writer” repository (the Jekyll project I am working on) to GitHub with this command:
git remote add origin git@github.com:highball8/tech-writer.git
The first time I send changes from my local Git repo to the GitHub-hosted repository, I use the git push origin master command from within the Jekyll project. Going forward, you can shorten the command to git push.
Building and Hosting Your Website on Amazon Web Services (AWS)
Create Your S3 Bucket
The first piece of AWS infrastructure we will create is the AWS Simple Storage Service (S3) bucket which will store the website’s files and act as a web server.
- Log in to AWS.
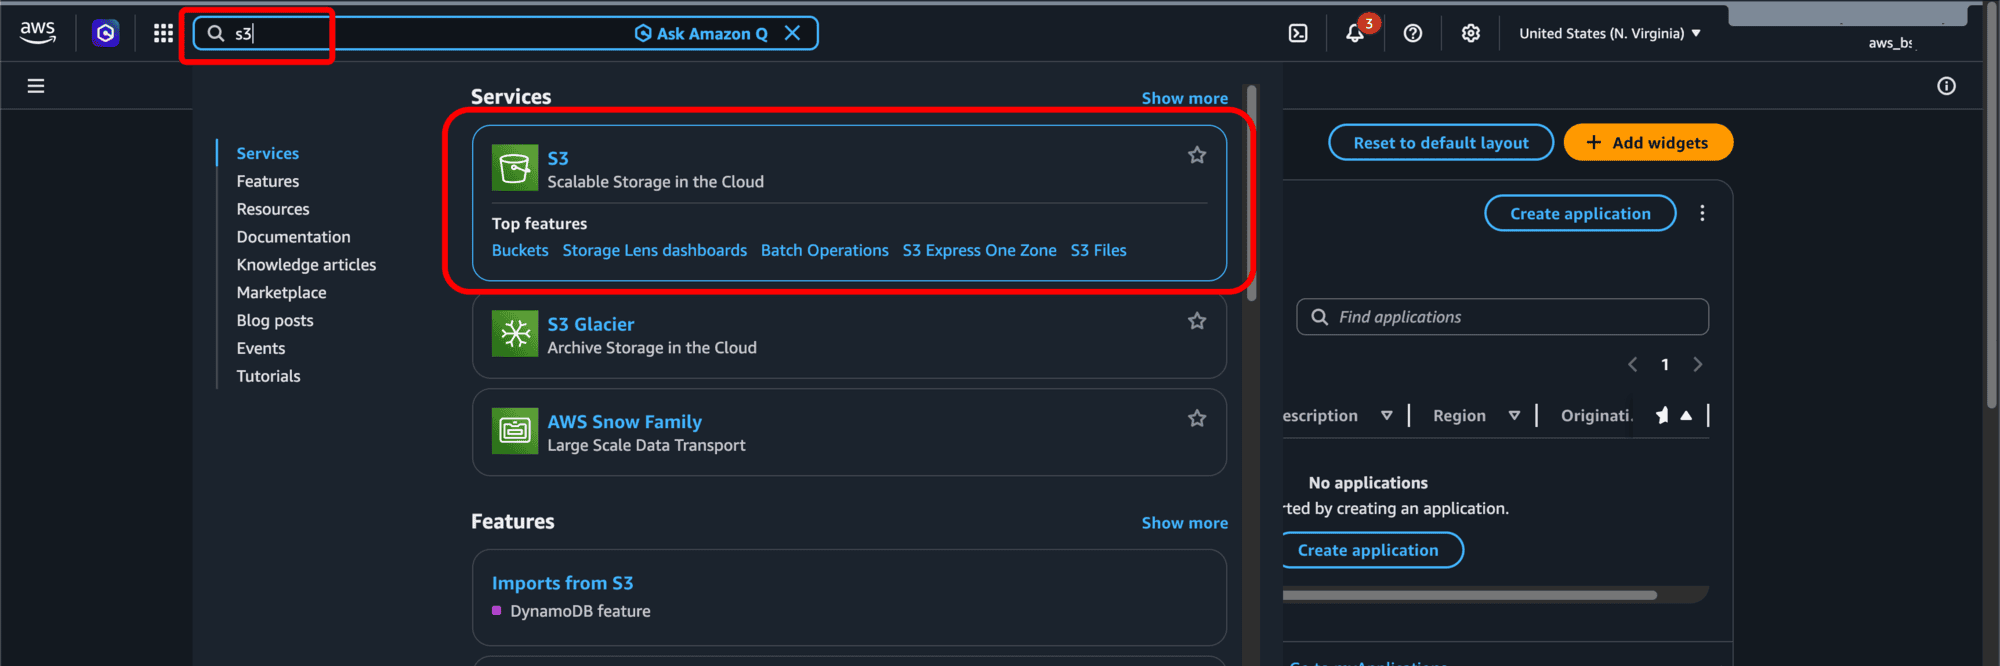
- Type s3 into the search bar and select S3 Scalable Storage in the Cloud from the results.
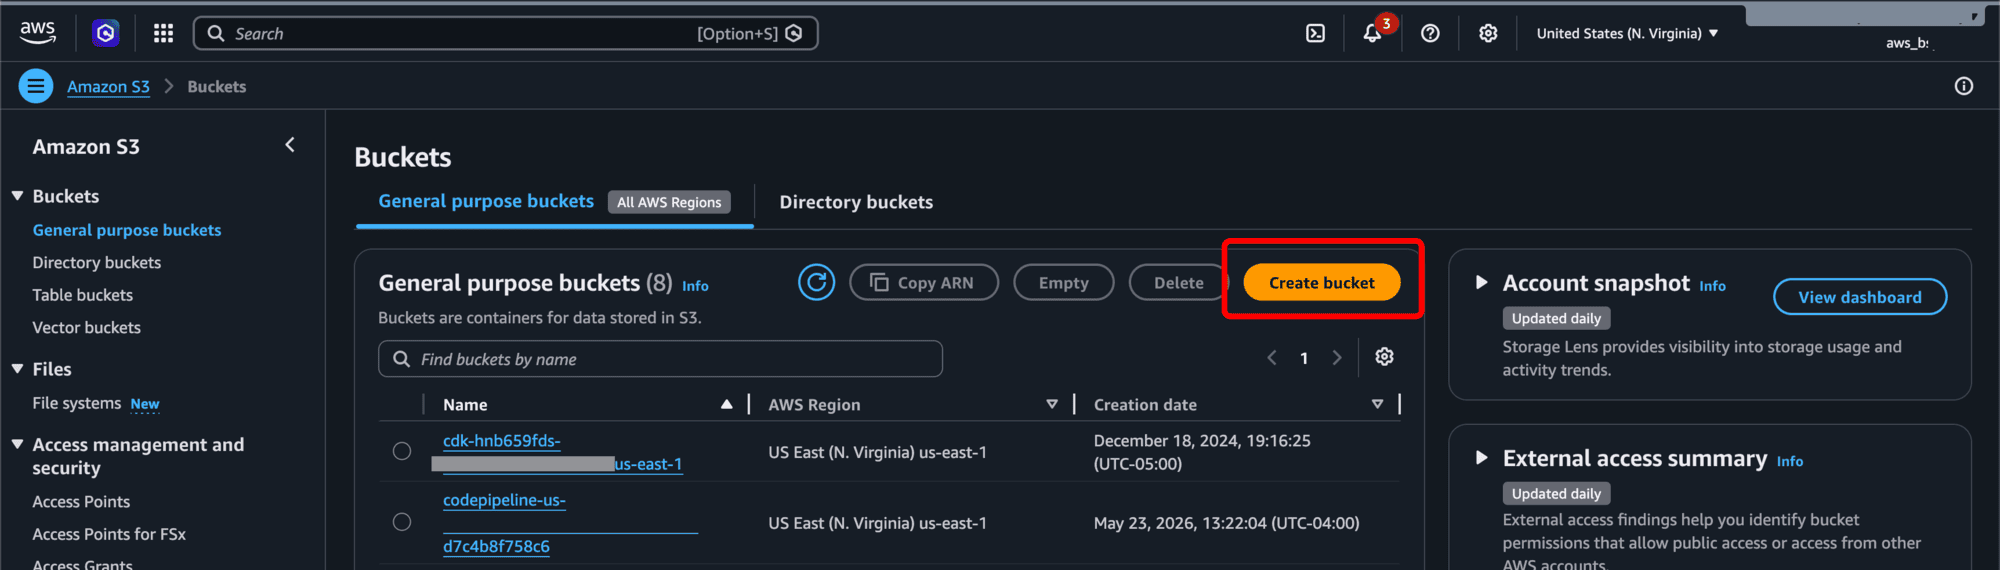
- Click Create bucket on the Buckets page.
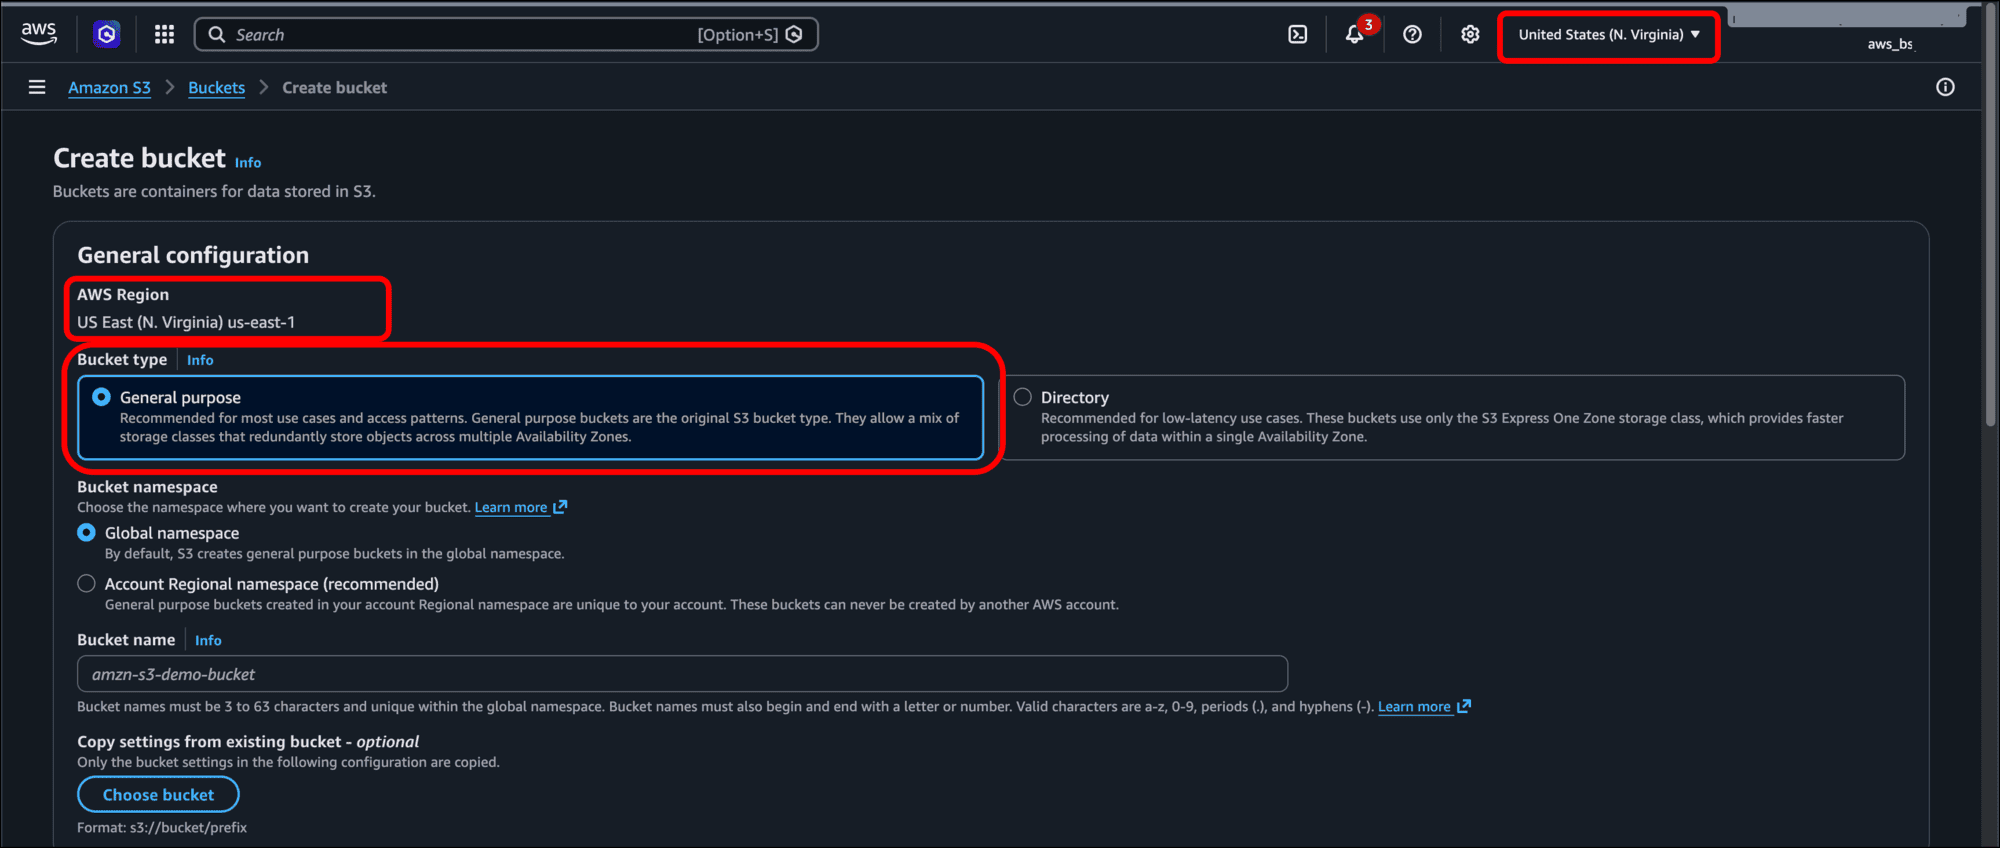
- On the Create bucket page, AWS Region is set by the region you have already suggested. (The region typically does not matter, since CloudFront will distribute it globally). Leave the Bucket type as General purpose.
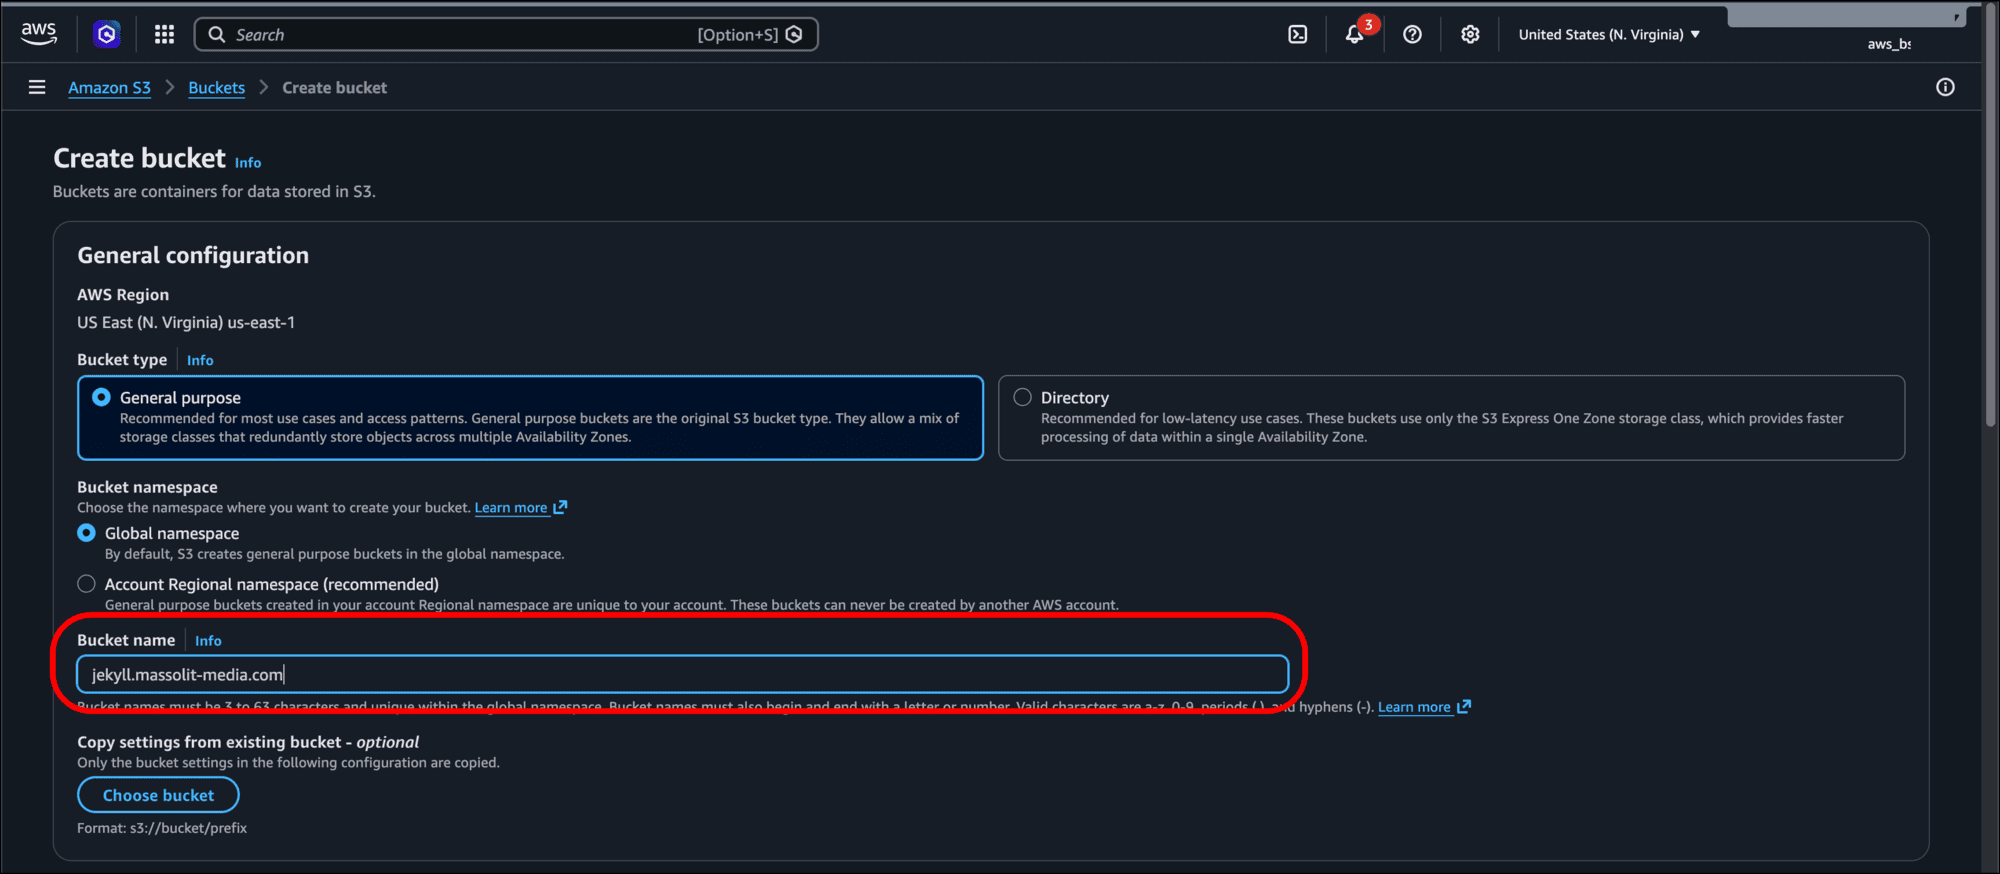
- Enter a Bucket name. I suggest using the same domain name you are using for your website. For example, the name of the S3 bucket hosting this website is tech-writer.massolit-media.com, which is the site’s domain name. For this tutorial, I am using jekyll.massolit-media.com to set up a separate domain.
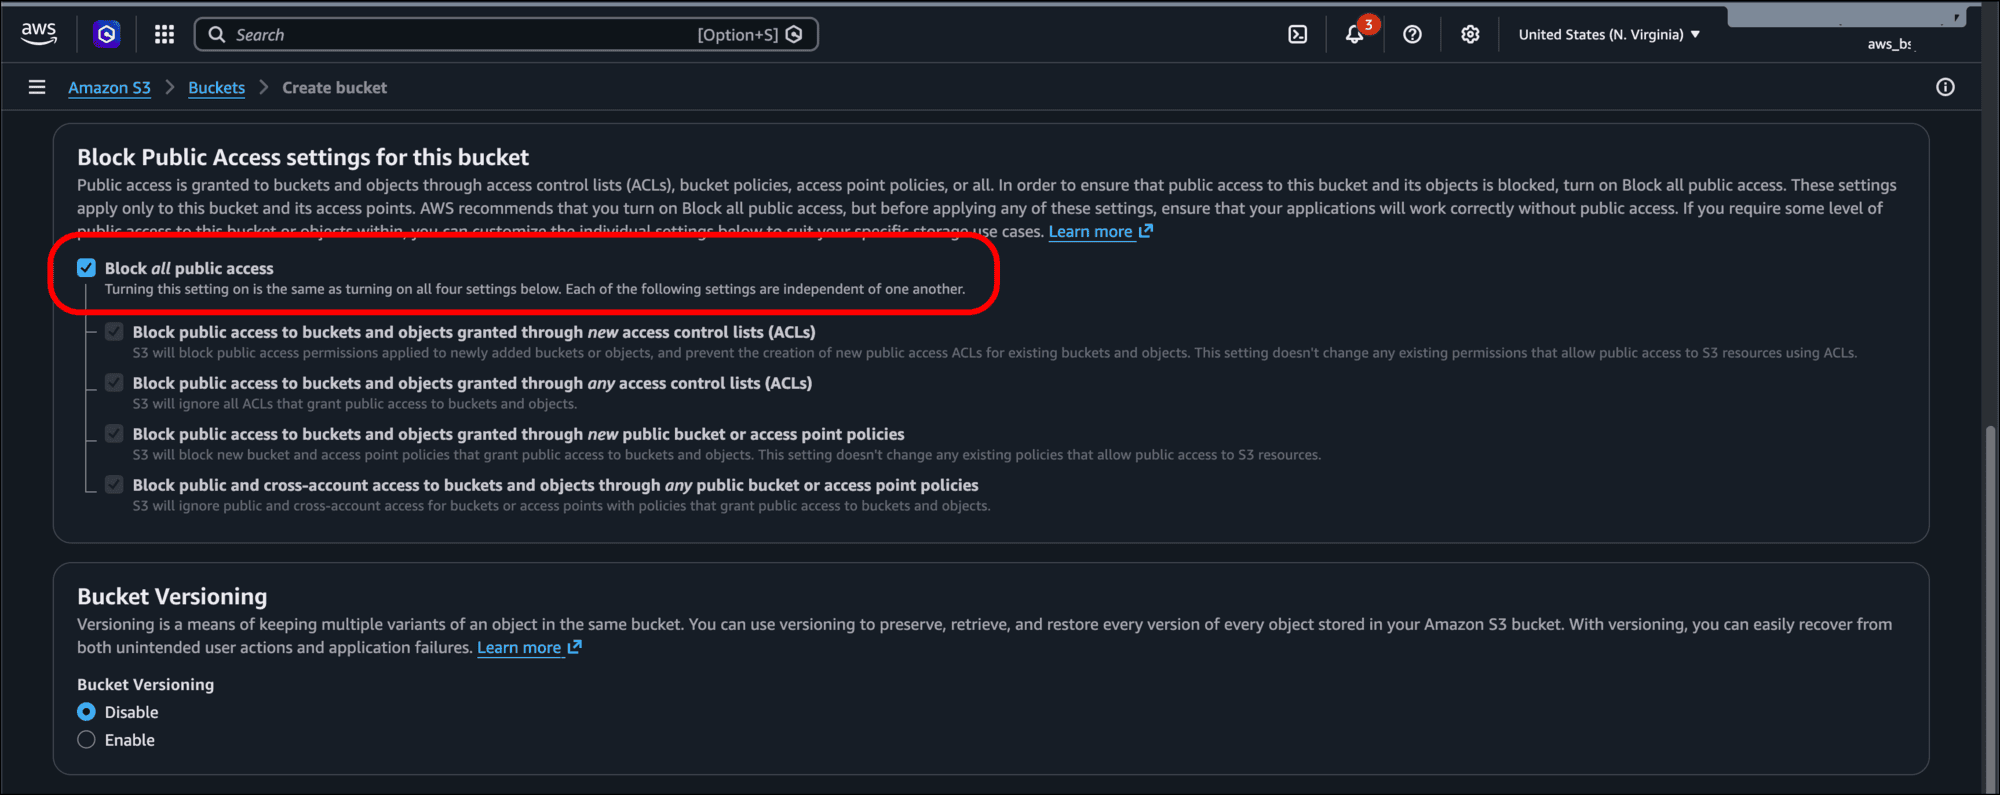
- Scroll down and deselect the Block all public access checkbox. While AWS selects this by default and you should use it for other use cases, the entire purposes of this S3 bucket is to host a public website, so you do want it accessible by the public.
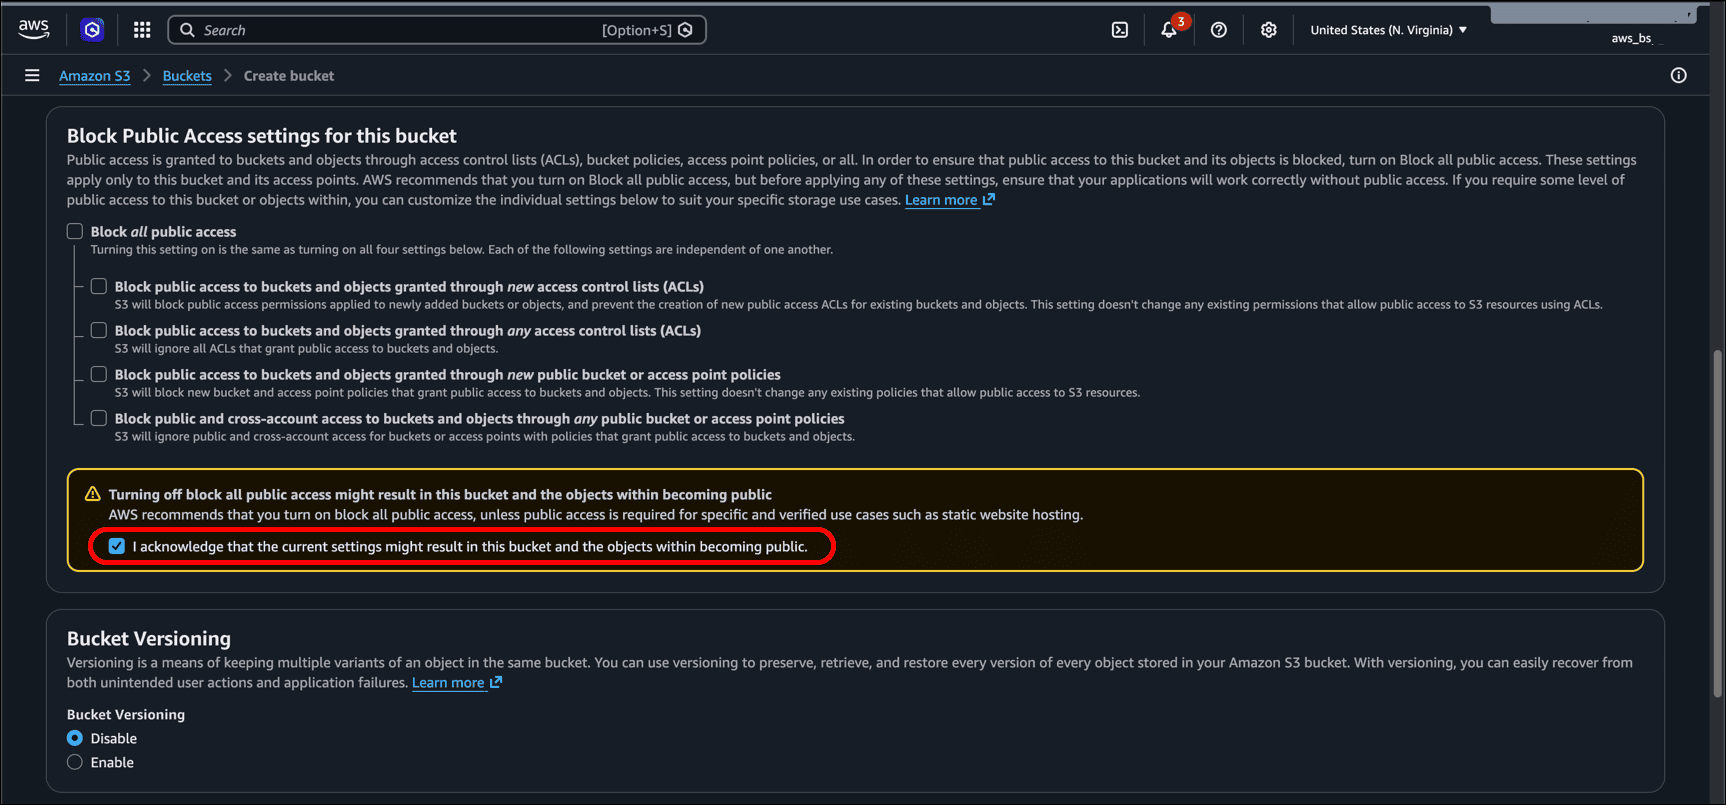
- Select the checkbox for I acknowledge that the current settings might result in this bucket and the objects within becoming public.
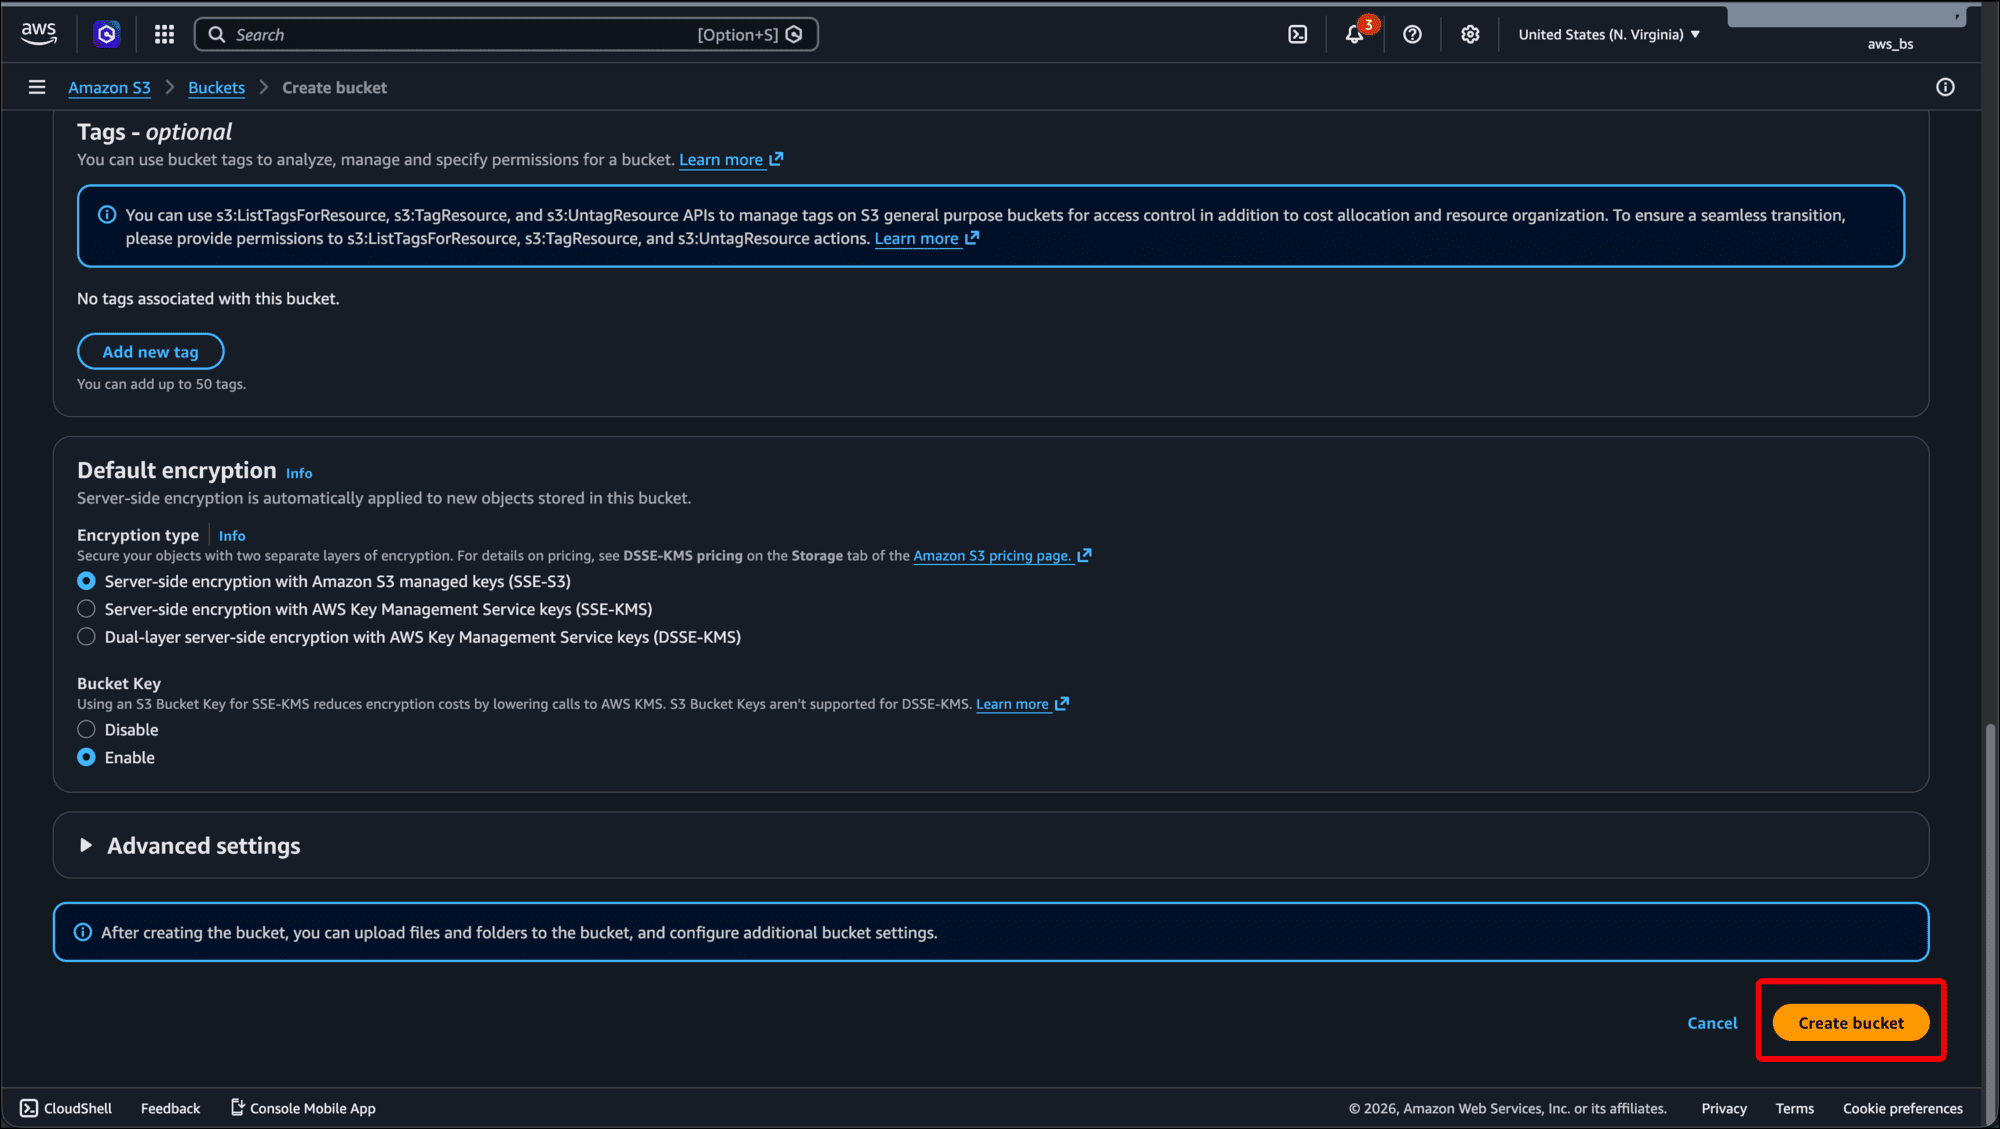
- Leave the defaults, scroll to the bottom of the page, and click Create bucket.
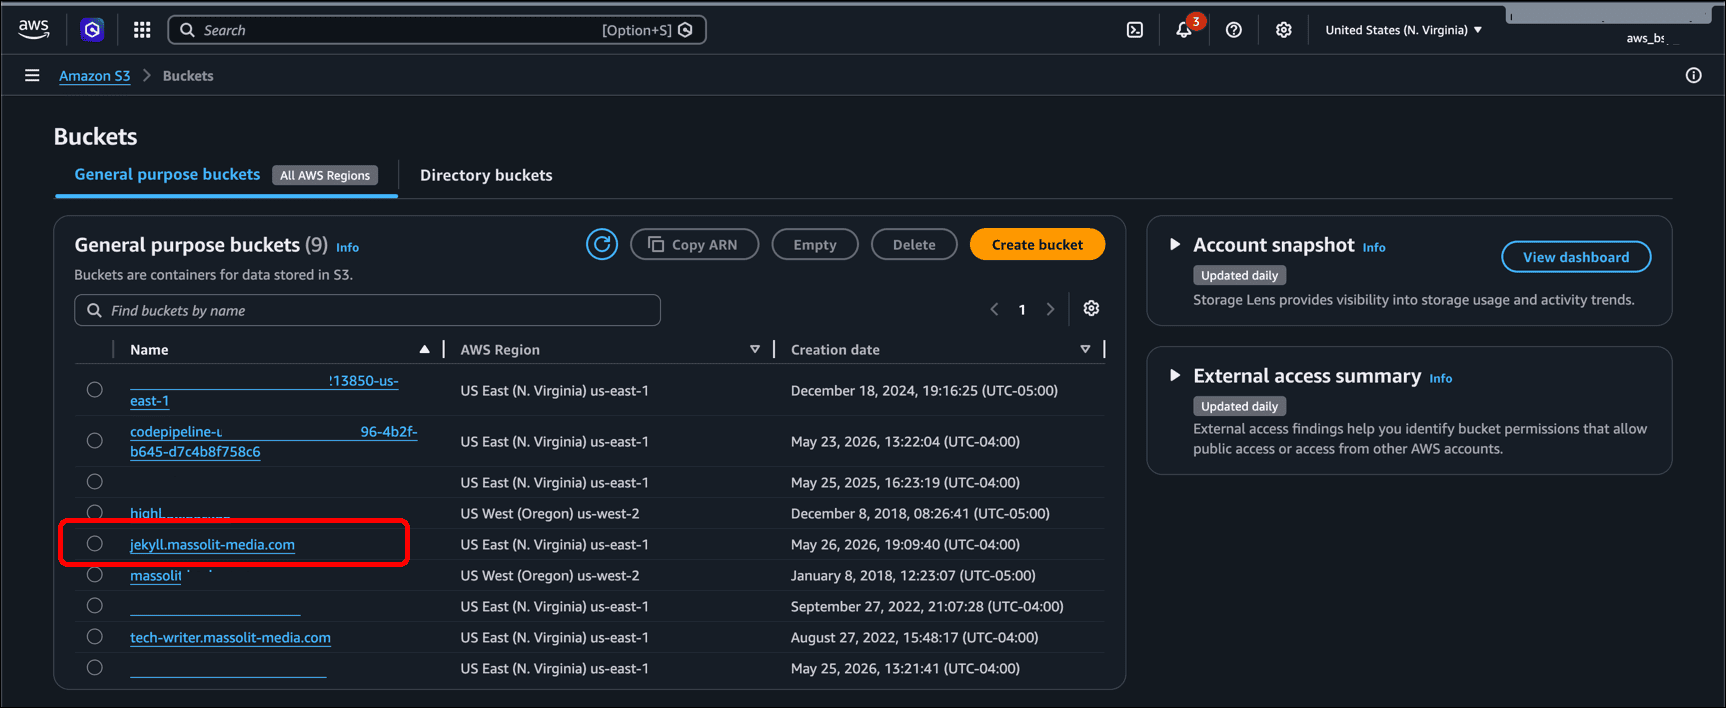
- On the Buckets page, click the link for the bucket you just created.
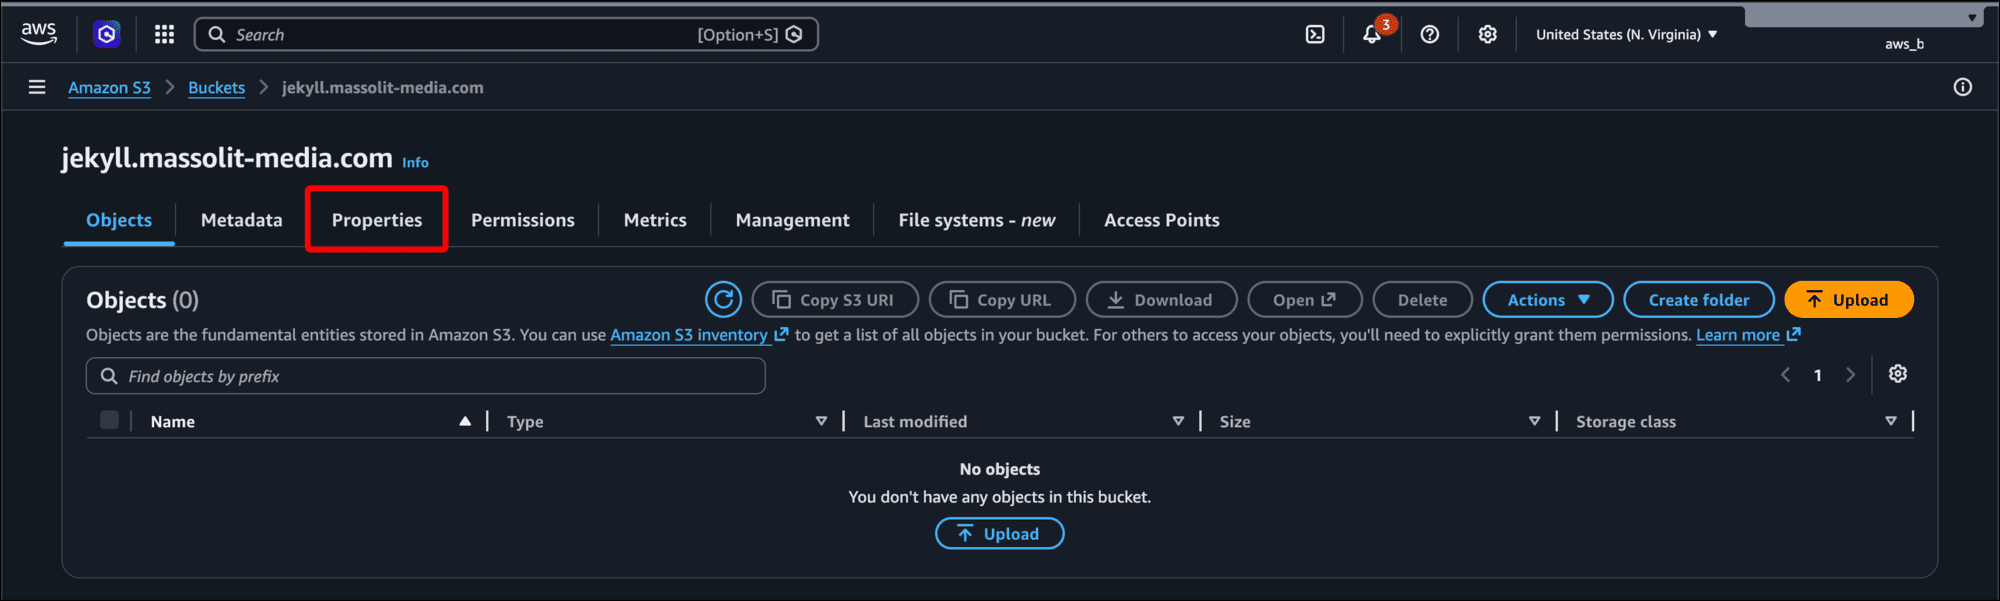
- Click the Properties tab.
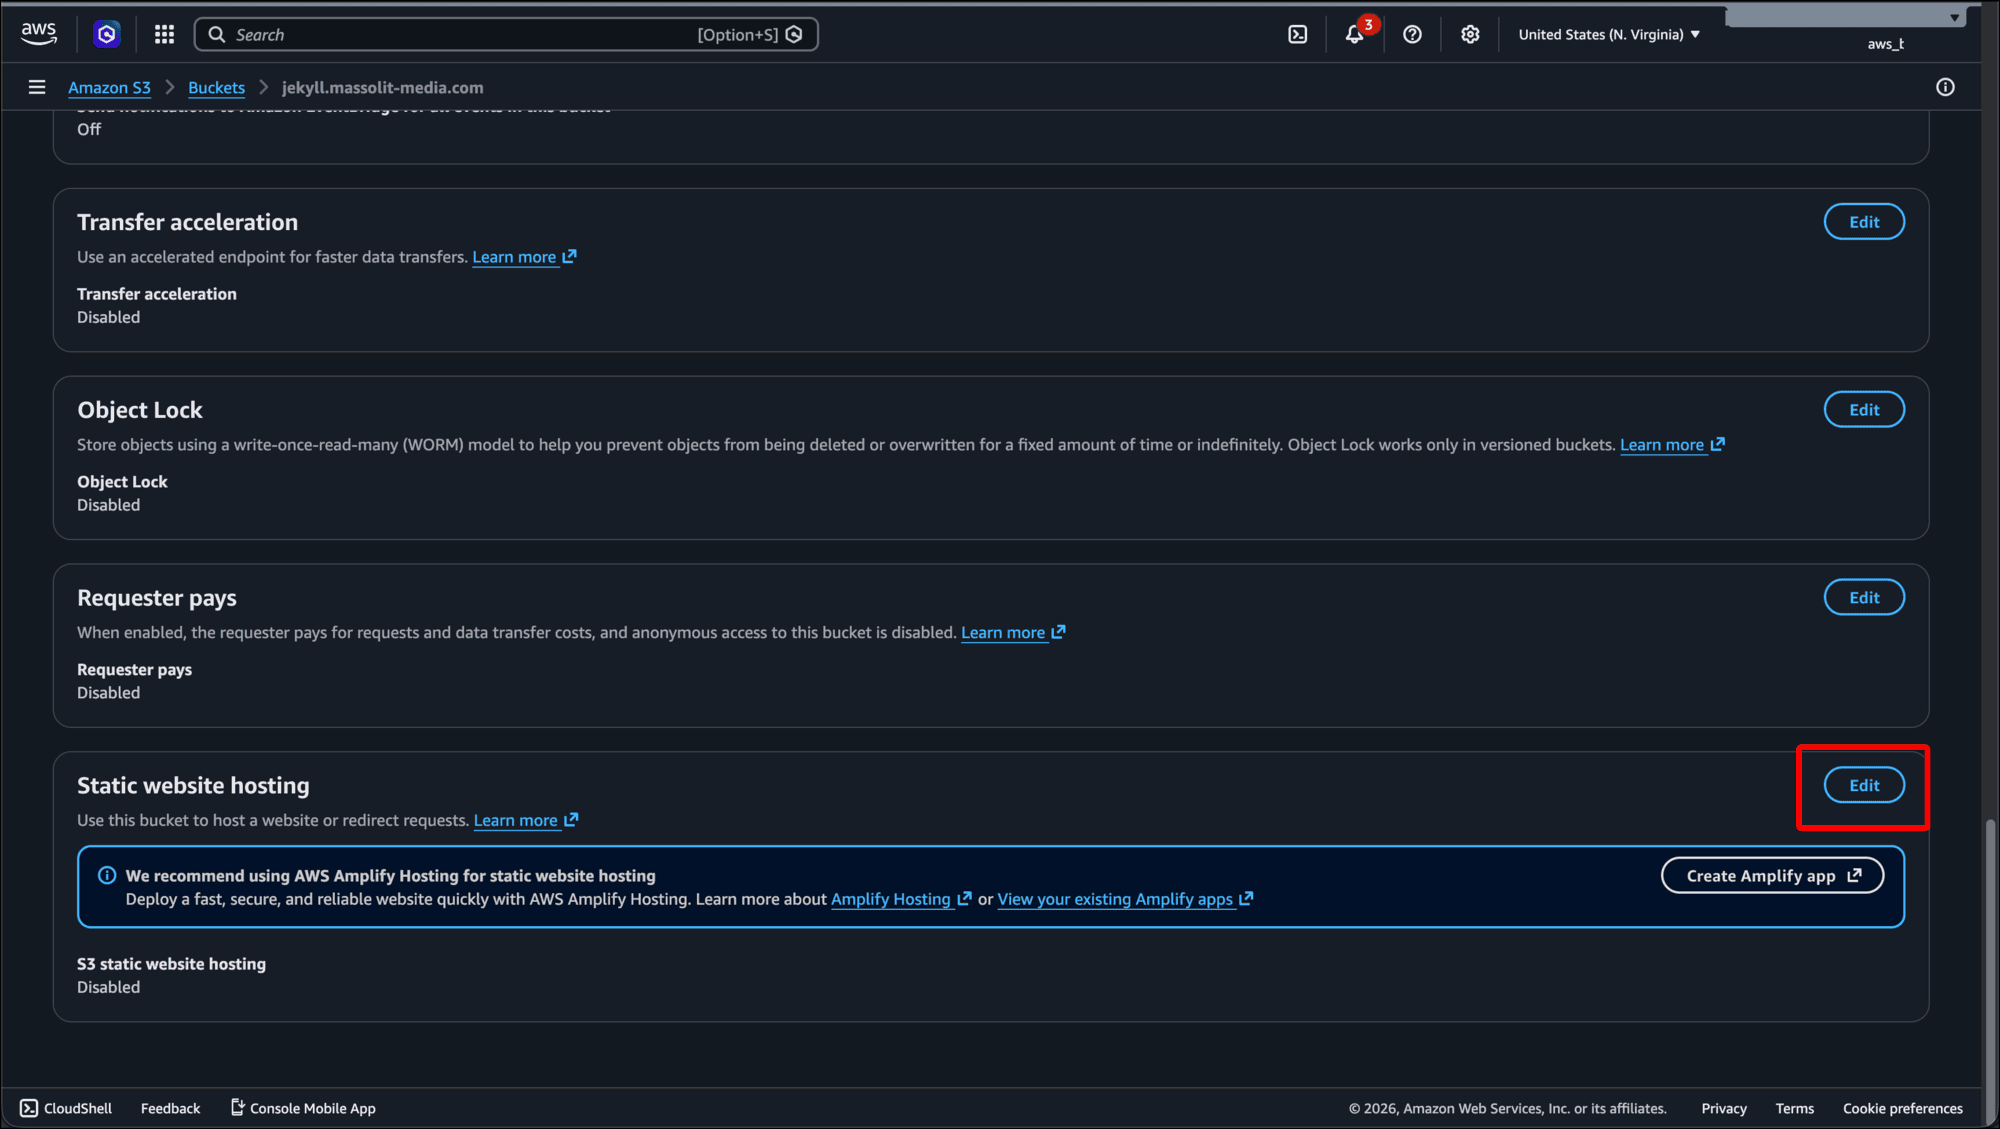
- Scroll down to the bottom of the page and click Edit in the Static website hosting area.
- On the Edit static website hosting page, click Enable.
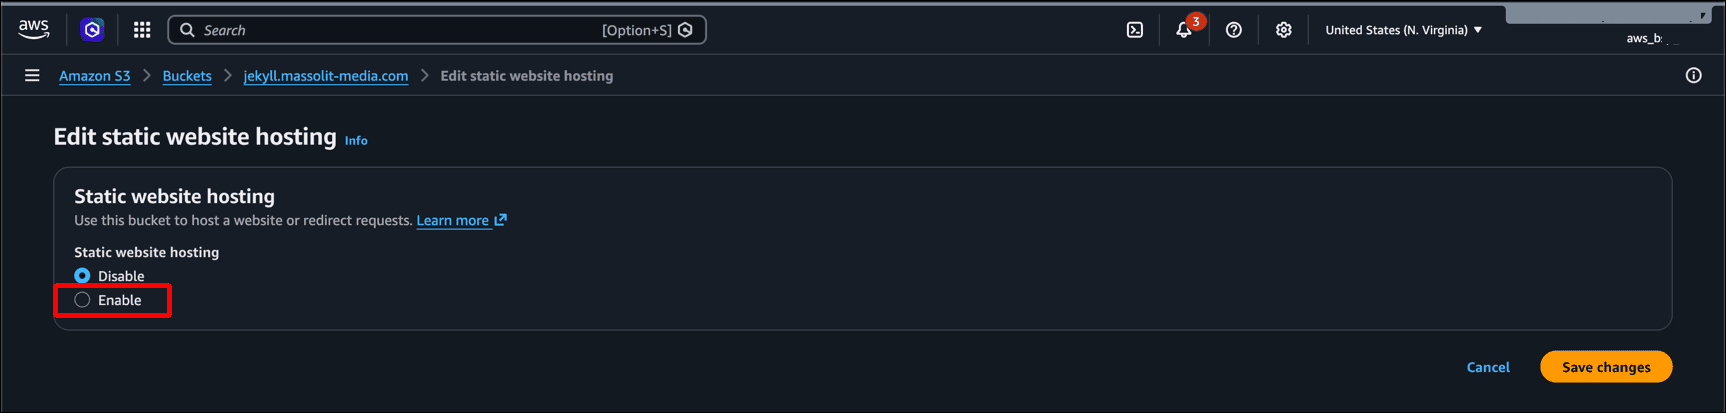
- When the Edit static website hosting section expands, leave Host a static website selected under Hosting type. In the Index document field, type index.html. This means that the
index.htmlfile in your Jekyll’s_sitefolder becomes the default web page that loads.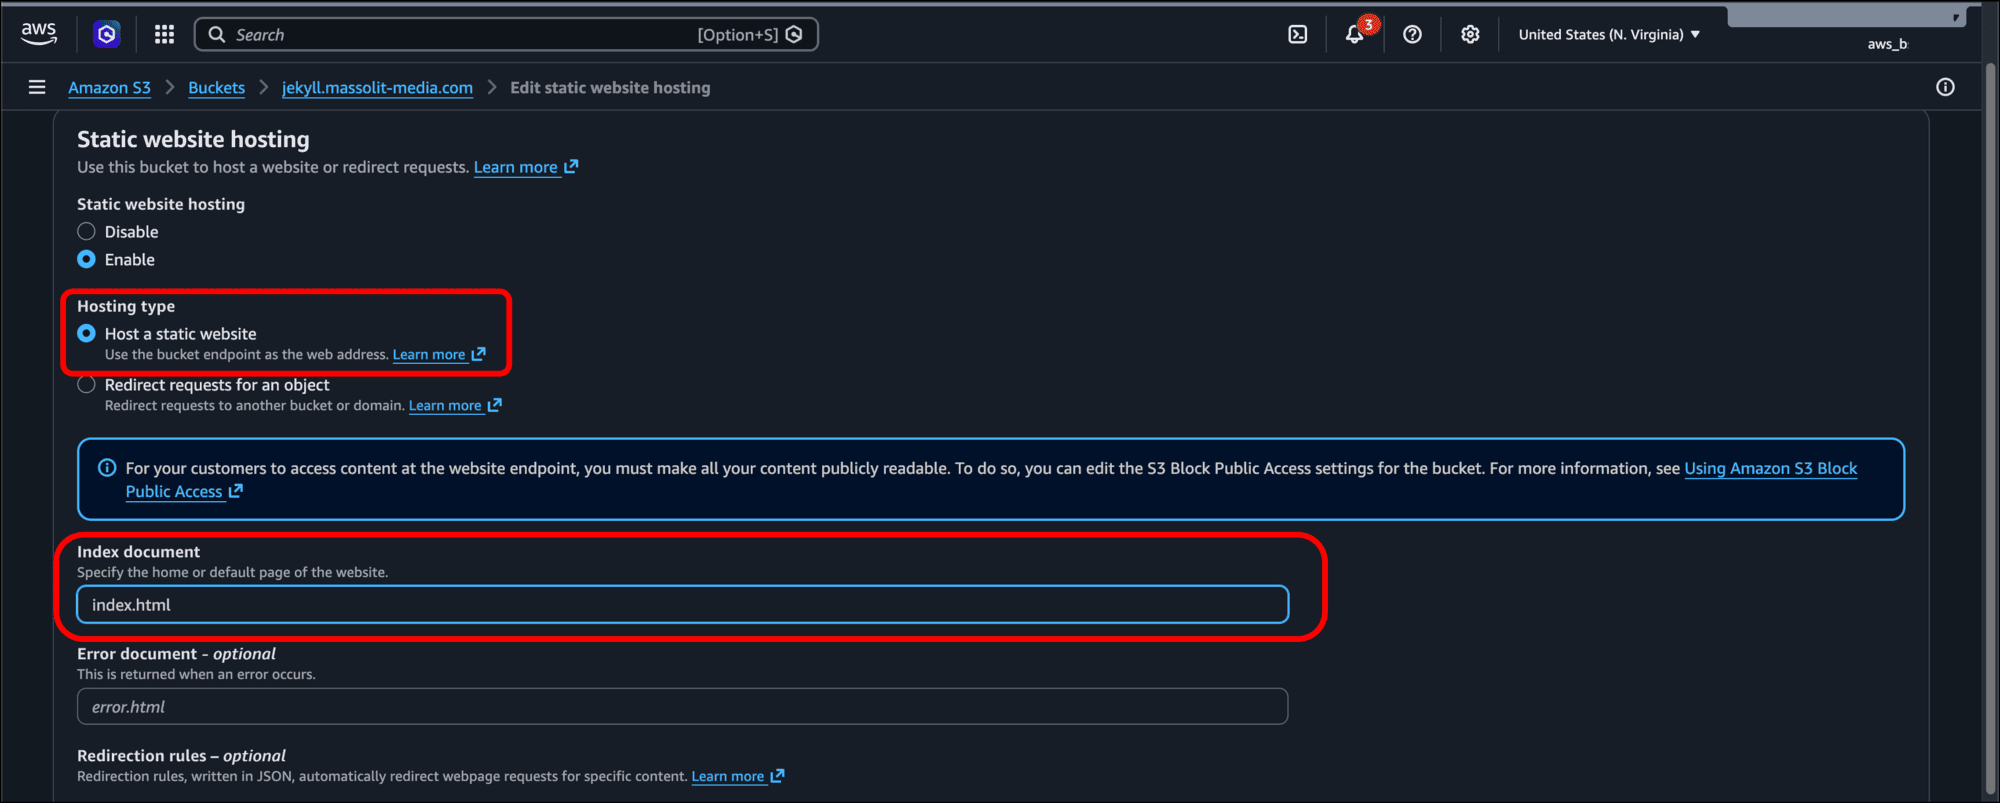
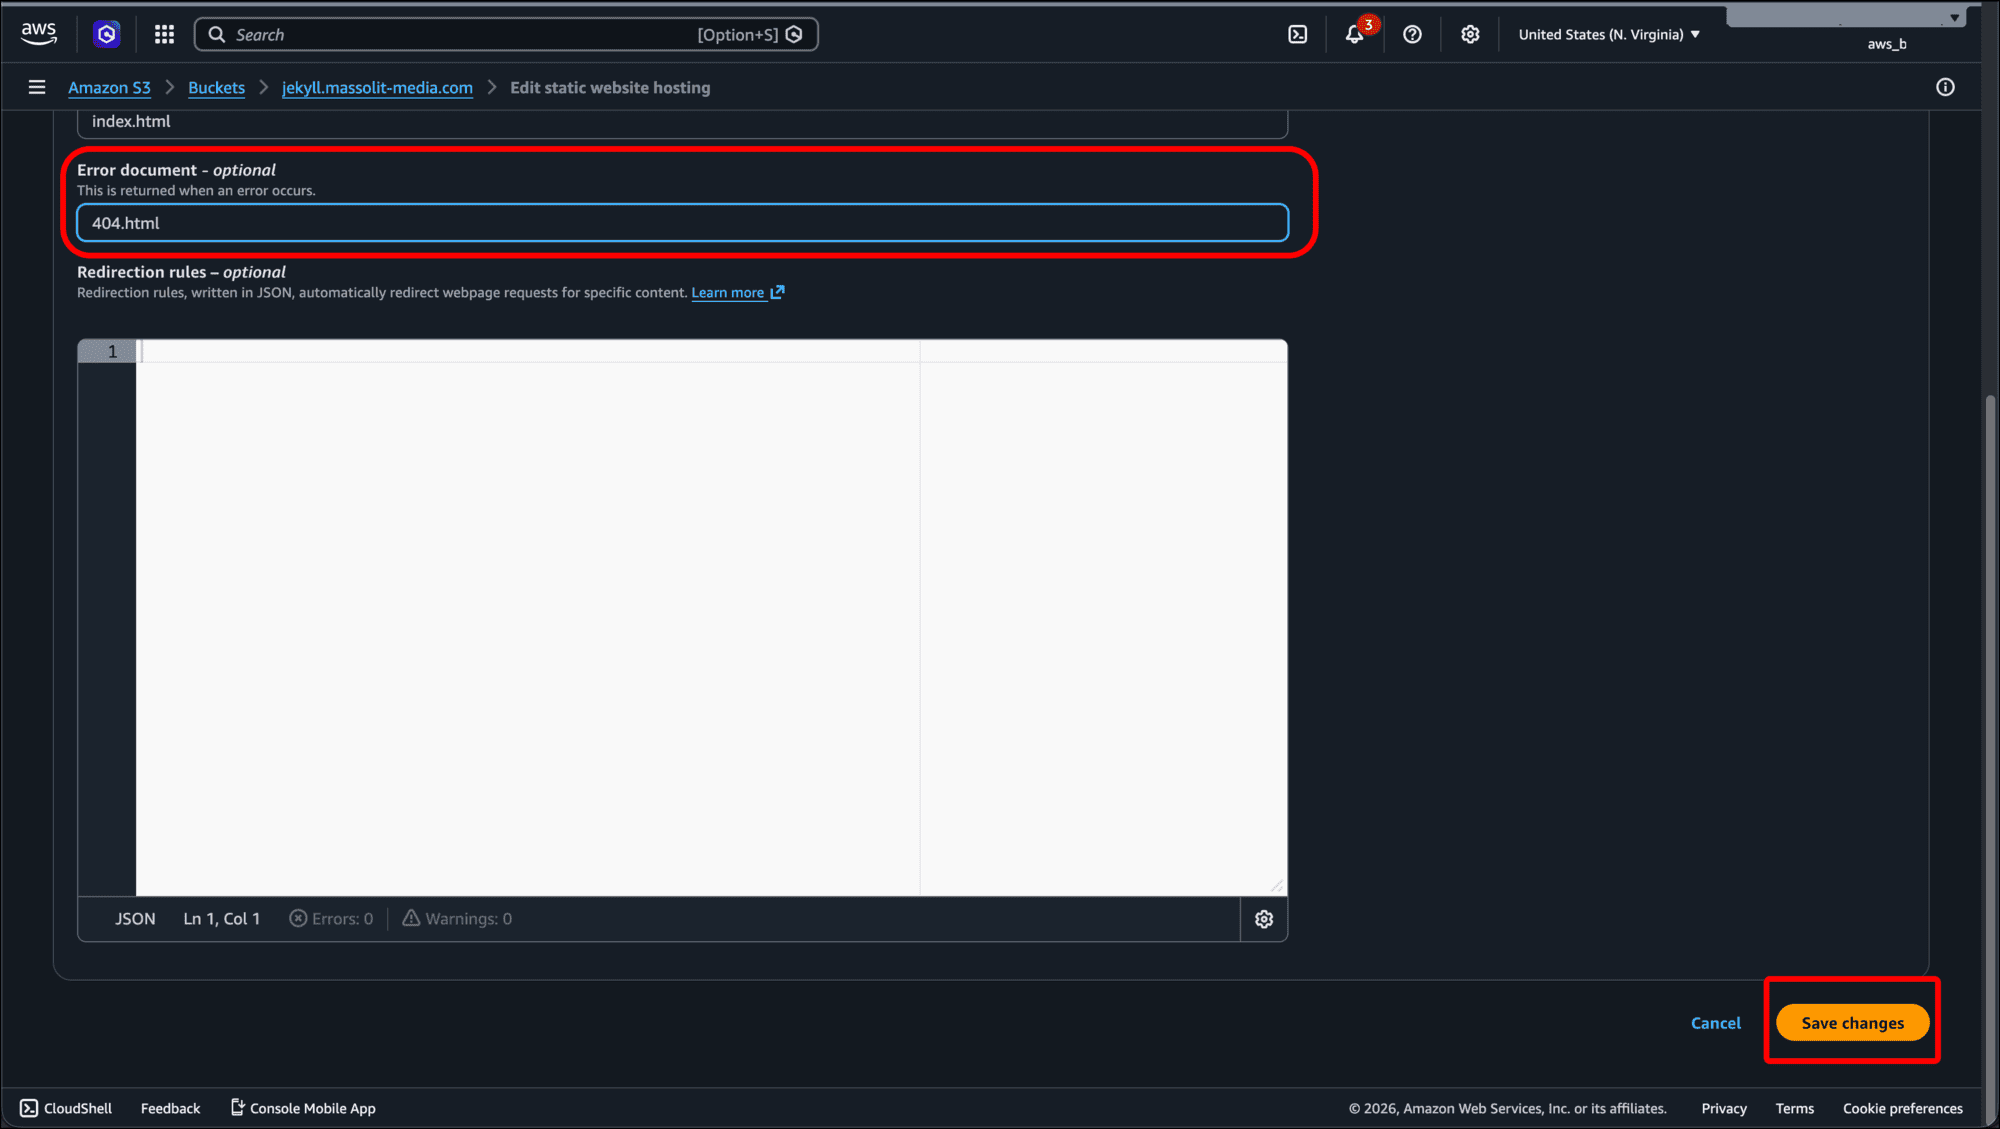
- In the Error document - optional field, enter 404.html, as Jekyll creates a 404 page by default, then click Save changes.
- Click the Permissions tab of the bucket page.
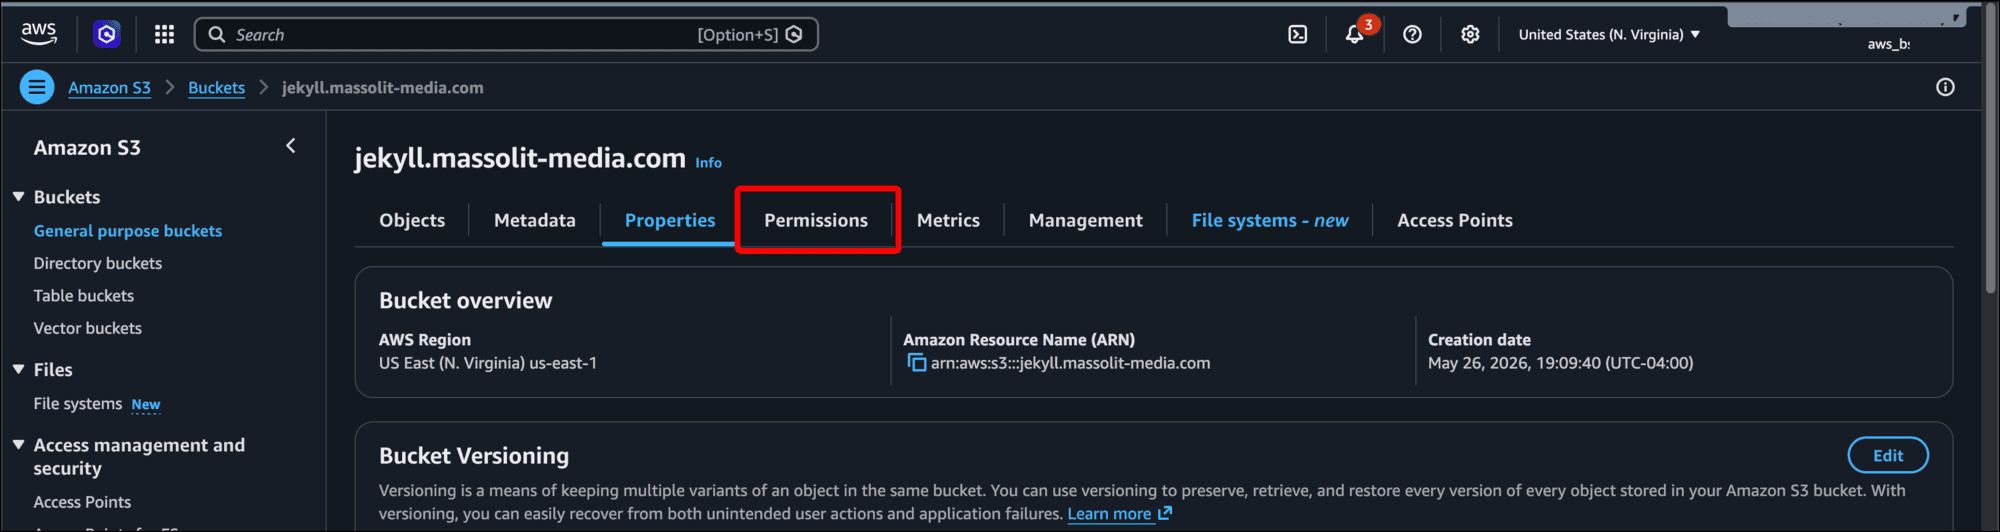
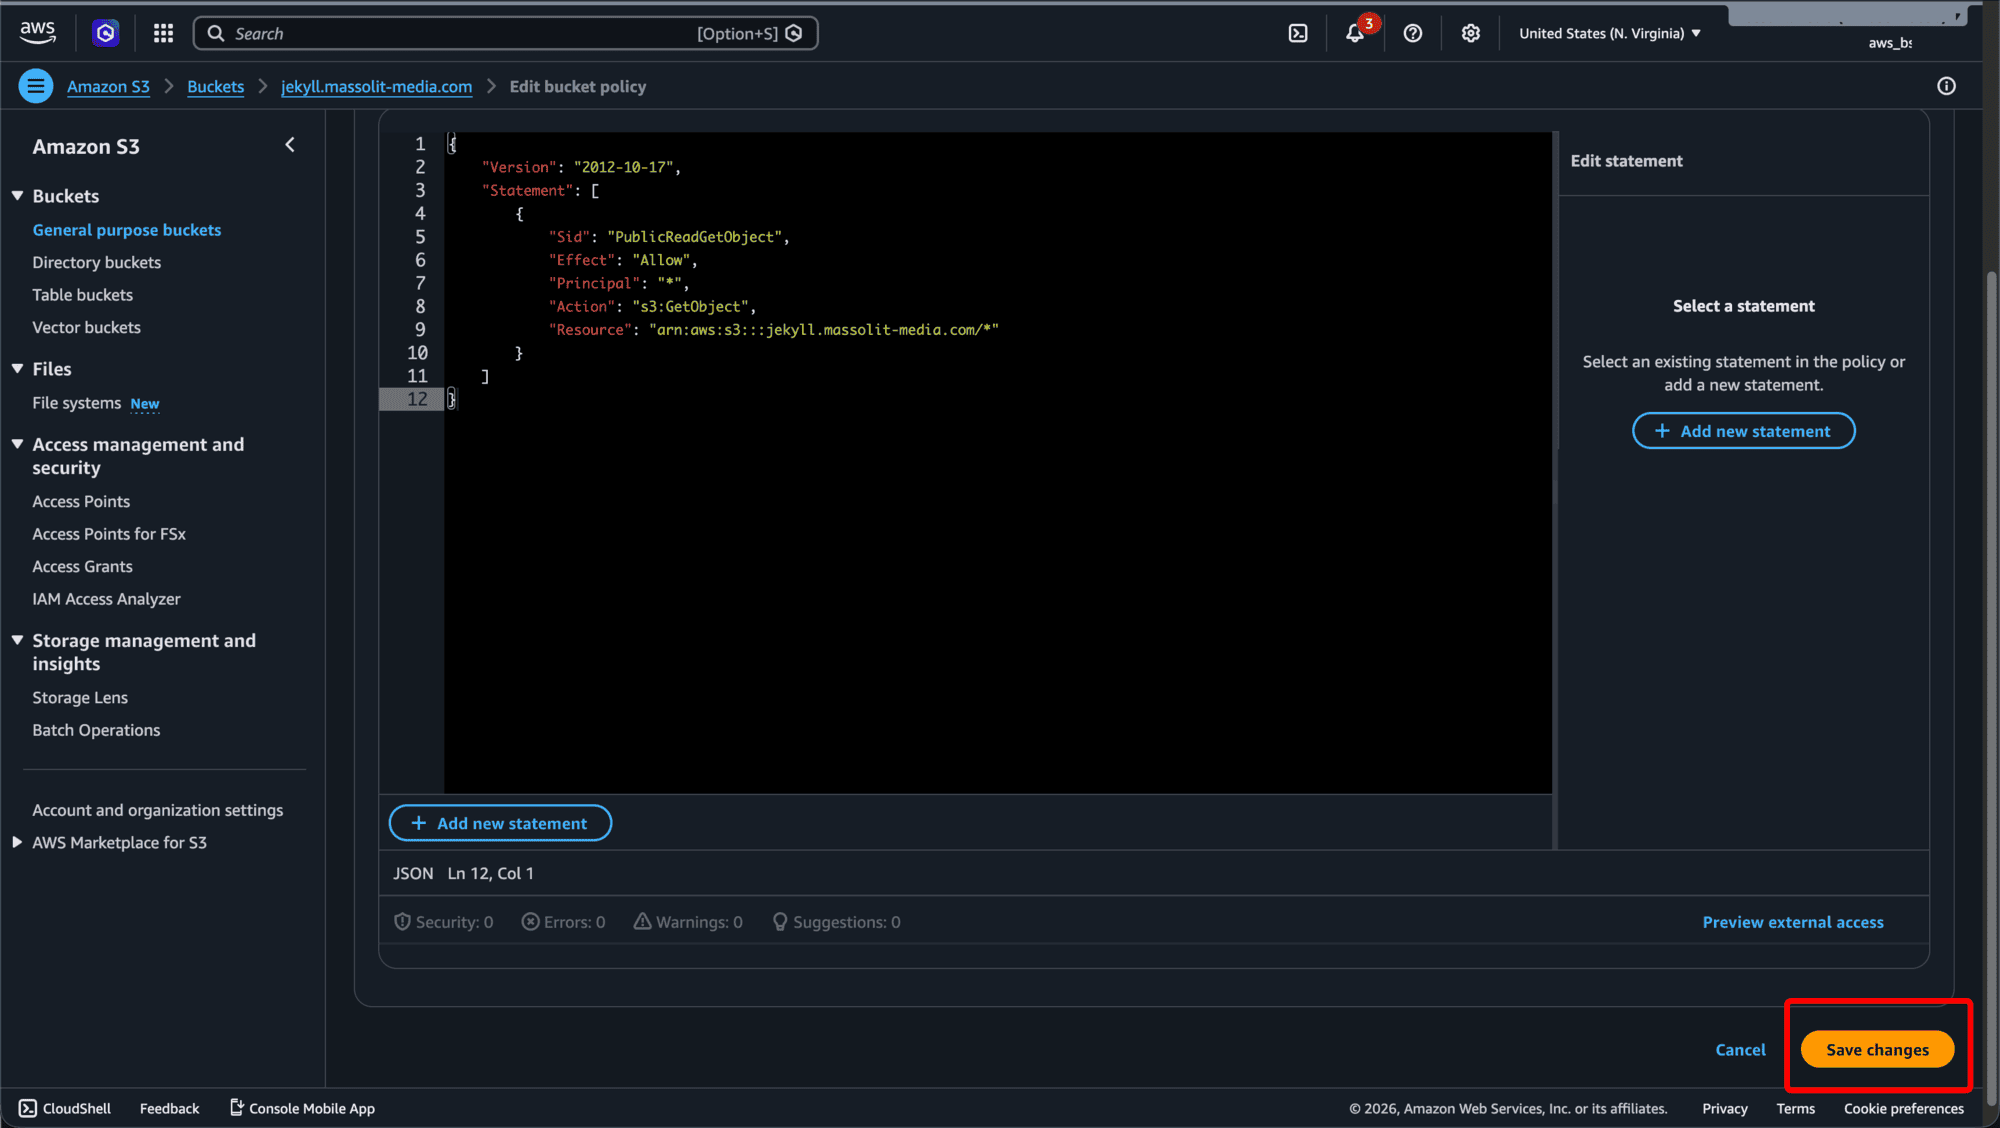
- Under Bucket policy, click the Edit button.

-
Paste this JSON into the policy field:
{
  "Version": "2012-10-17",
  "Statement": [
    {
      "Sid": "PublicReadGetObject",
      "Effect": "Allow",
      "Principal": "*",
      "Action": "s3:GetObject",
      "Resource": "<amazon-resource-name-arn:aws:s3:::>/*"
    }
  ]
}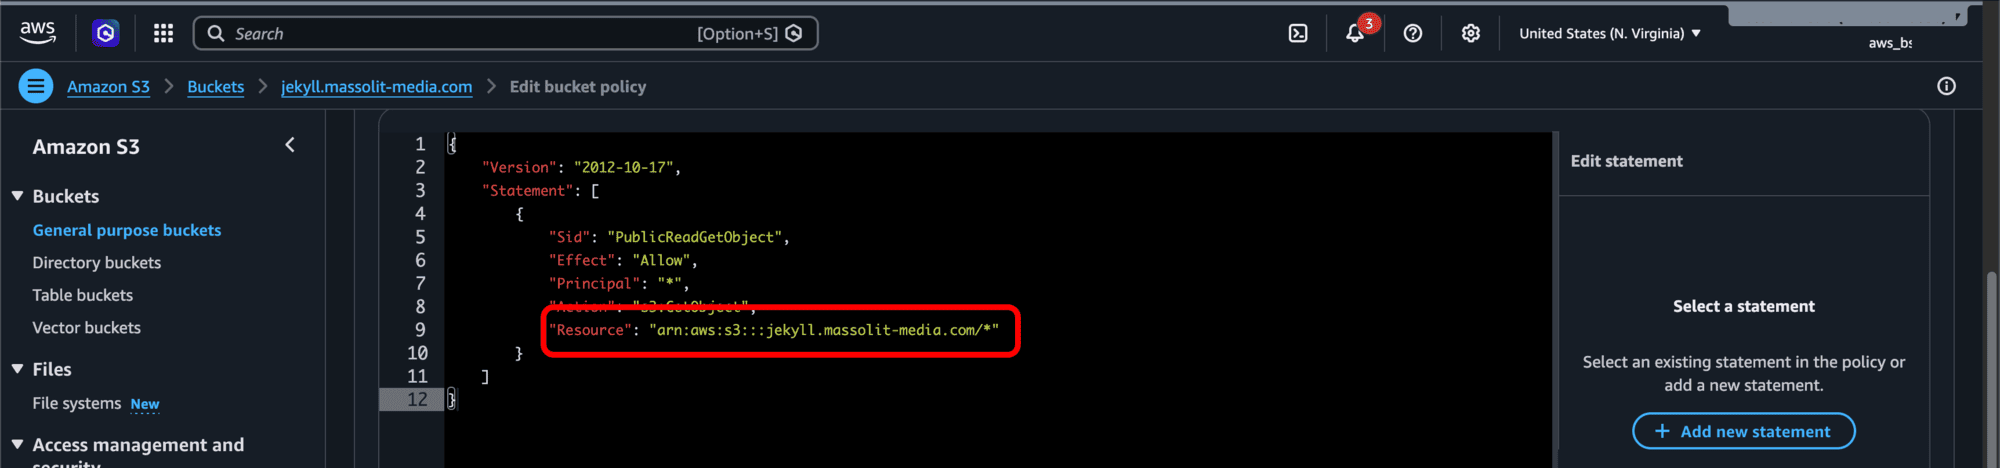
- The only change you need to make to this JSON is the
"Resource:"field where I put a placeholder value. You need to enter the Amazon Resource Name (ARN) for the S3 bucket, which you can retrieve from the S3 bucket’s page.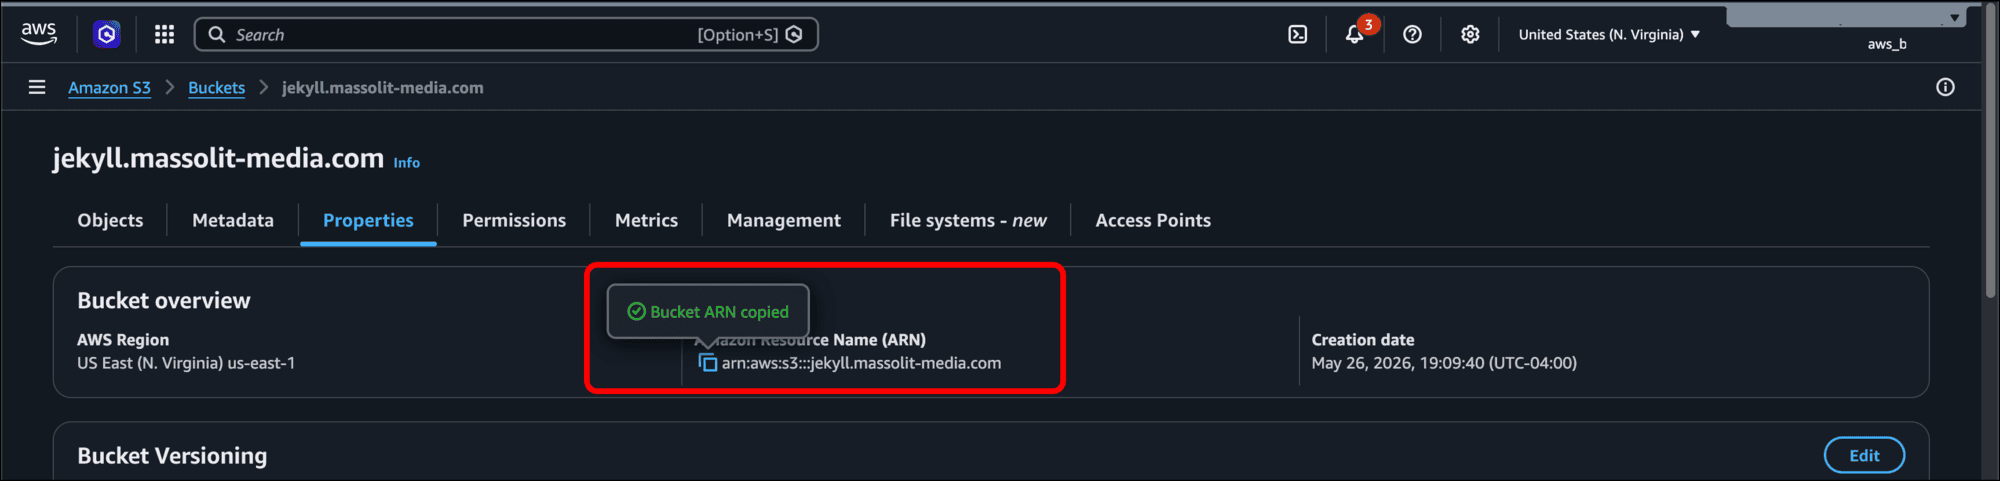
- You can copy this value, which will begin with
arn:aws:s3:::, from the bucket’s Properties tab and replace my placeholder text, but you must append/*to the end of the ARN
- The only change you need to make to this JSON is the
- When you are done, click Save changes.
Create Your TLS Certificate in AWS Certificate Manager
Now you need to create a TLS certificate that will accompany the CloudFront distribution.
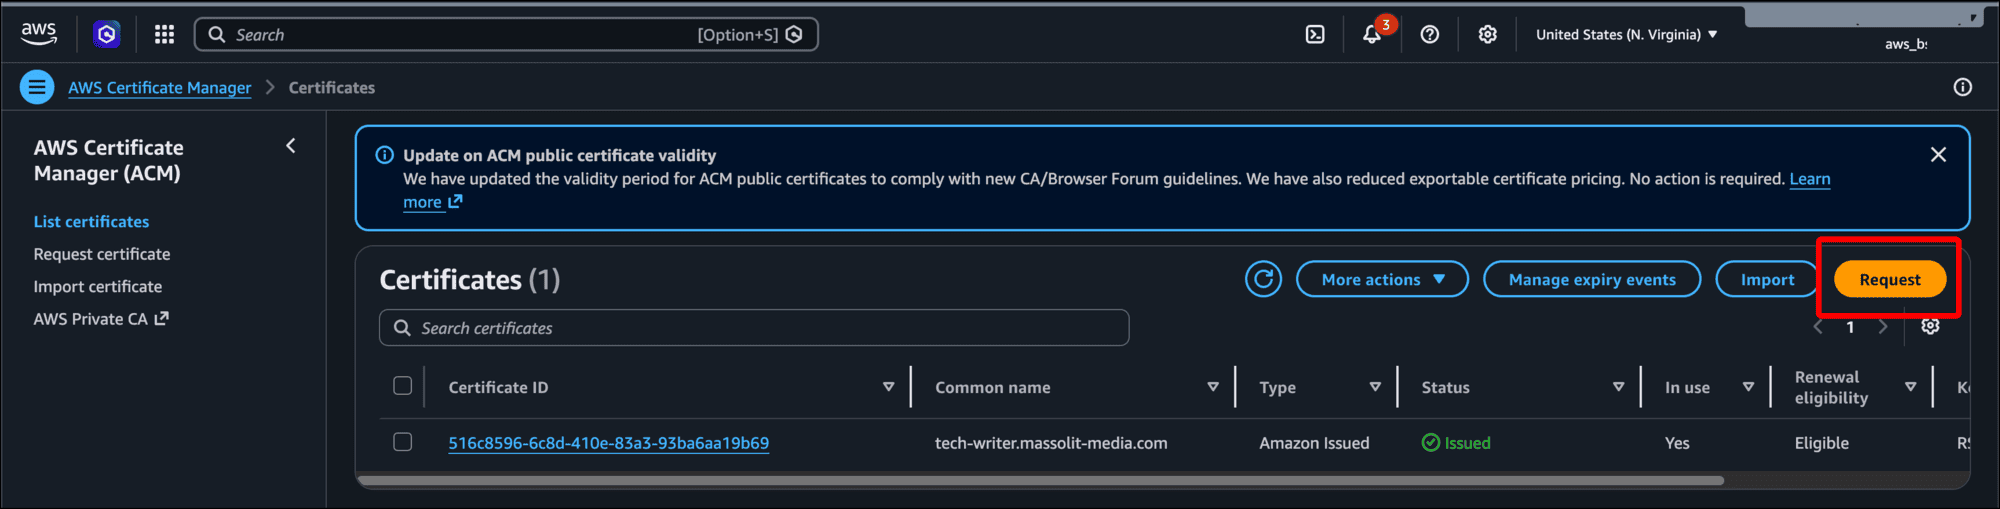
- Type certificate into the search bar and select Certificate Manager from the results.

- When the Certificates page loads, click the Request button.
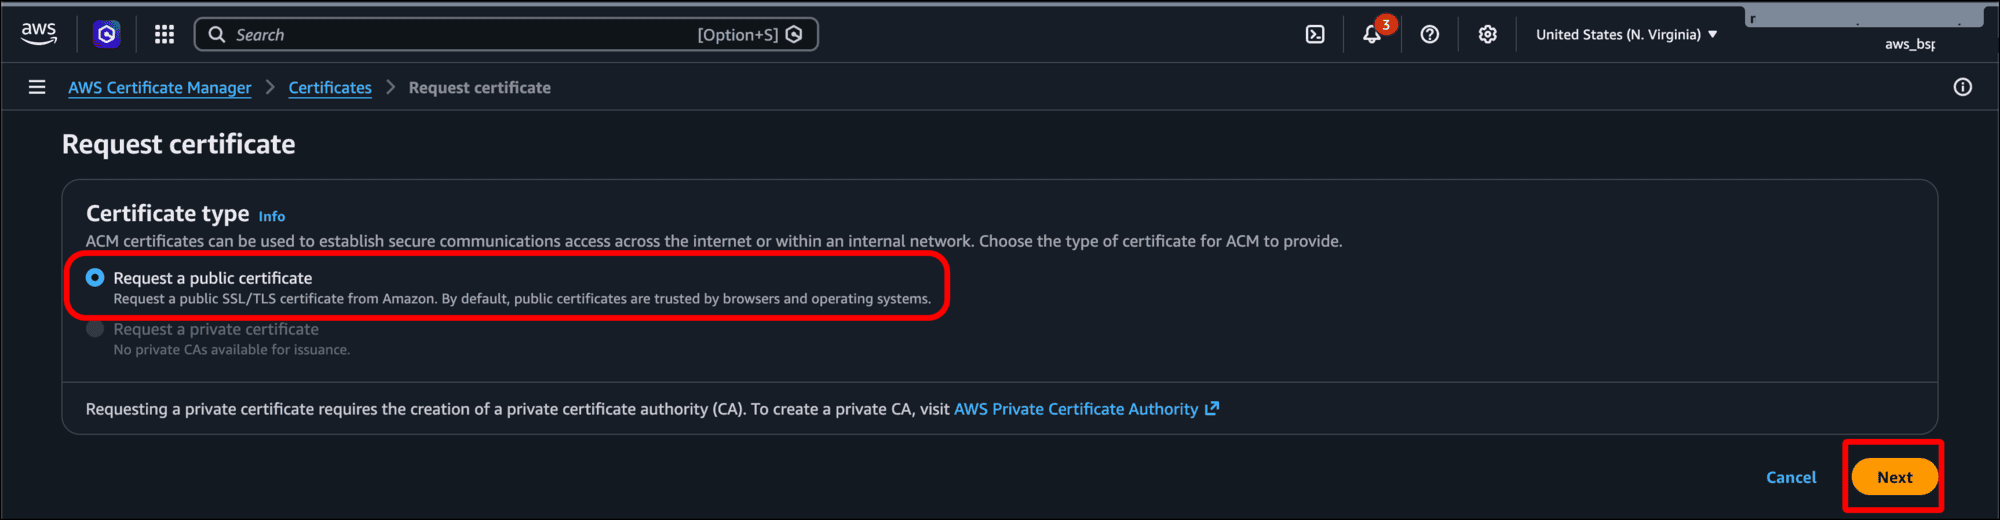
- On the Request certificate page, leave the default Certificate type of Request a public certificate selected and click Next.
- Enter the Fully qualified domain name for your website. I am using
jekyll.massolit-media.comin this tutorial. I have not configured the domain name for this site yet, but I need to give the certificate the fully qualified domain name (FQDN) that you want it to use.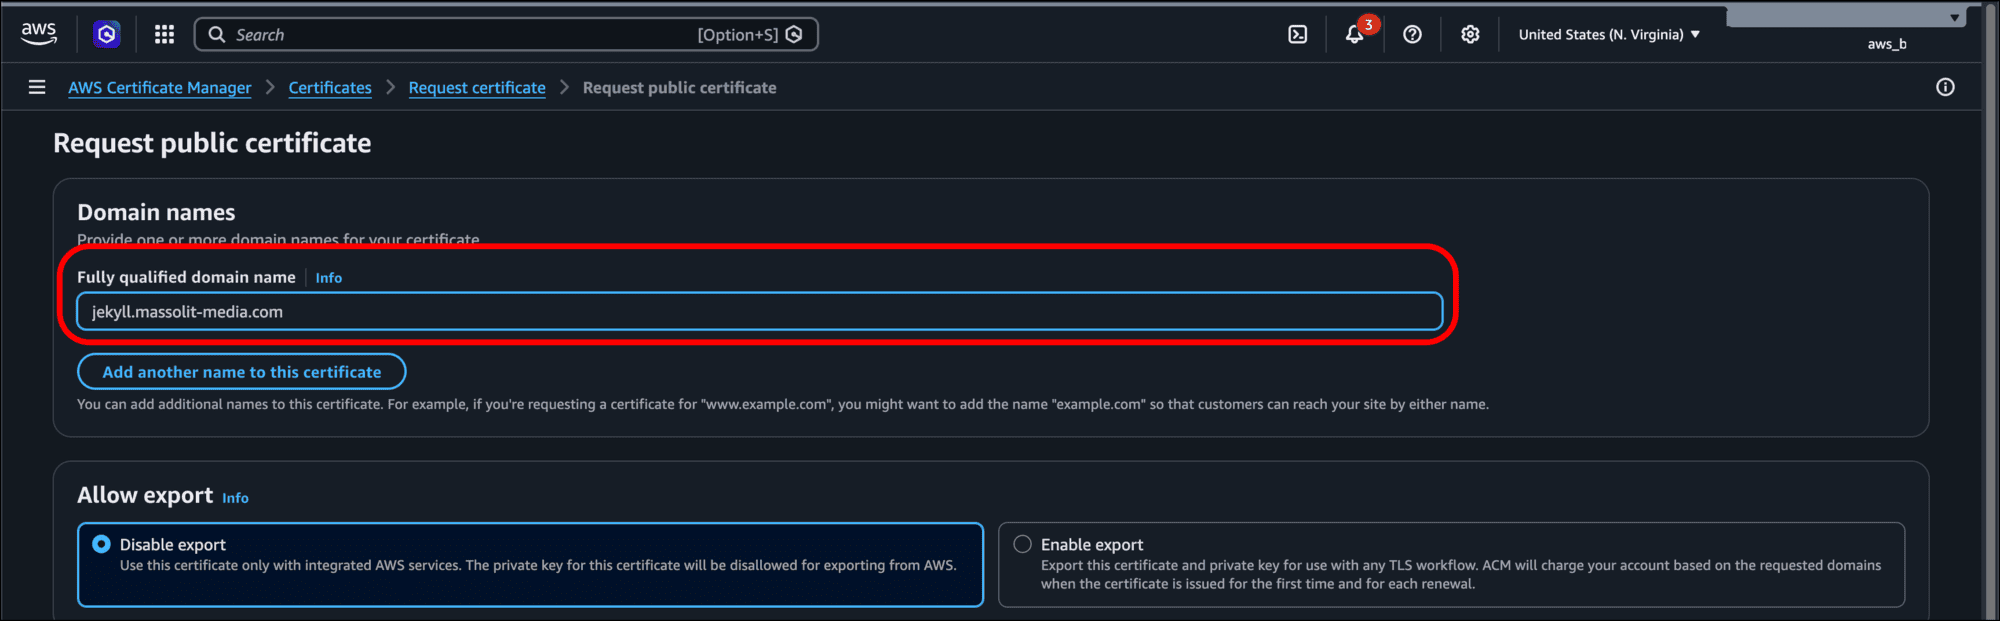
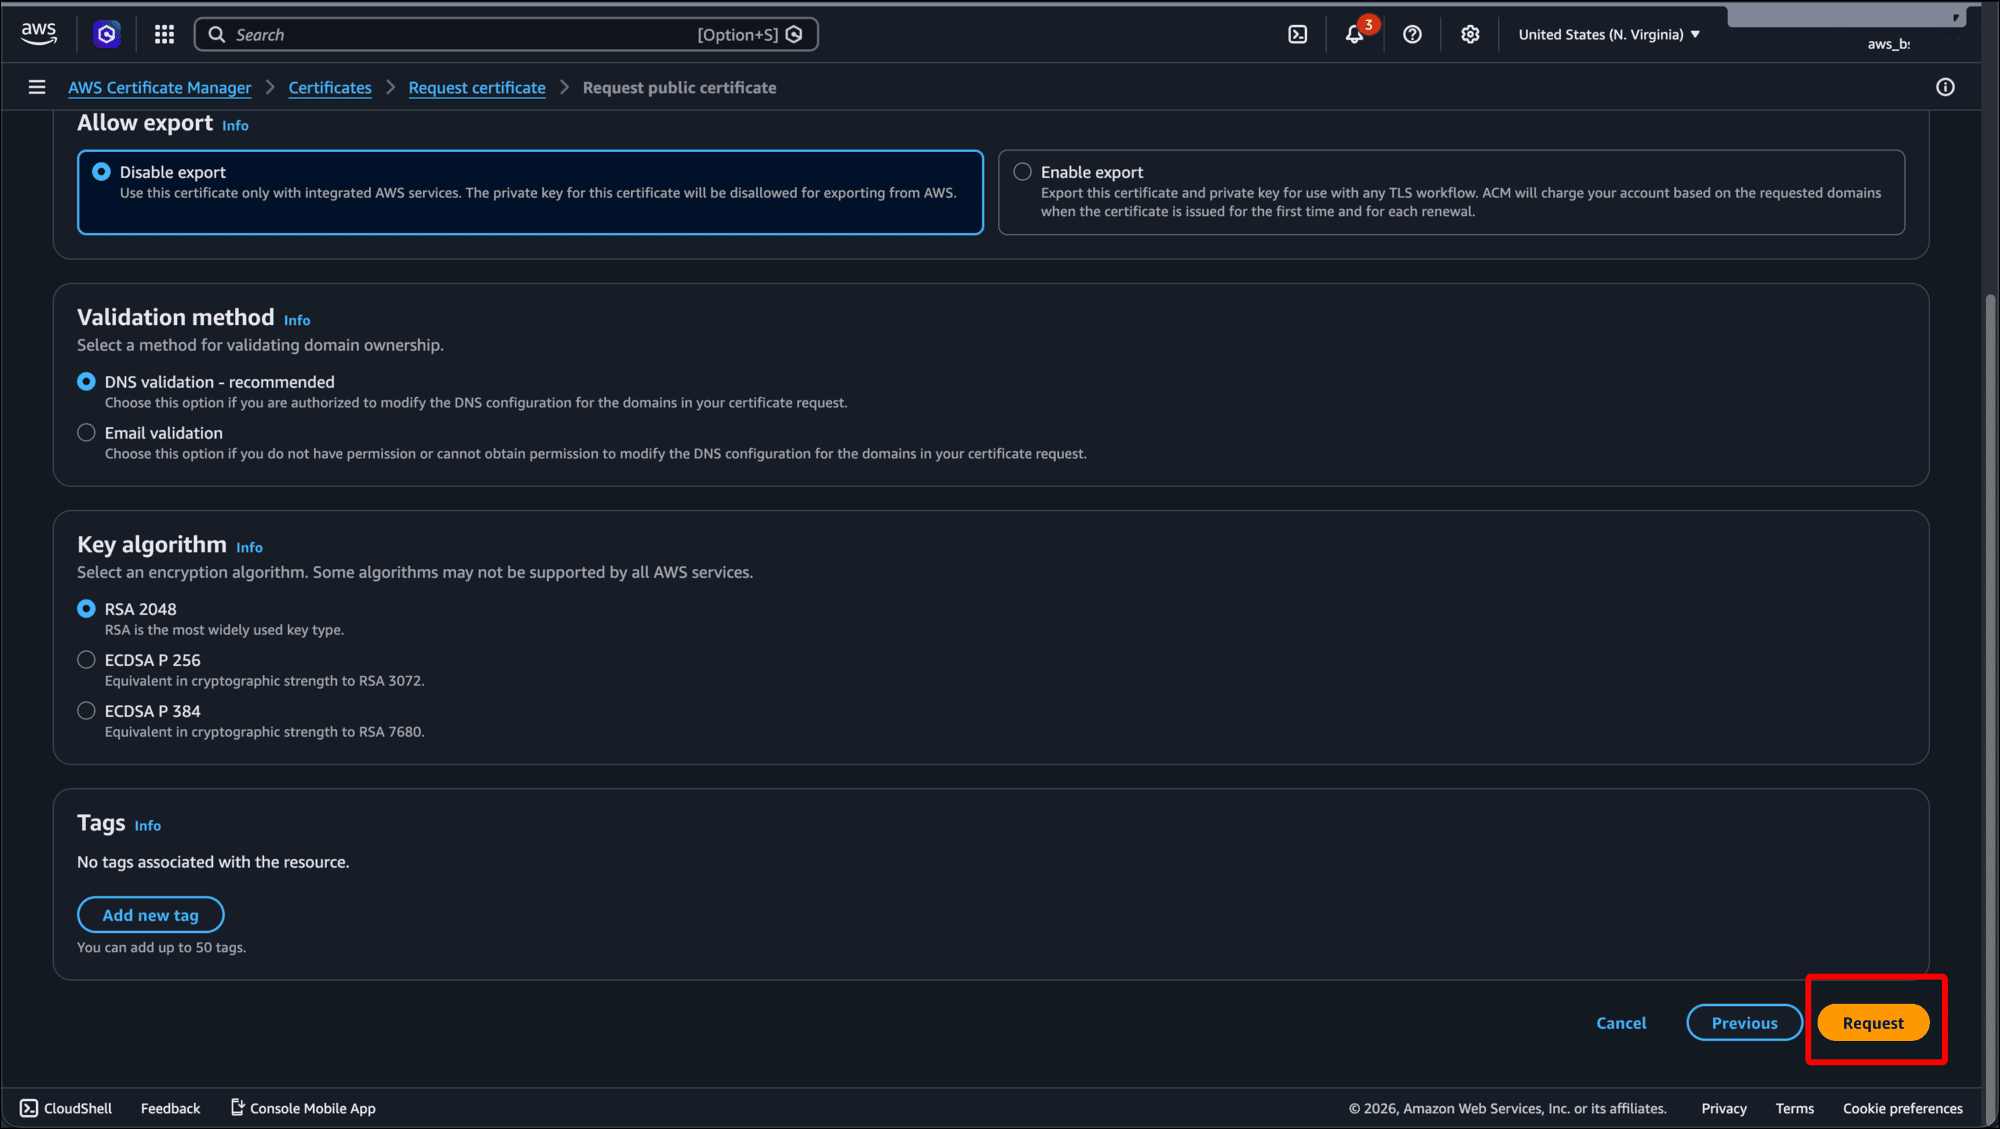
- Scroll to the bottom of the page and click Request.
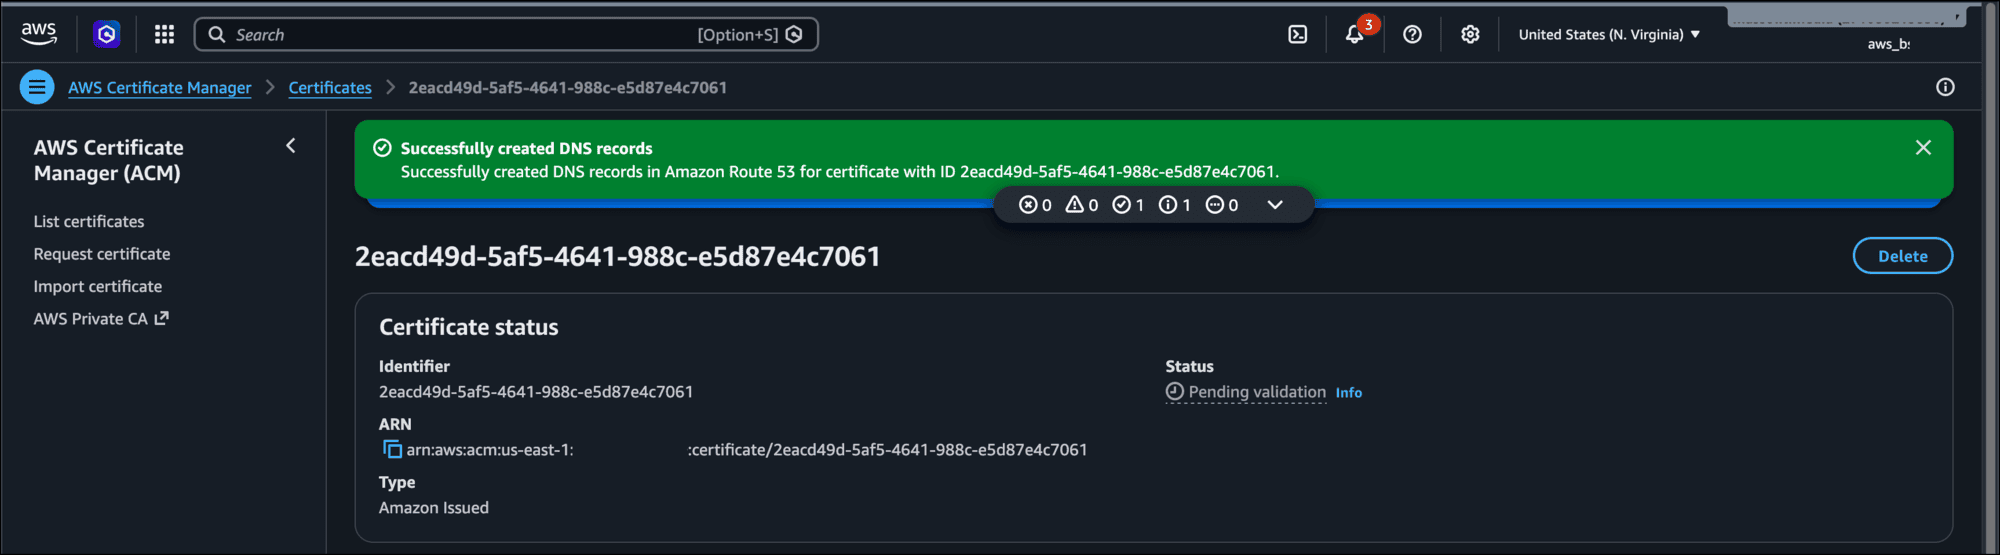
- The certificate is given a Universal Unique Identifier (UUID) as its name. You should see a banner:
Successfully requested certificate with ID <UUID>. A certificate request with a status of pending validation has been created. Further action is needed to complete the validation and approval of the certificate.At first, the Domains section will be empty.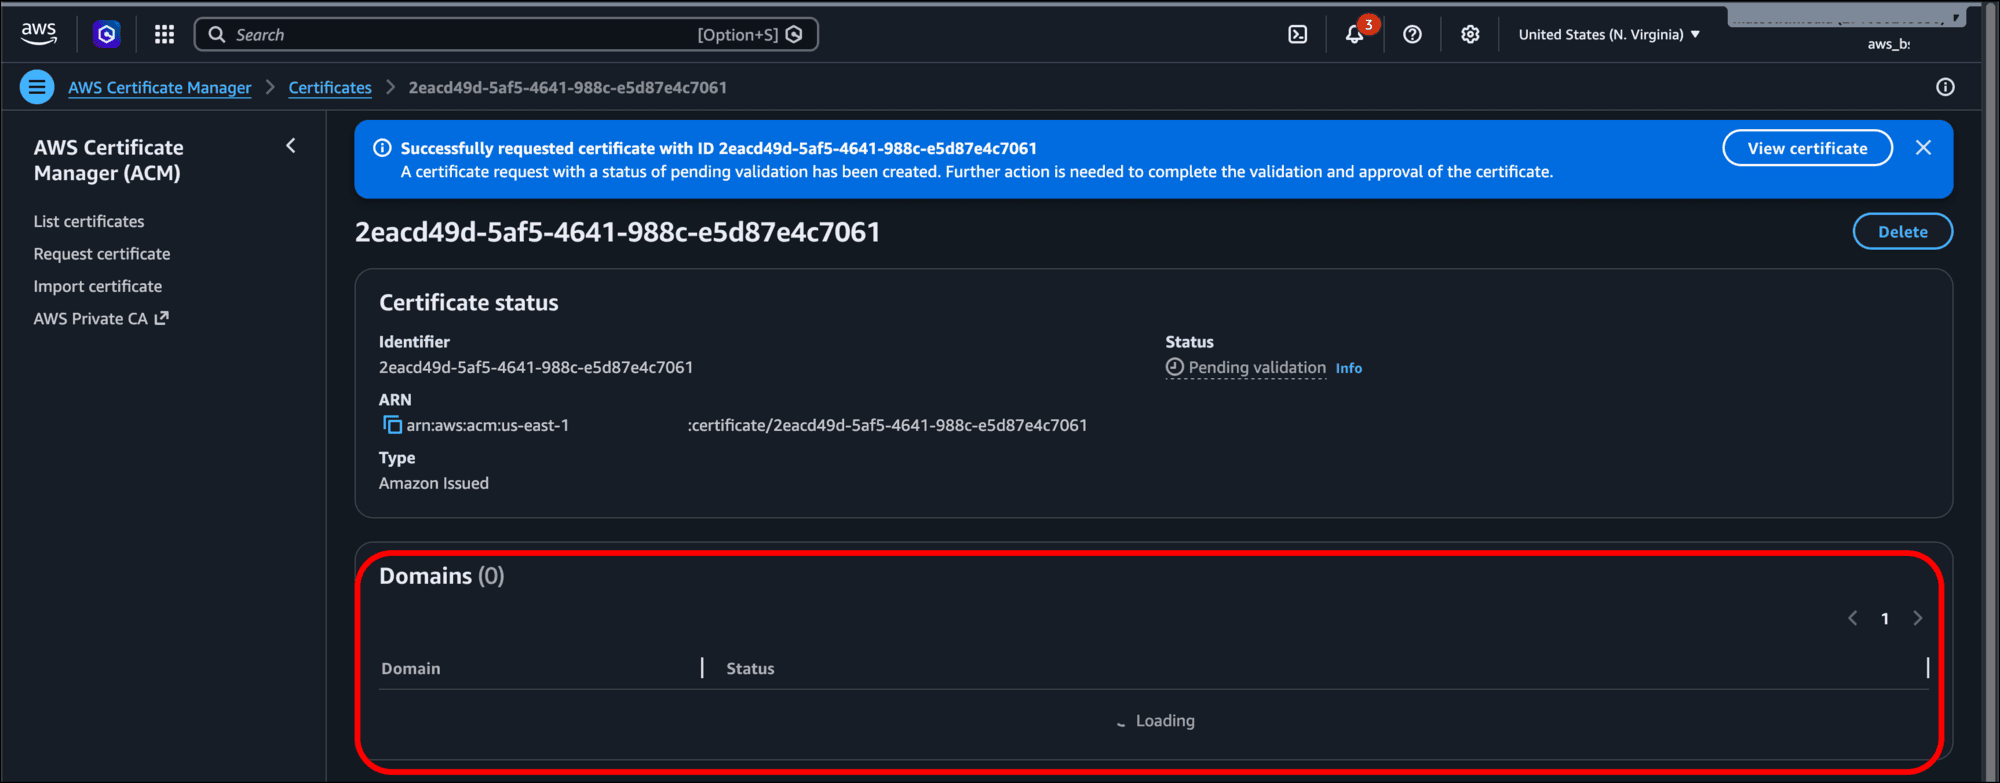
- Shortly after your request the certificate, the Domains section will update to display the Domain, or FQDN value, that you entered earlier. The certificate has a Status of Pending validation. When you see these updates, click the Create records in Route 53 button.
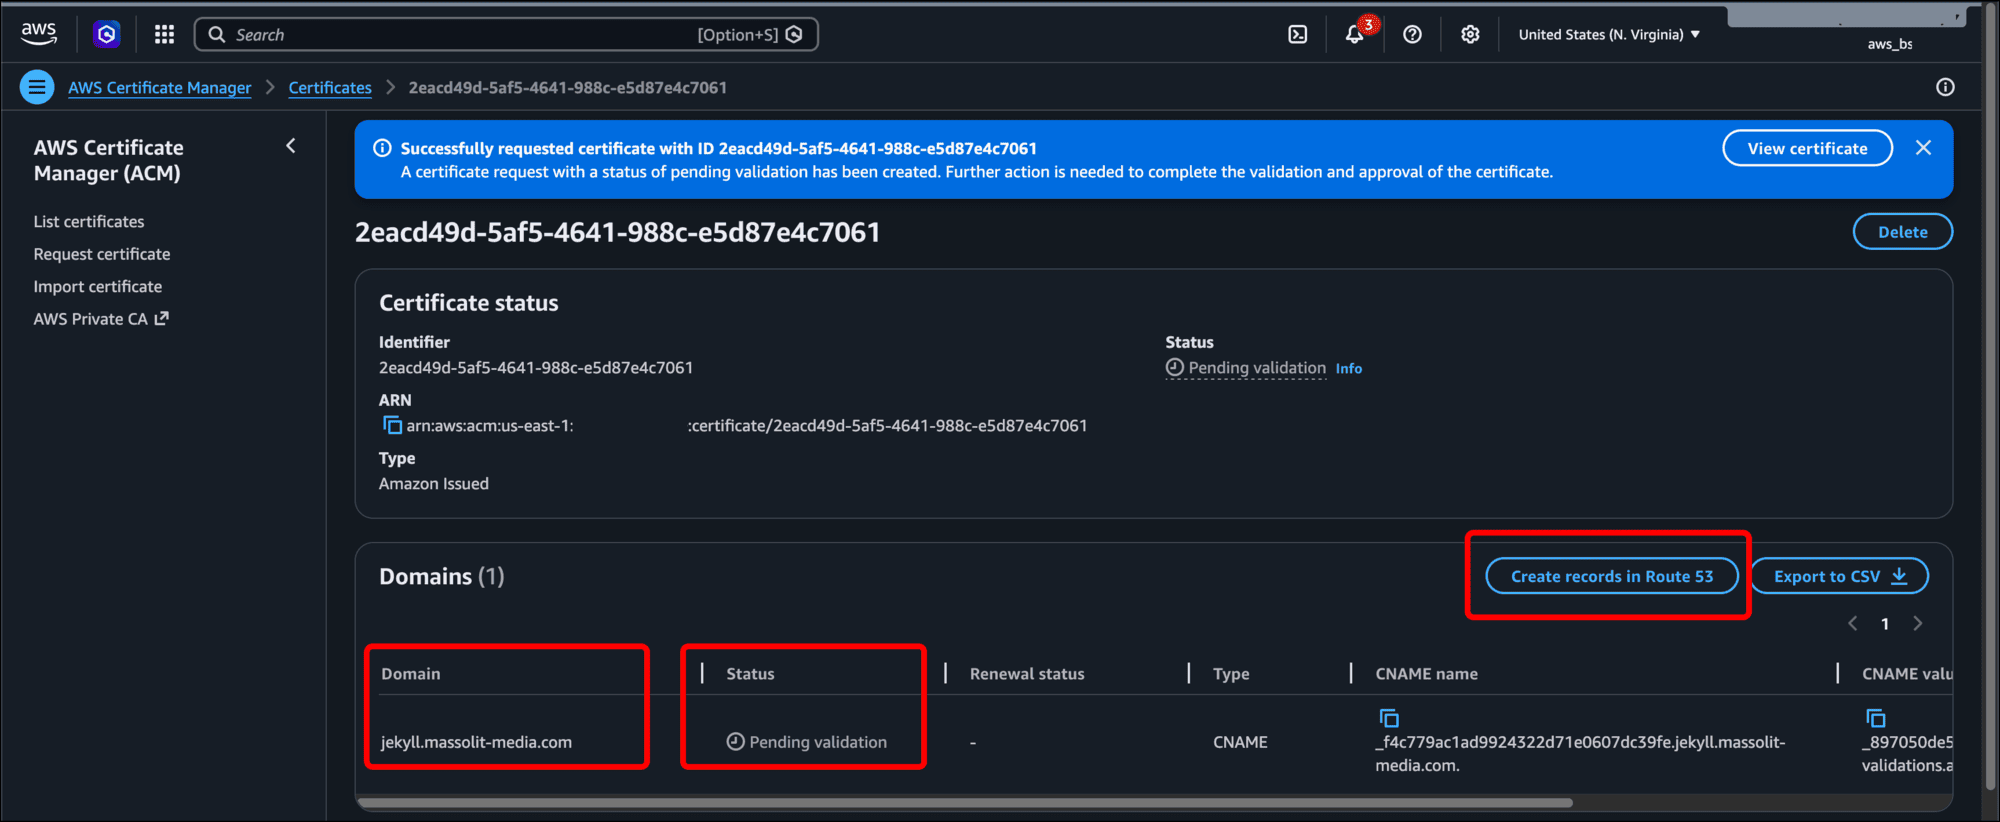
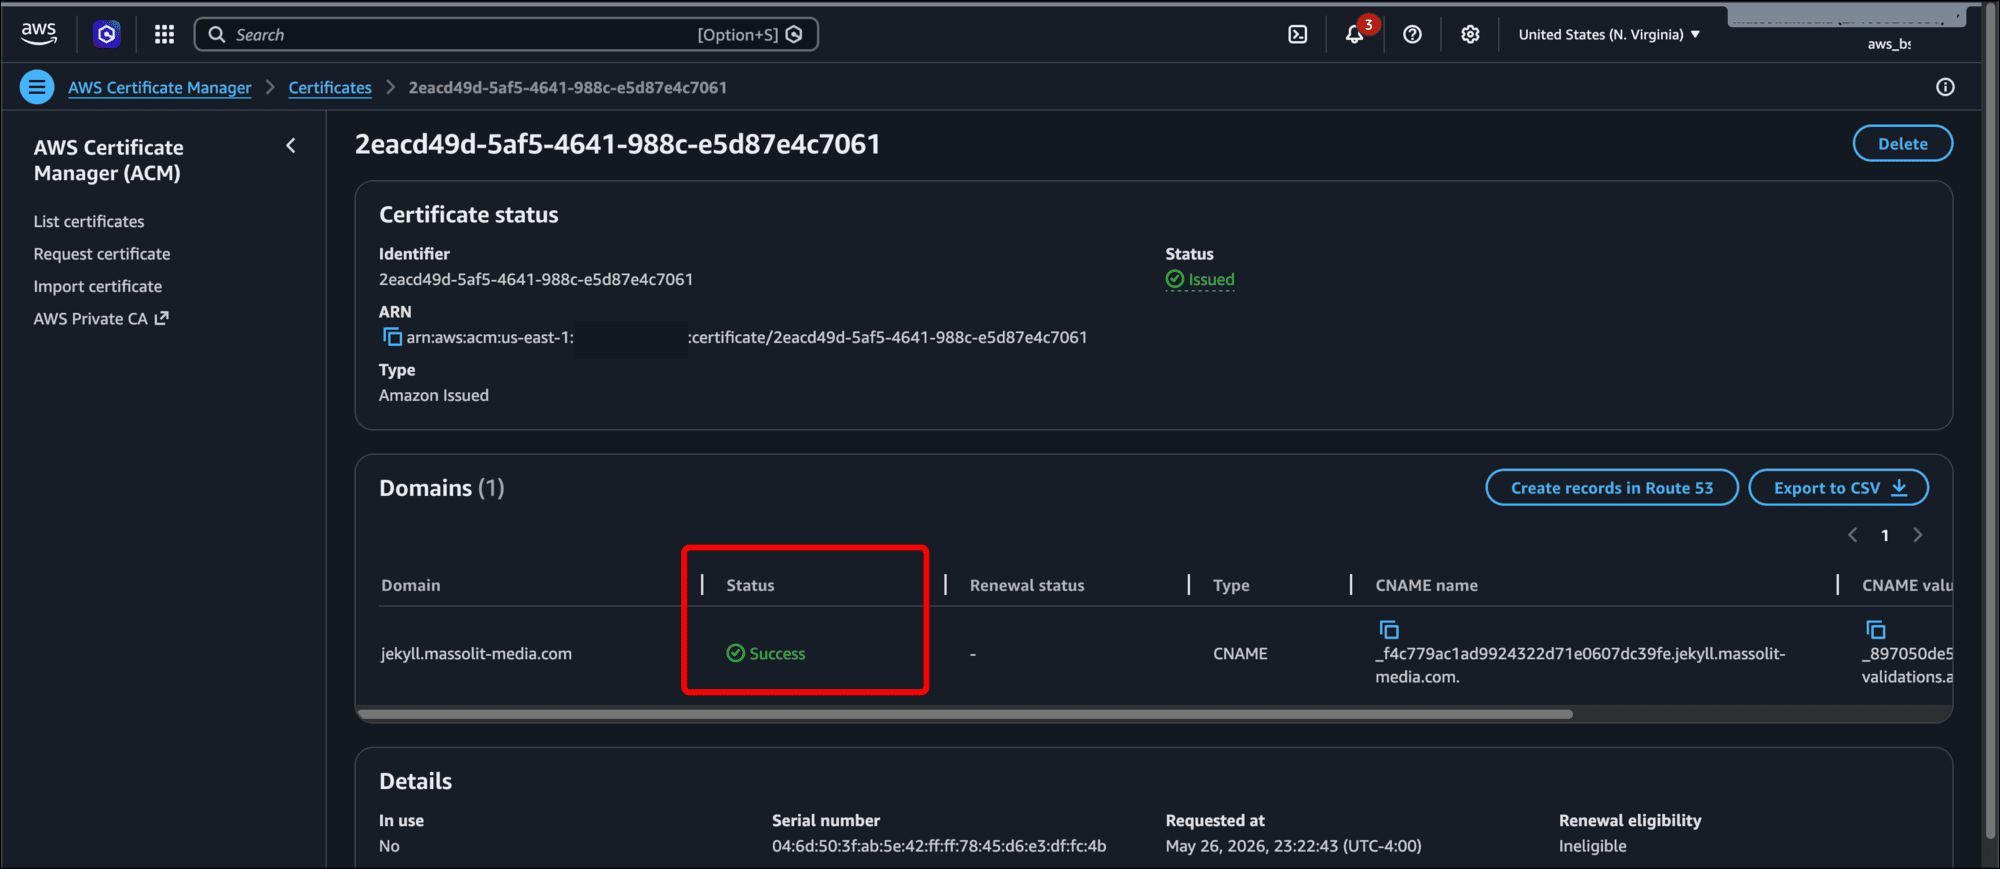
- If you only entered one FQDN value, it should be selected by default. Click Create records.

- When you return to the certificate page, you should see a green banner that says Successfully created DNS records in Amazon Route 53 for your certificate.
- Before too long (five to 10 minutes) the Status of your certificate request should change to Success.
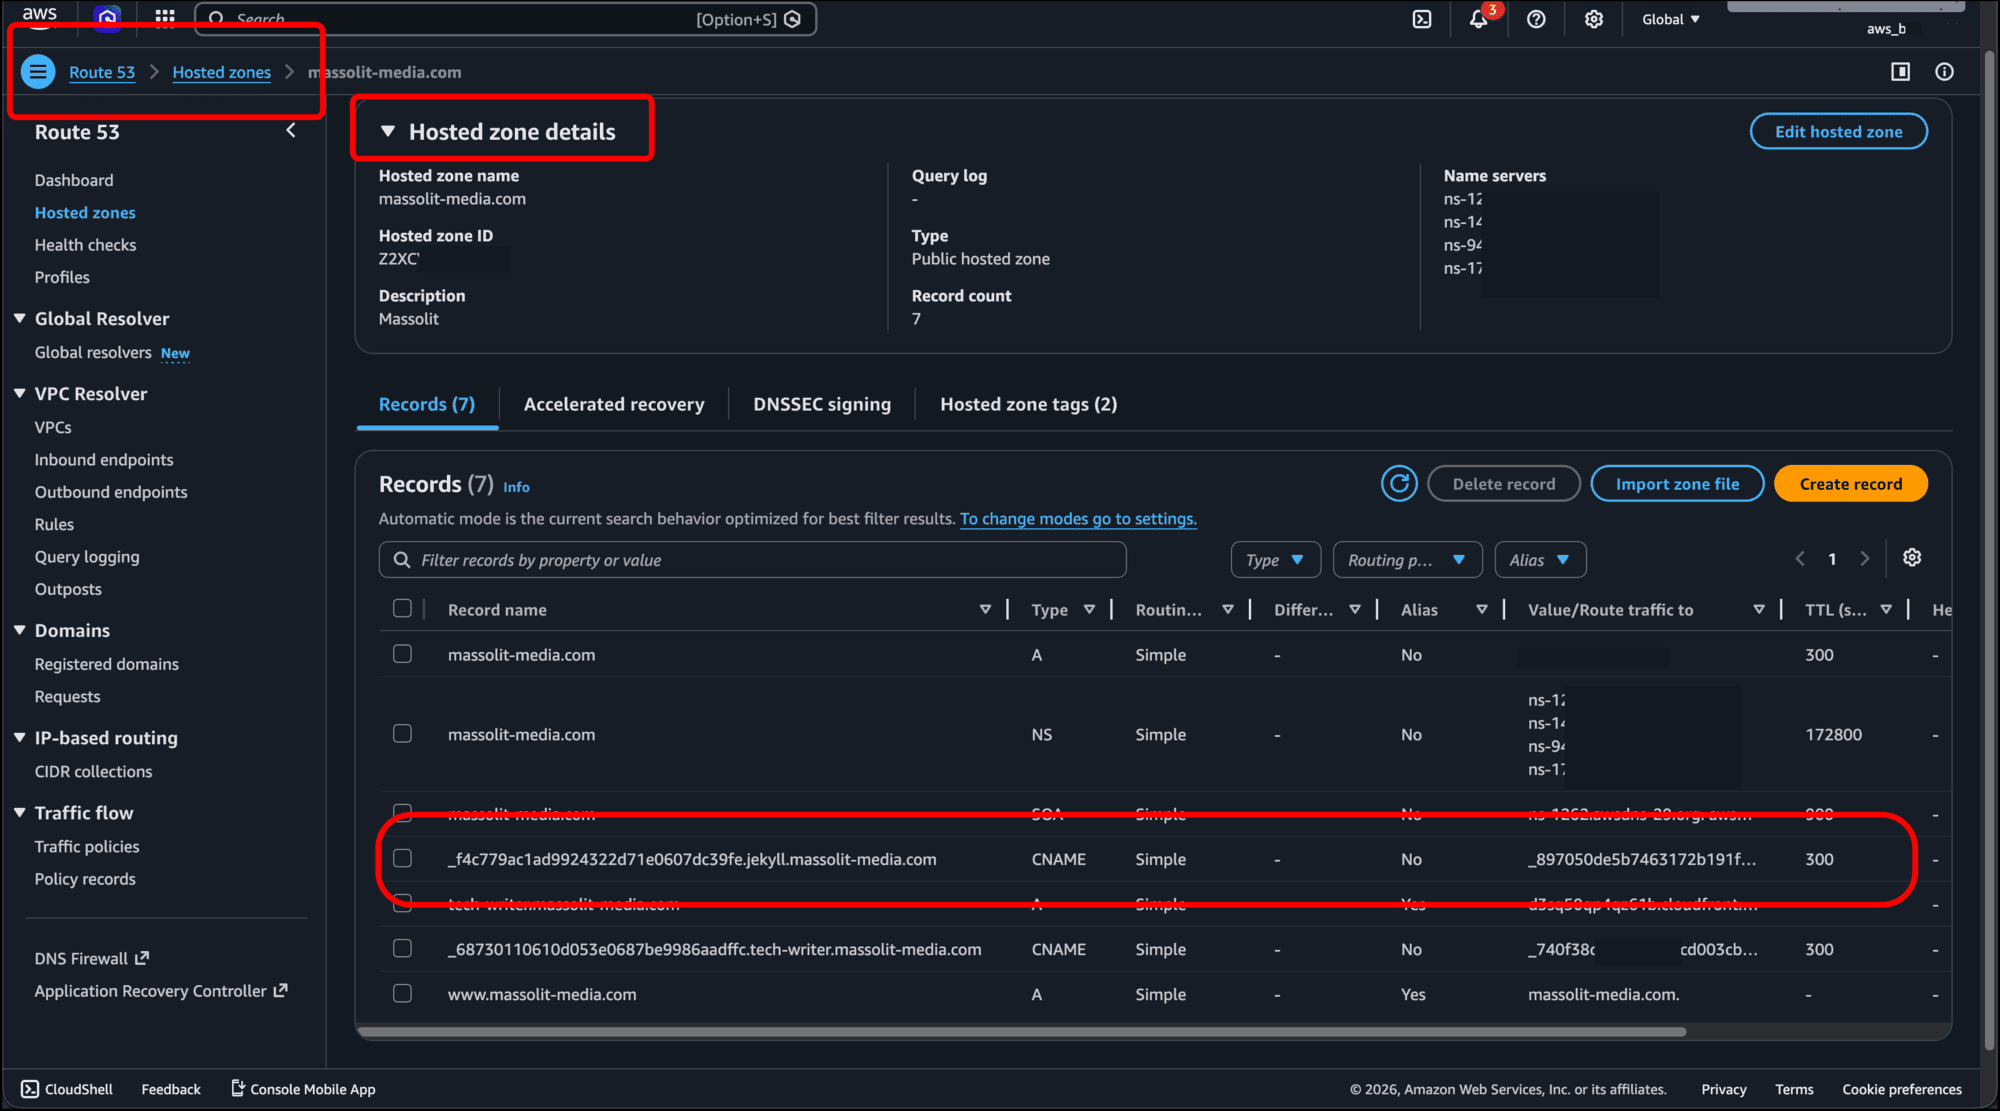
- If you navigate to AWS Route 53 and open the Hosted zone details for the domain name you used, you should see the new CNAME records that you created for your certificate when you chose the option to create records in Route 53. In my example, I have a Route 53 hosted zone for the domain name massolit-media.com and my example subdomain, jekyll.massolit-media.com appears as a CNAME record for the certificate I created.
Create an AWS CloudFront Distribution for Your Static Website
Now you need to set up an AWS CloudFront distribution that will provide your site with a domain name and TLS/SSL certificate as well as a content delivery network to propagate it across the internet.
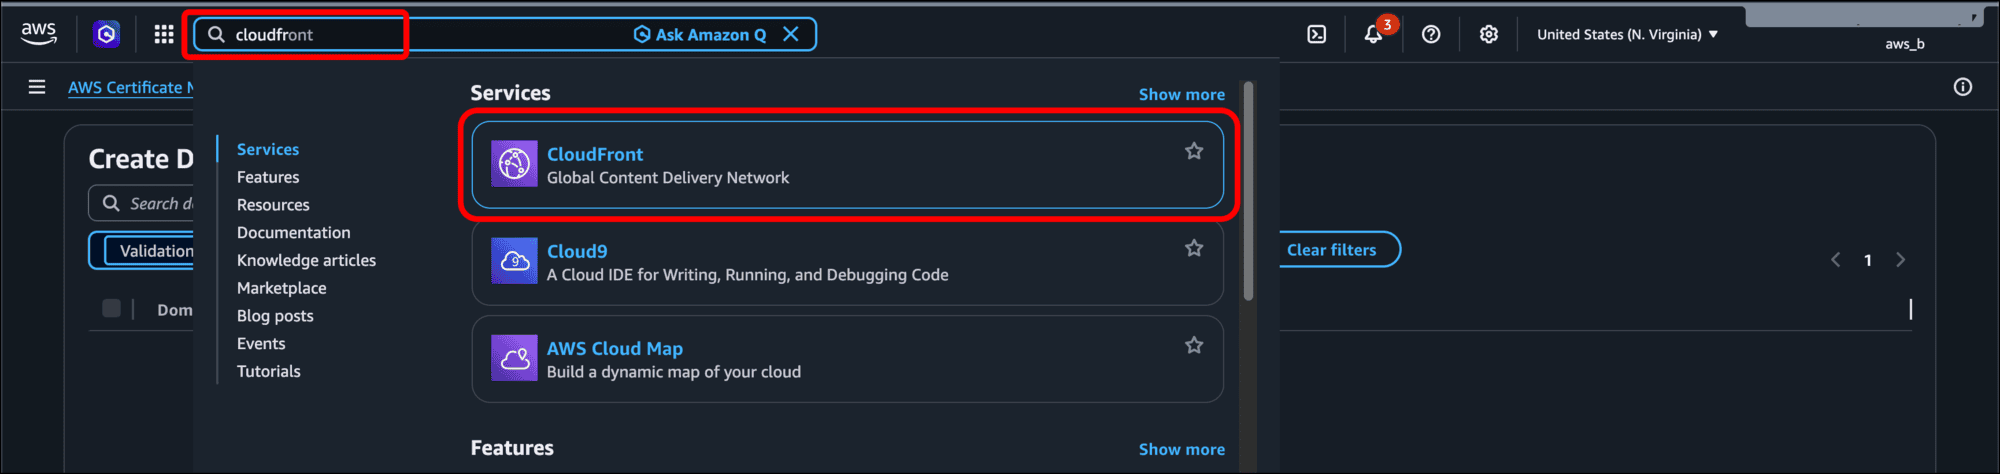
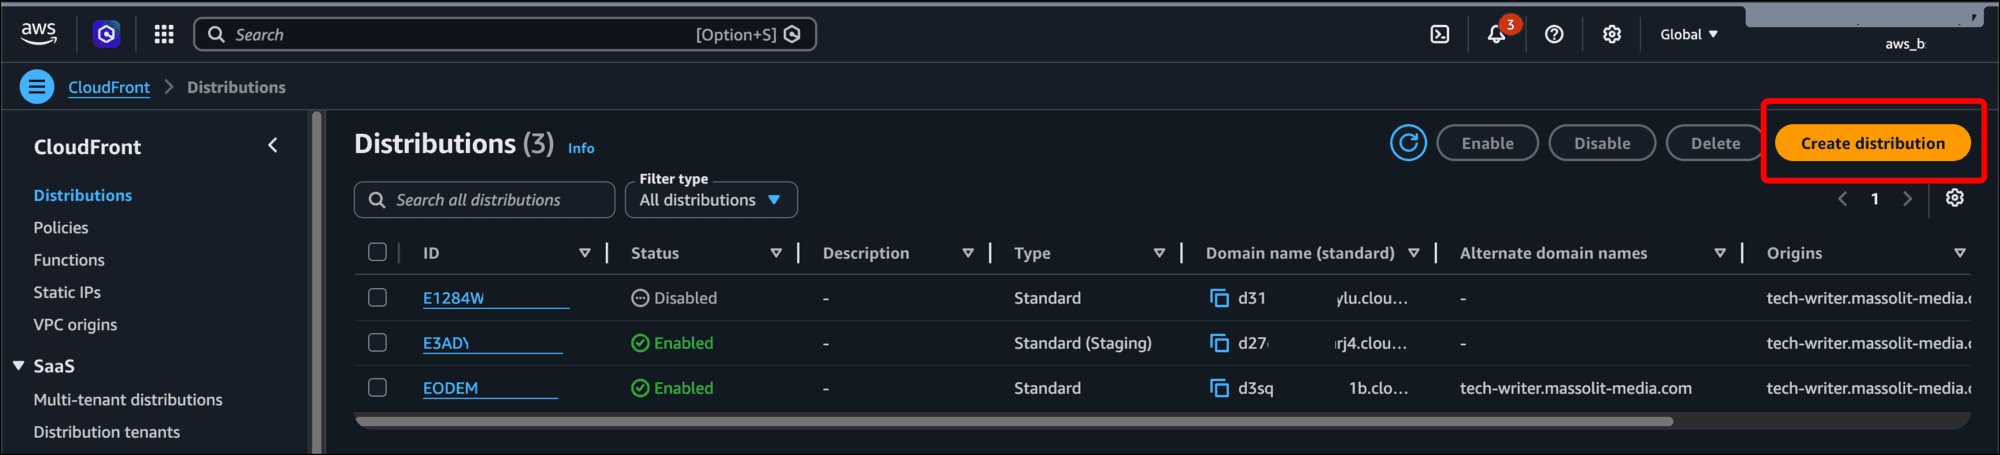
- Type cloudfront into the search bar and select CloudFront from the results.
- Click Create distribution.
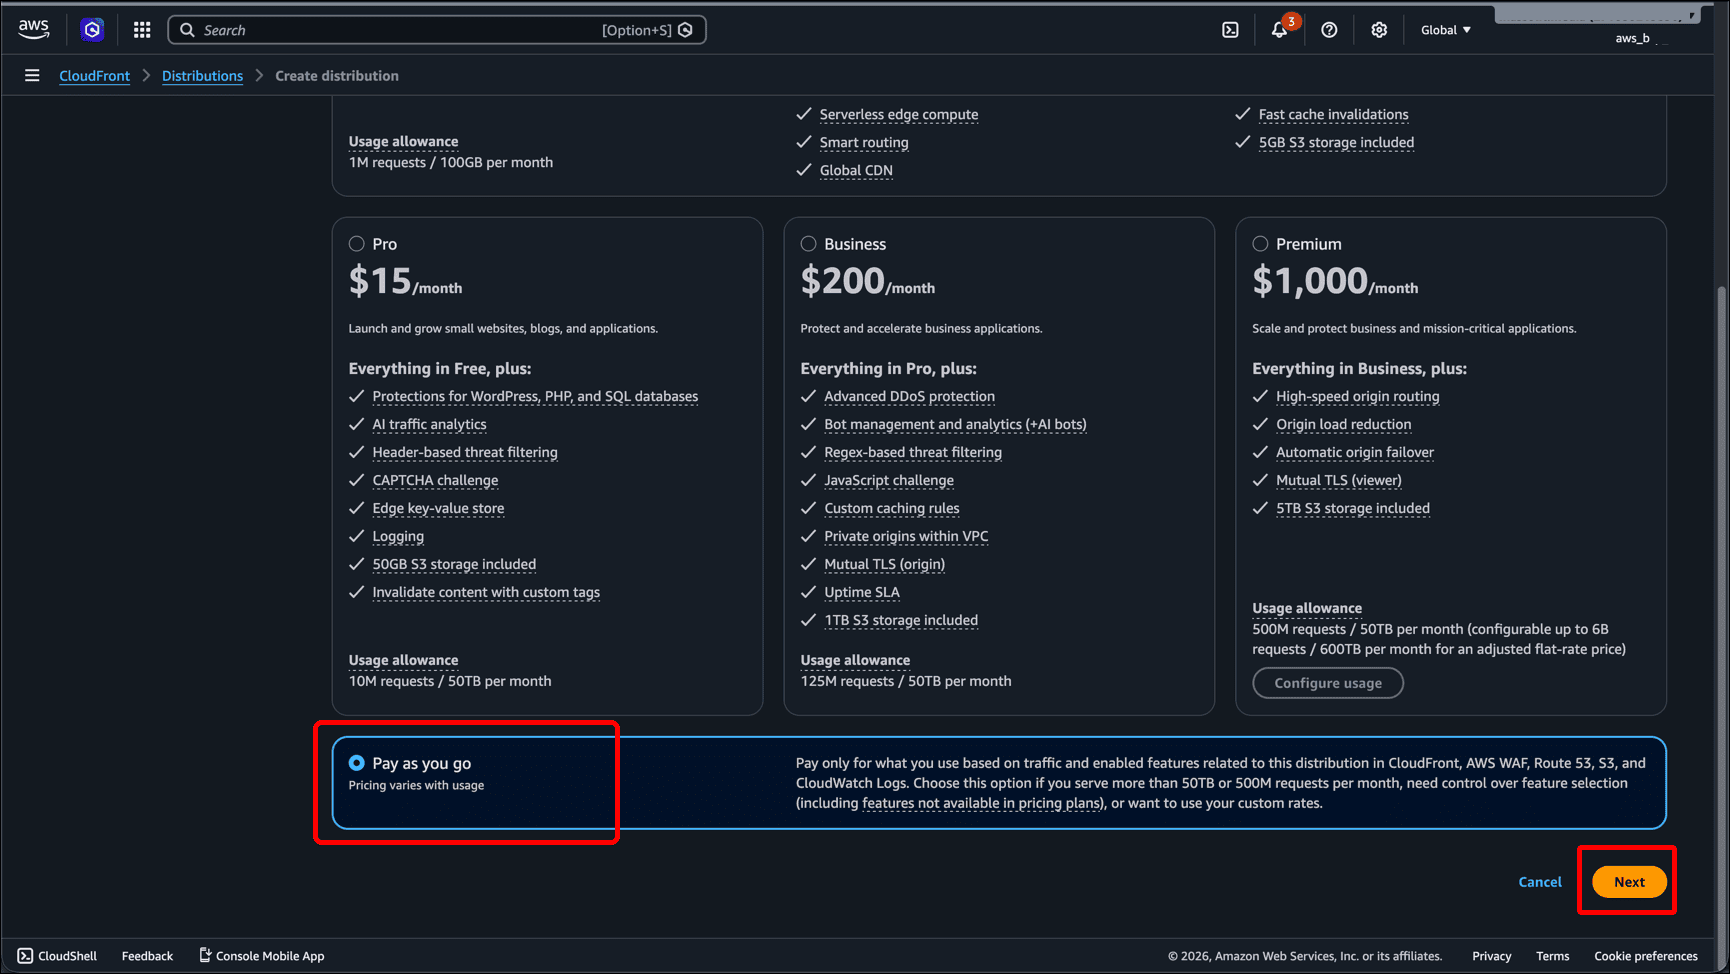
- Scroll to the bottom, select the Pay as you go radio button, and click Next.
-
On the Get started page:

- Enter a Distribution name (for example, the website domain name or FQDN) and, if you like, a Description.
- Leave Distribution type as Single website or app.
- If you already have the domain name configured, you can enter it in the Domain field.
- Click Next.
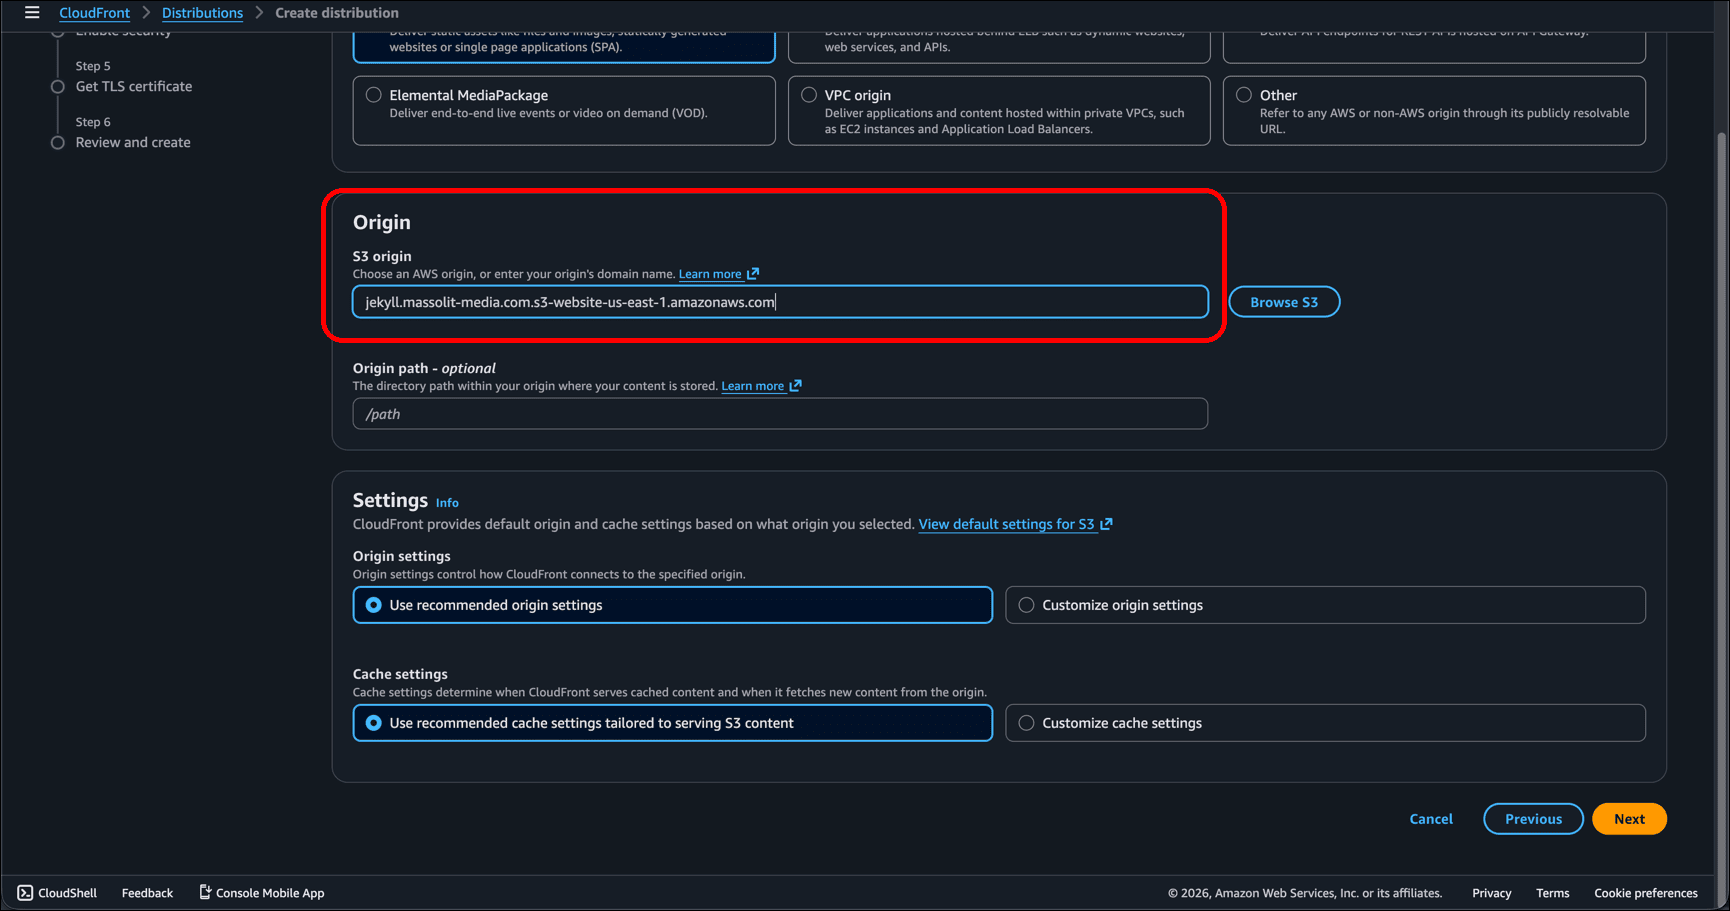
- On the Specify origin page, leave Origin type as Amazon S3.
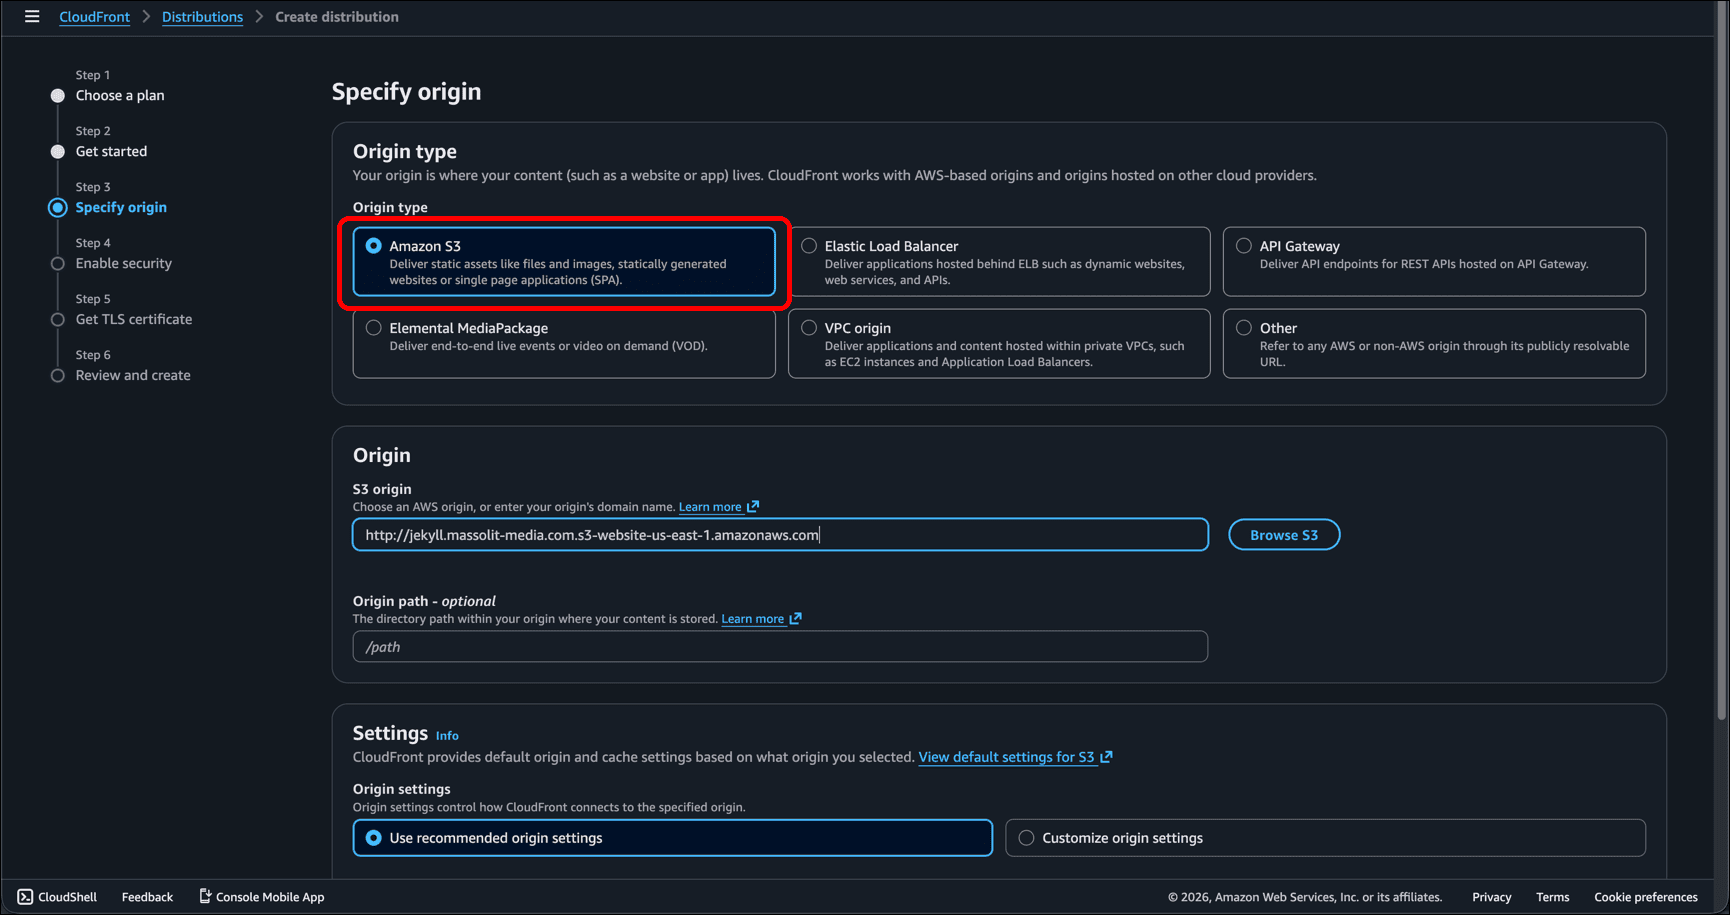
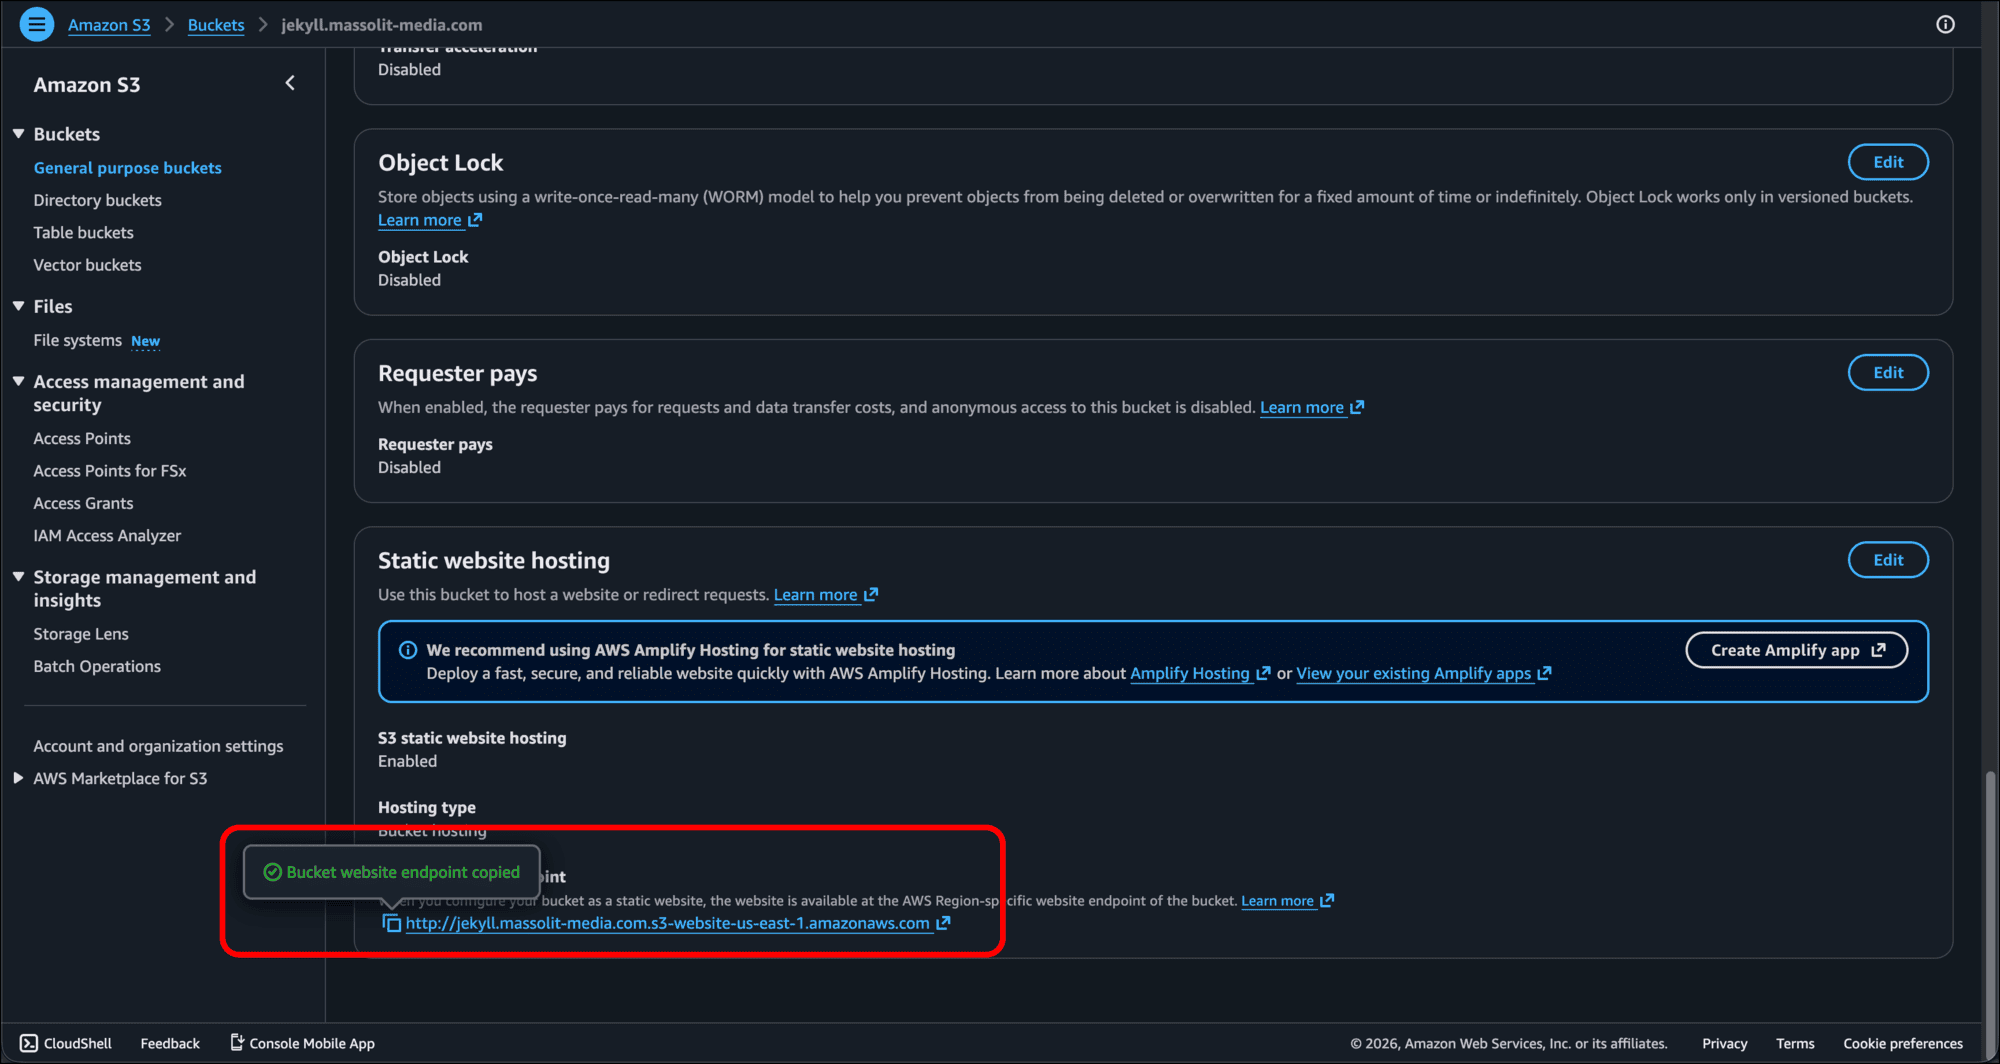
- Go back to the page for the S3 bucket and open the Properties tab again. At the bottom of the page, copy the value for the Bucket website endpoint.
- Paste the Bucket website endpoint value into the S3 origin field in the Origin section of the Create distribution page.
-
Under Settings, click Customize origin settings and scroll down when the section expands. Under Protocol, click HTTP only.
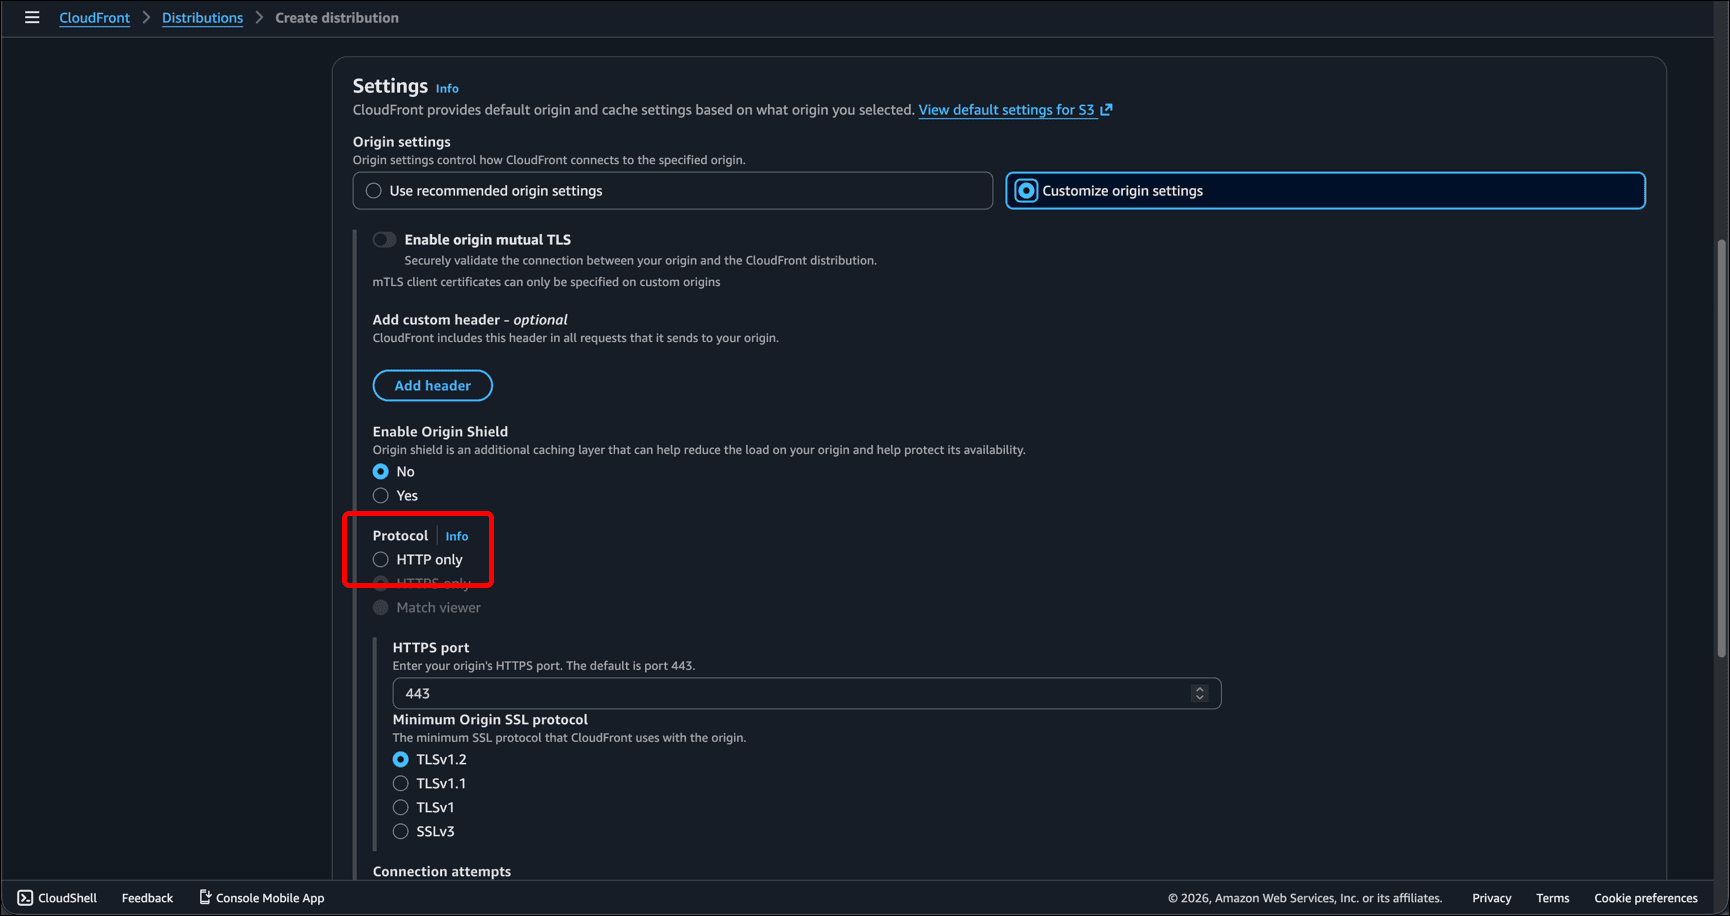
This may seem counterintuitive, and it tripped me up when I was writing this tutorial, but apparently S3 buckets only support HTTP. It’s the CloudFront Distribution you are creating, and its accompanying TLS certificate, that will provide HTTPS. So when you set the origin (the S3 bucket), you need to specify HTTP only.
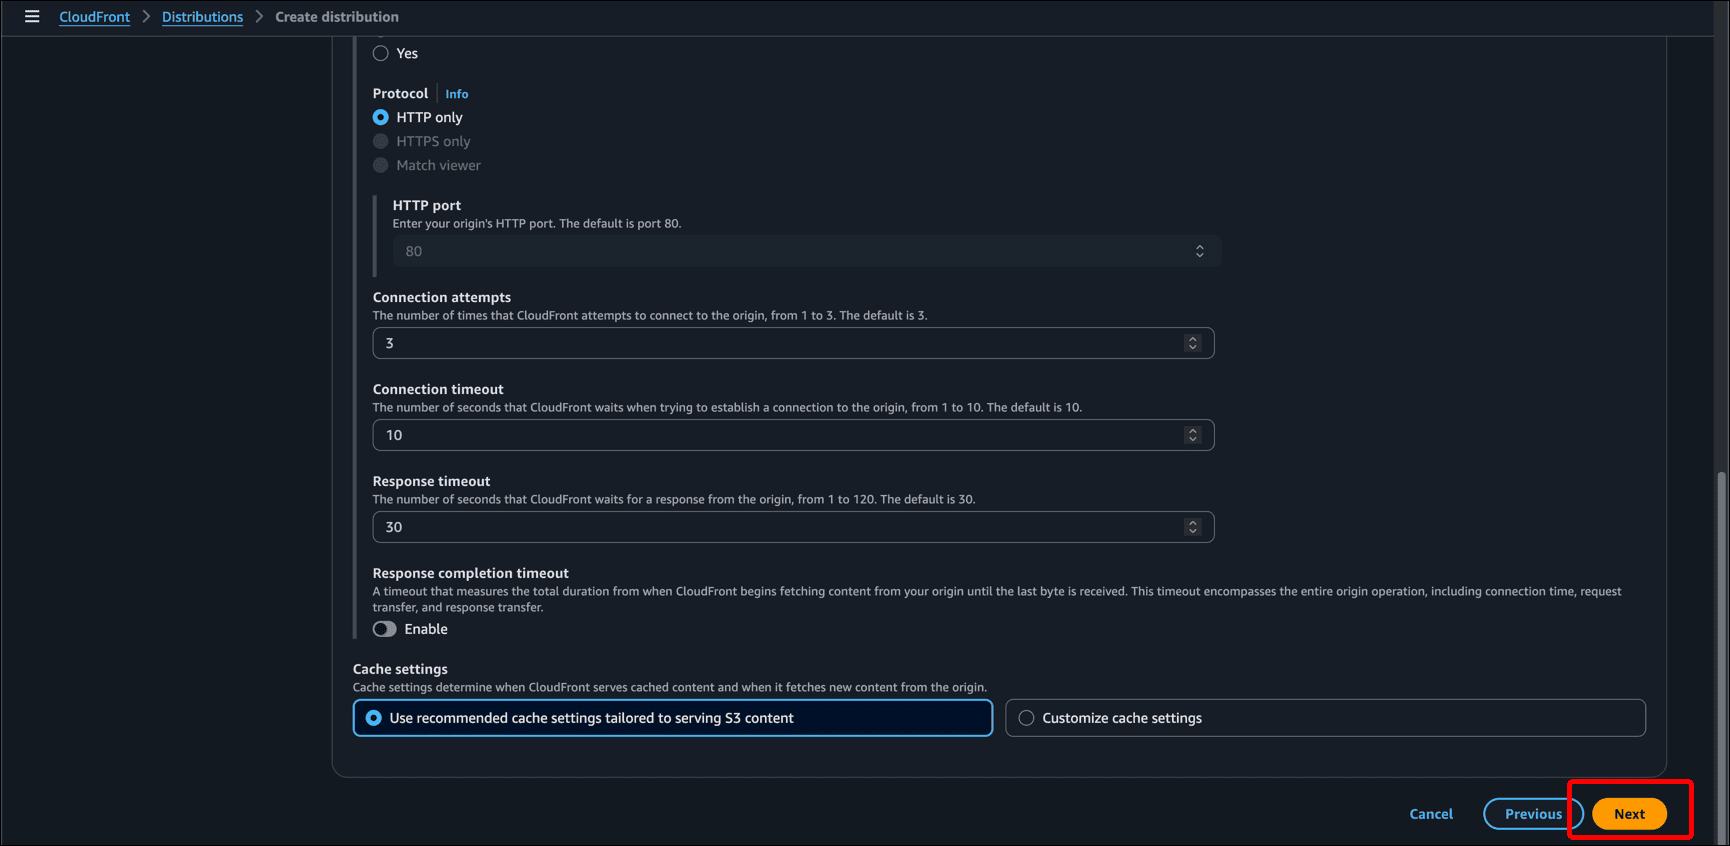
- Scroll to the bottom of the page and click Next.
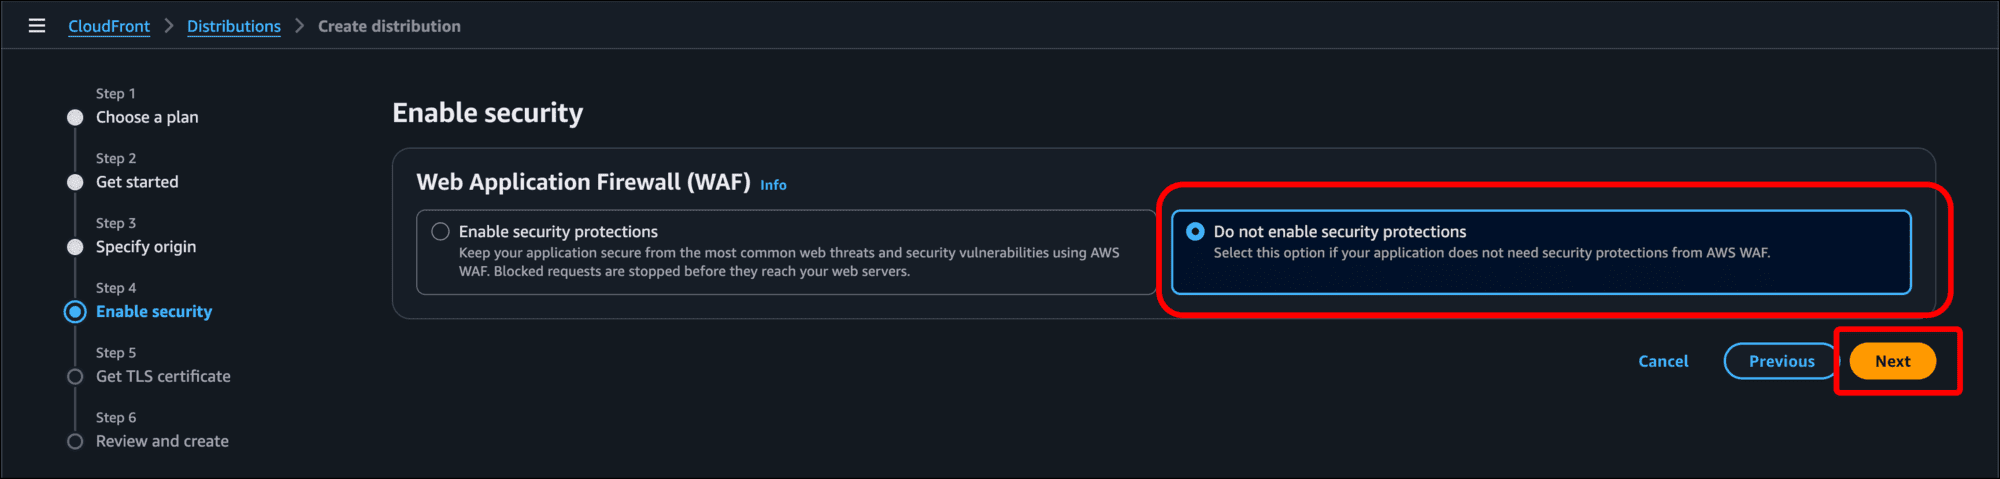
- On the Enable security page, click the Do not enable security protections radio button and then click Next. Since this is a static website, there is not much for a web application firewall to protect.
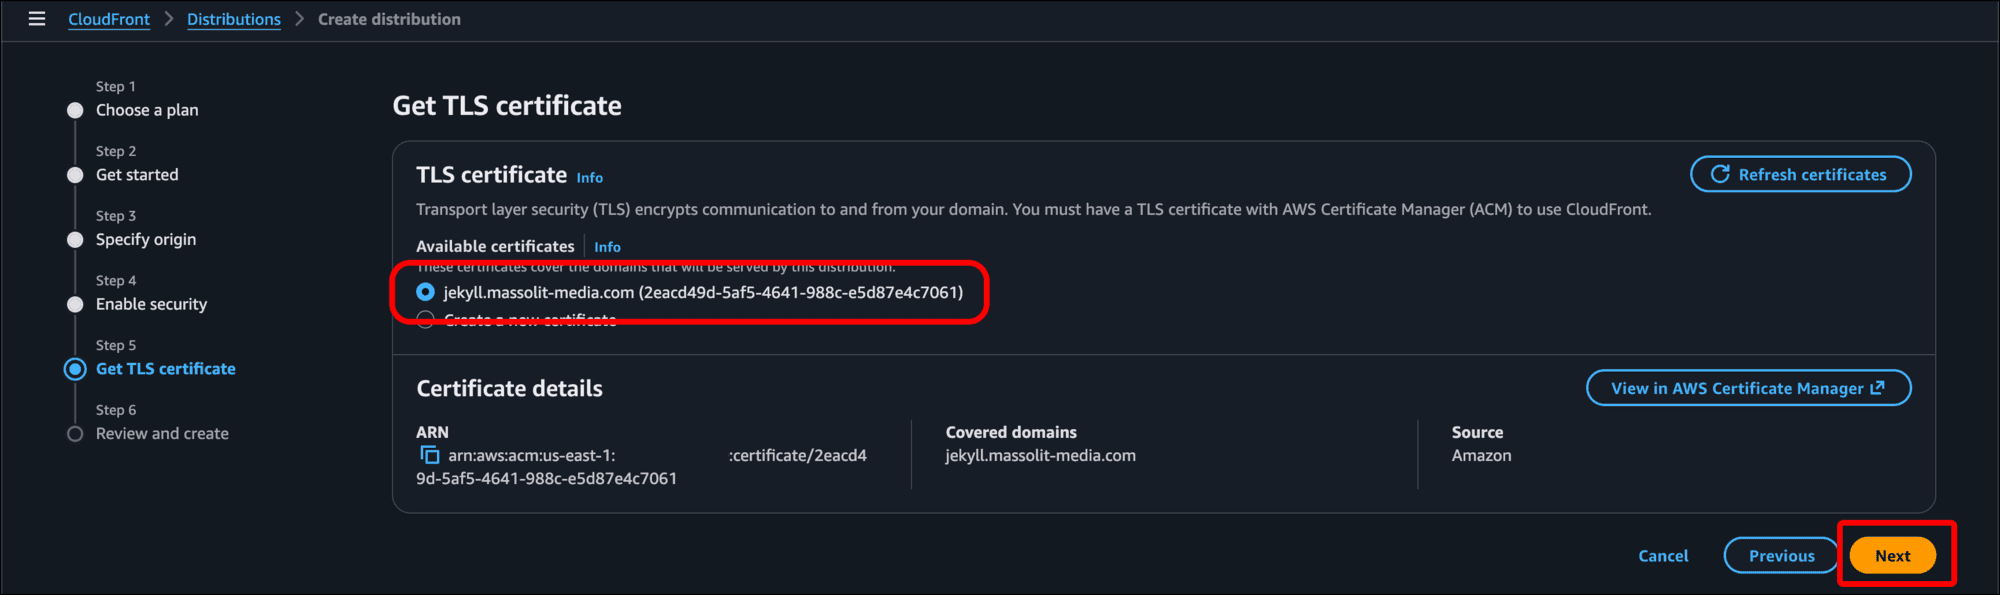
- On the Get TLS certificate page, there should be a radio button for the certificate you just created, and it should be selected by default. Click Next.
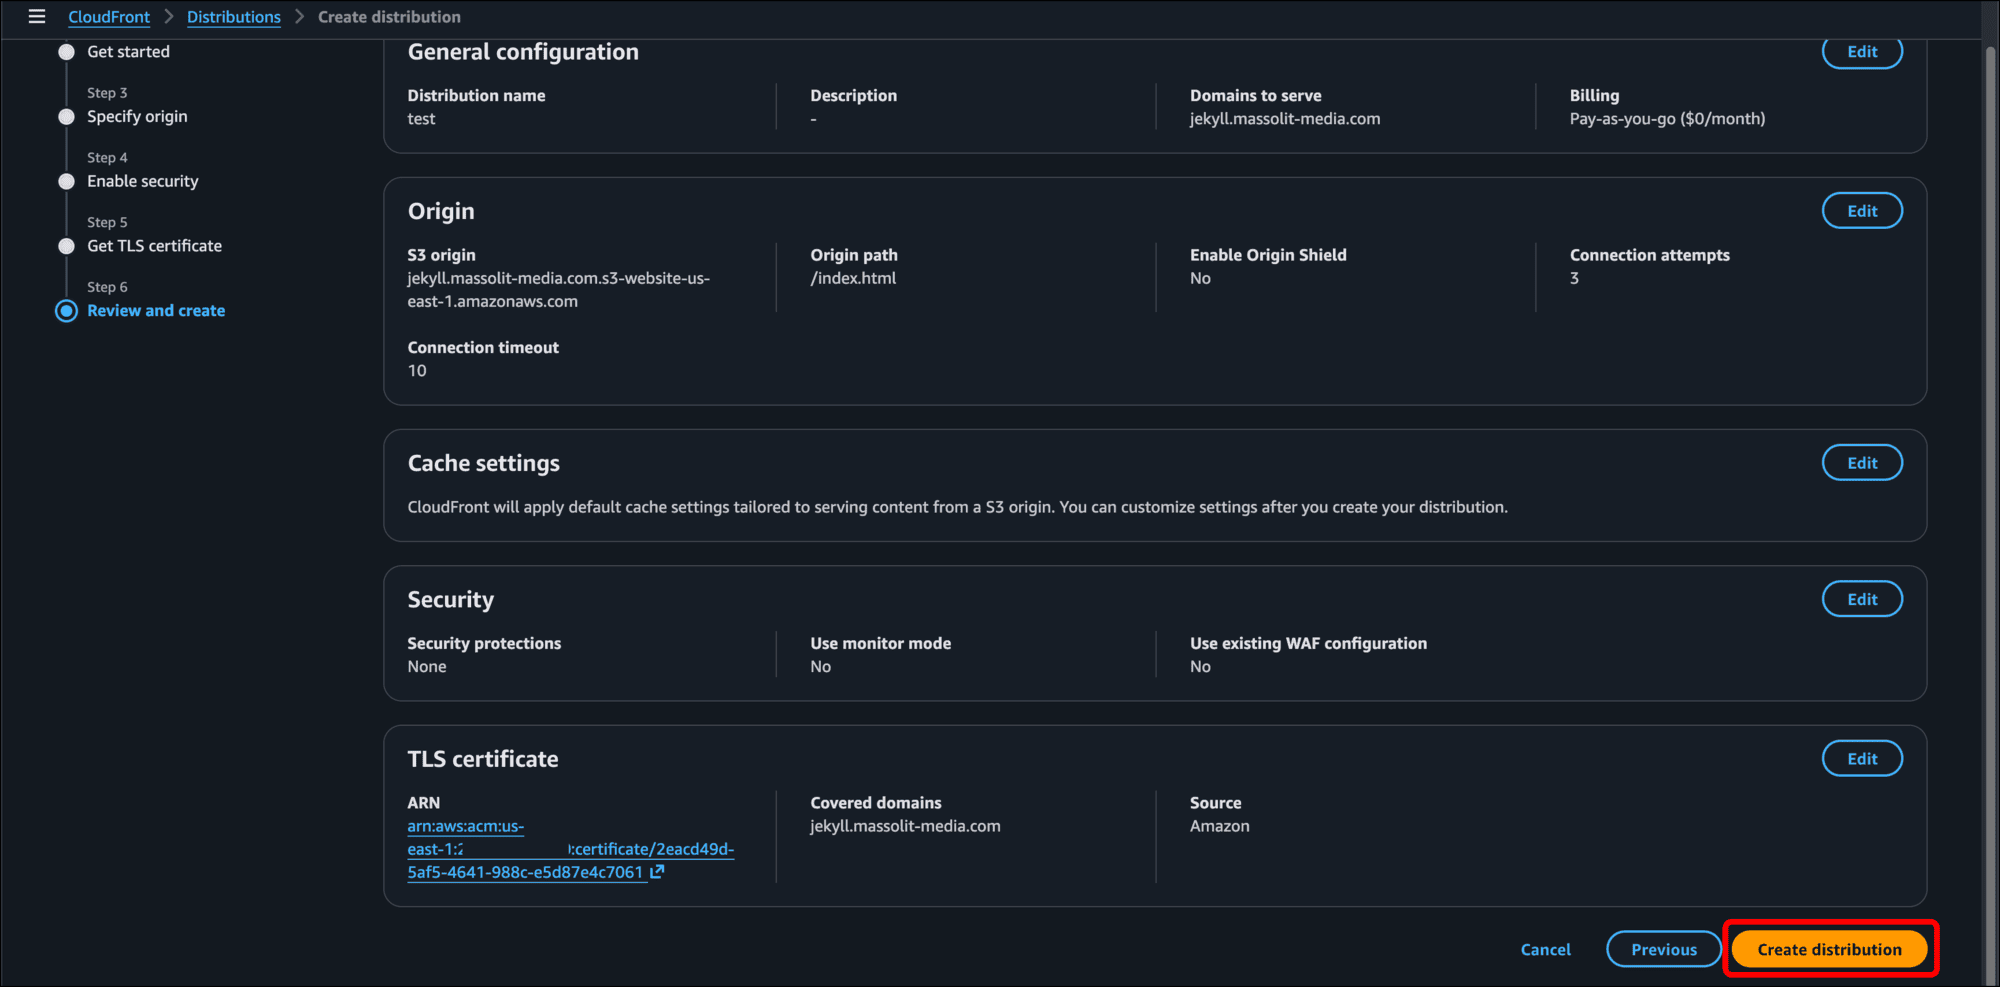
- Scroll to the bottom of the Review and create page and click Create distribution.
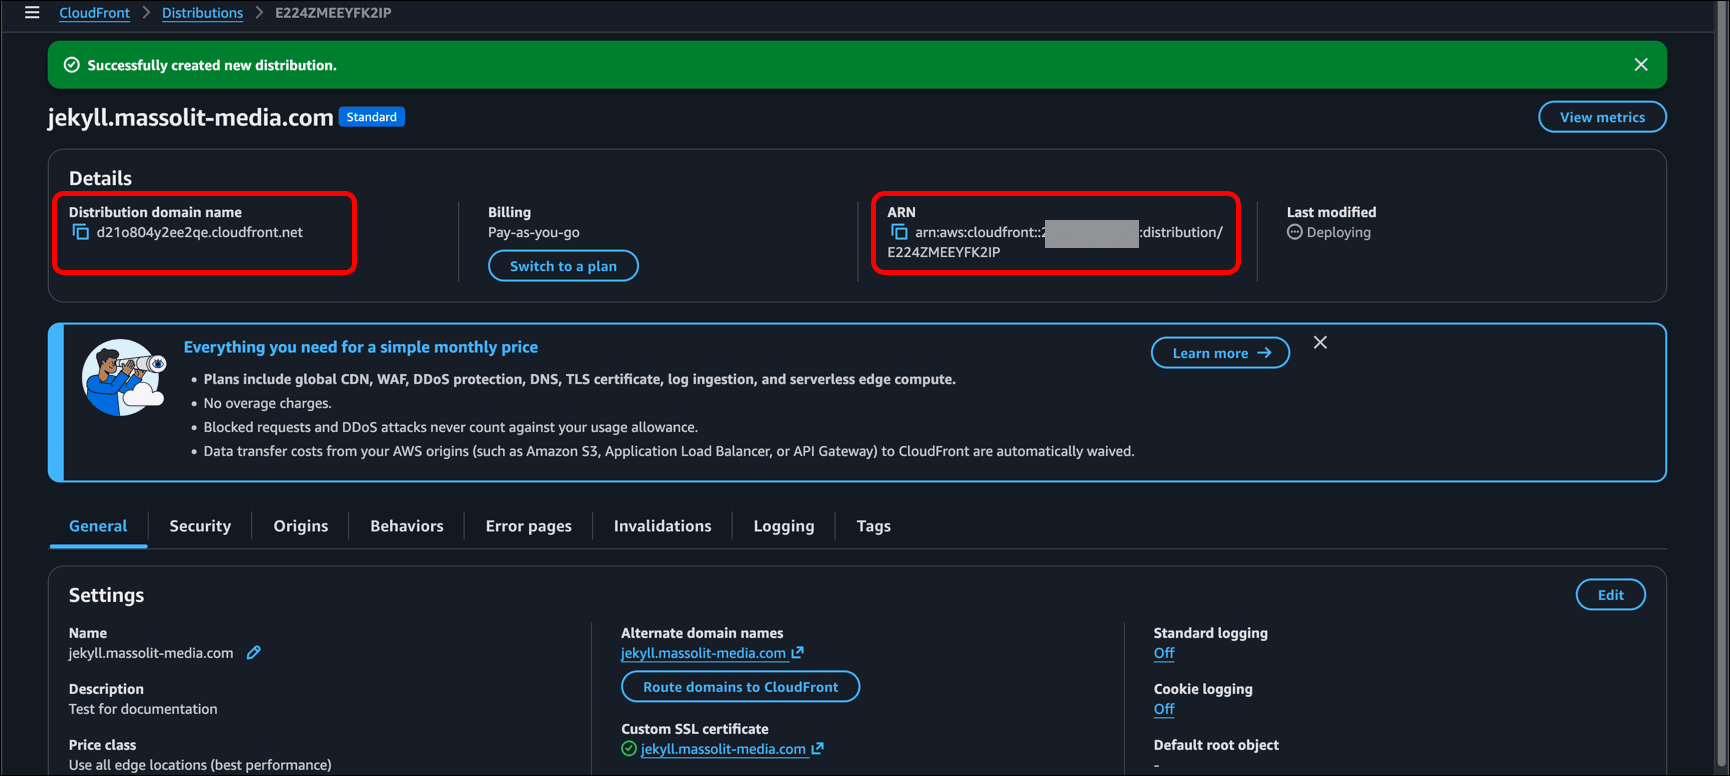
- A green banner displays Successfully created new distribution. You can also see the Distribution domain name and the ARN.
Add Route 53 DNS A Record for the CloudFront Distribution
Now you need to return to the Route 53 page and pick the hosted zone you are using to add a DNS “A record” associated with the CloudFront distribution.
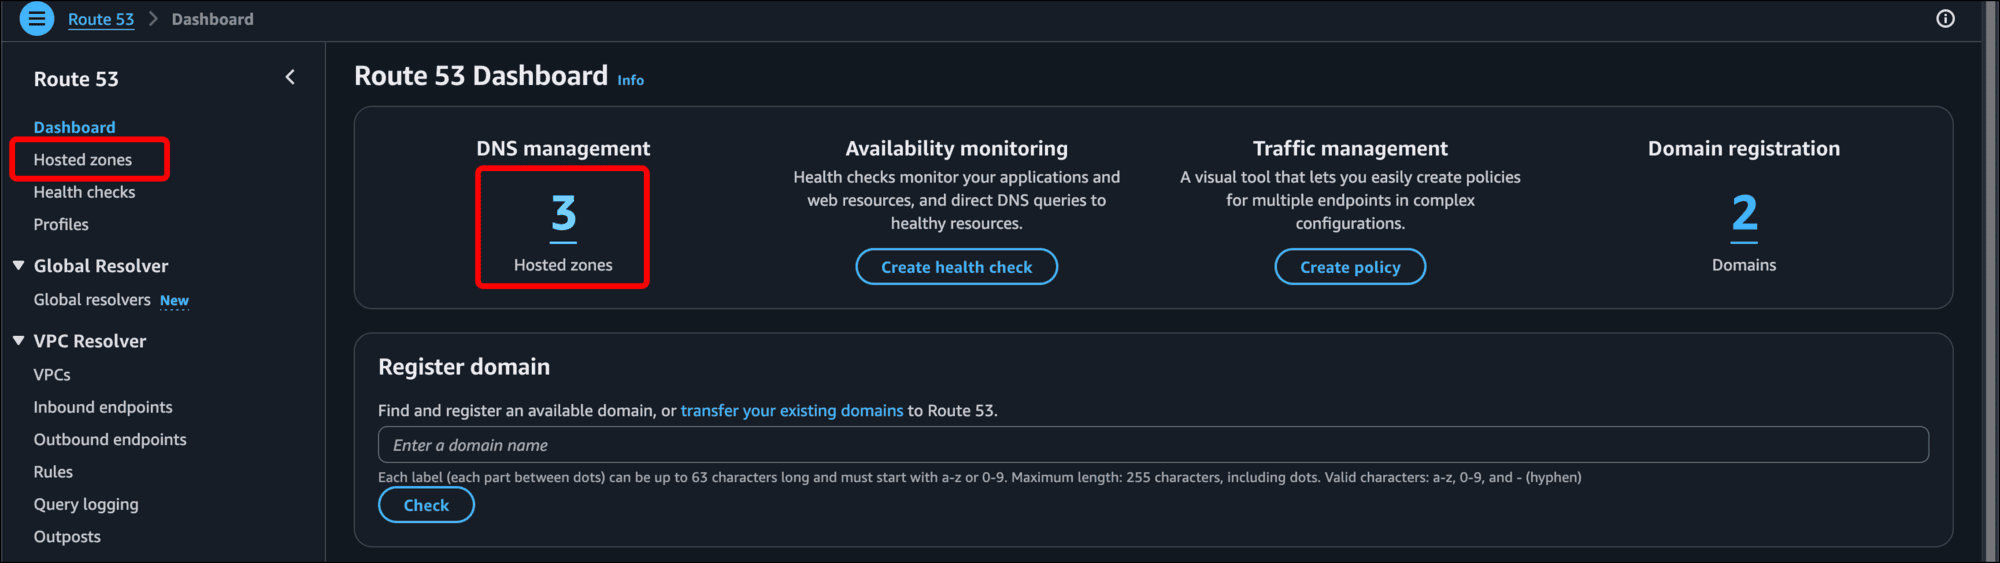
- Type route into the search bar and select Route 53.

- In the left sidebar or under Route 53 Dashboard > DNS management, click Hosted zones.
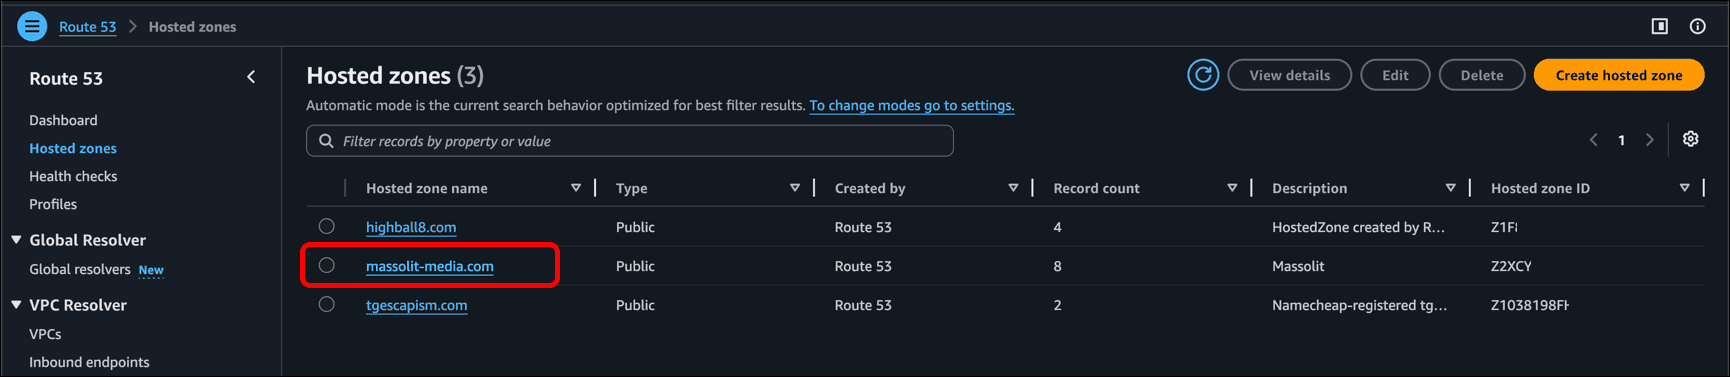
- Click the link for the hosted zone (domain name) you are using. In my case, that is the preconfigured hosted zone for massolit-media.com.
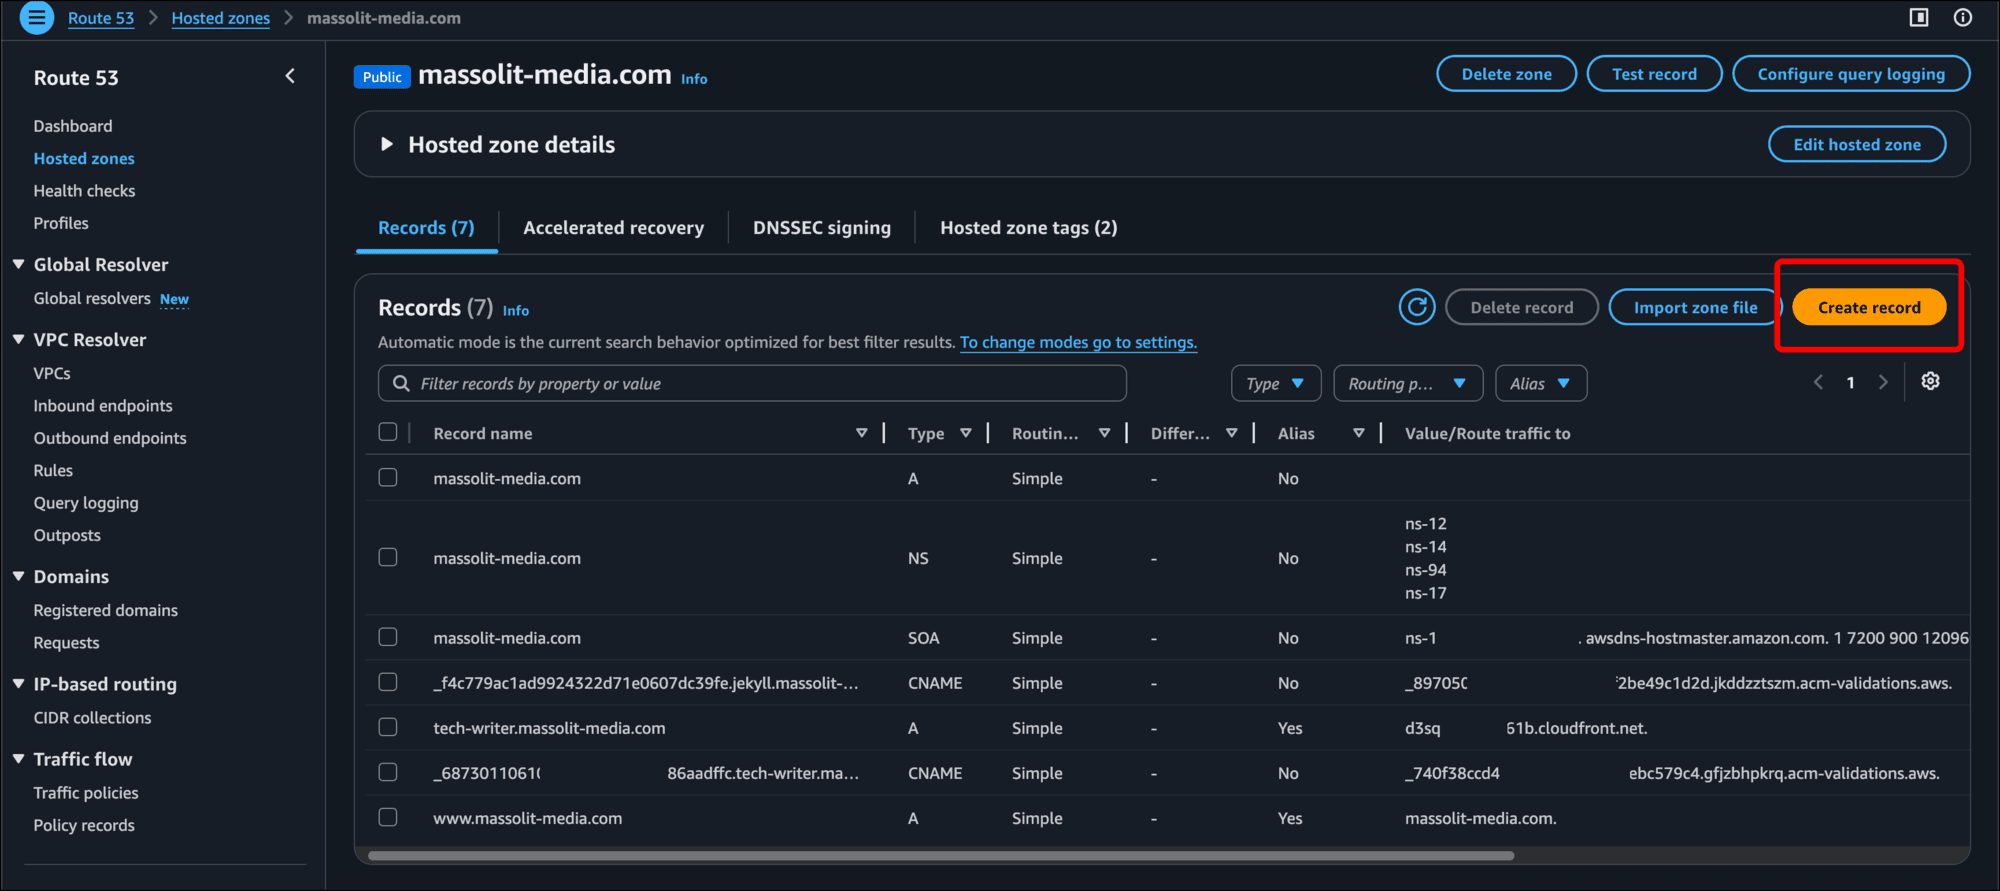
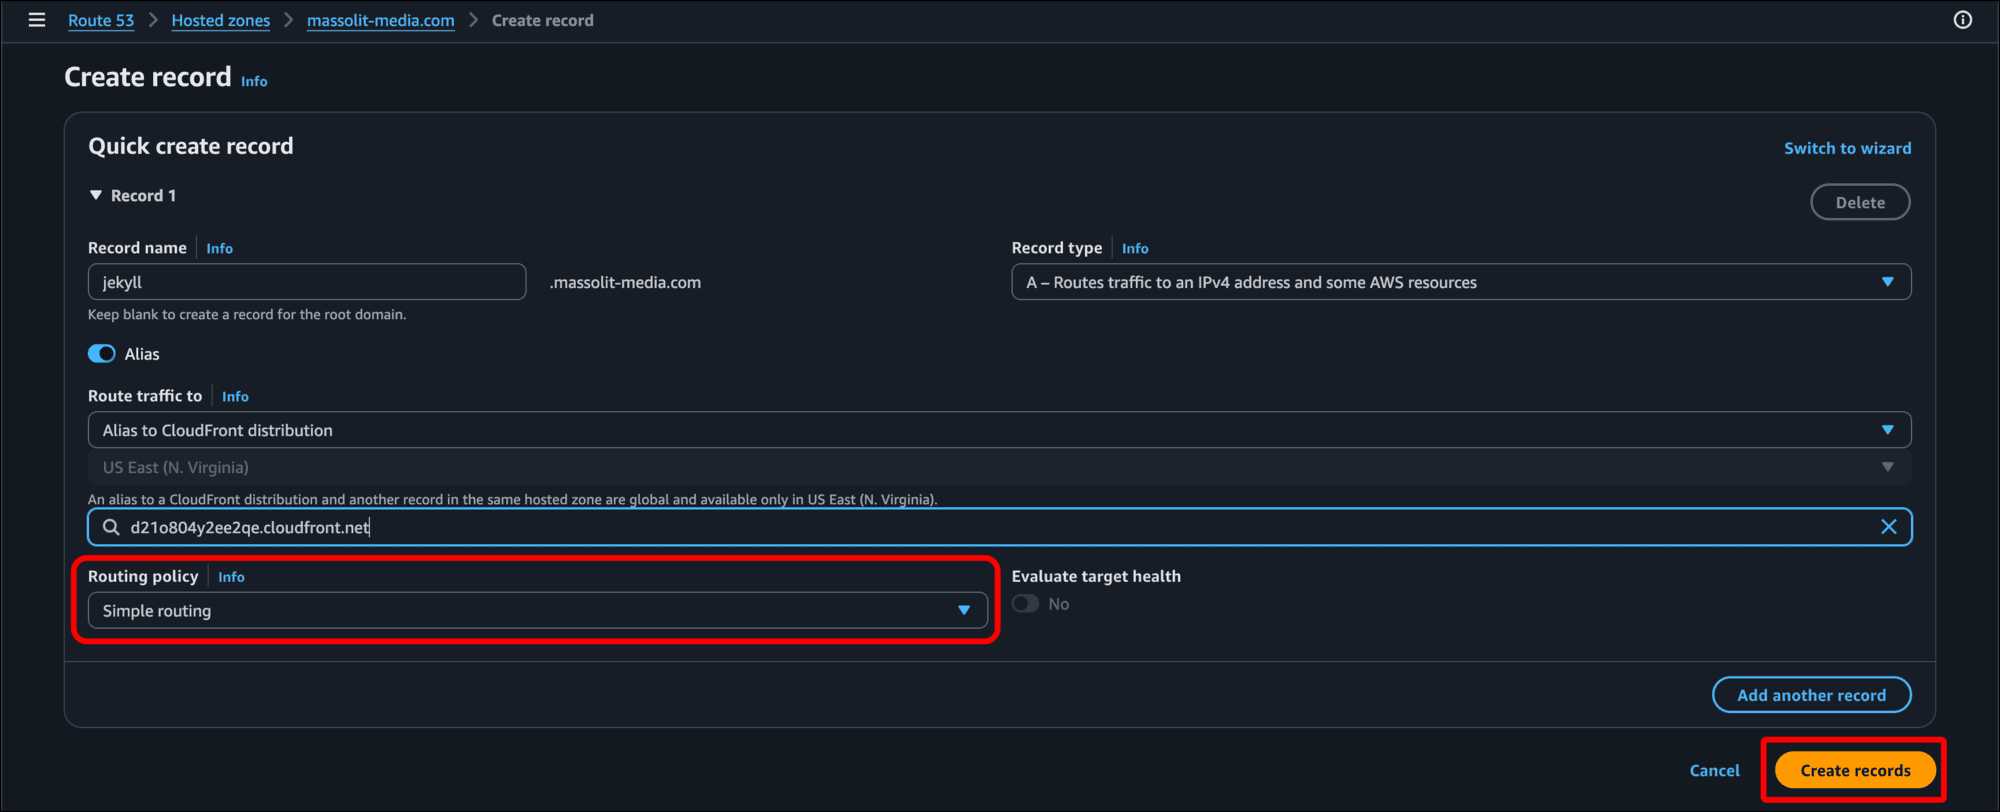
- You need to create a DNS A record that points to the CloudFront distribution. Click Create record.
- I am using a subdomain. On the Create record page, I enter jekyll in the Record name field. (If I were using a root domain I would leave this field empty.)
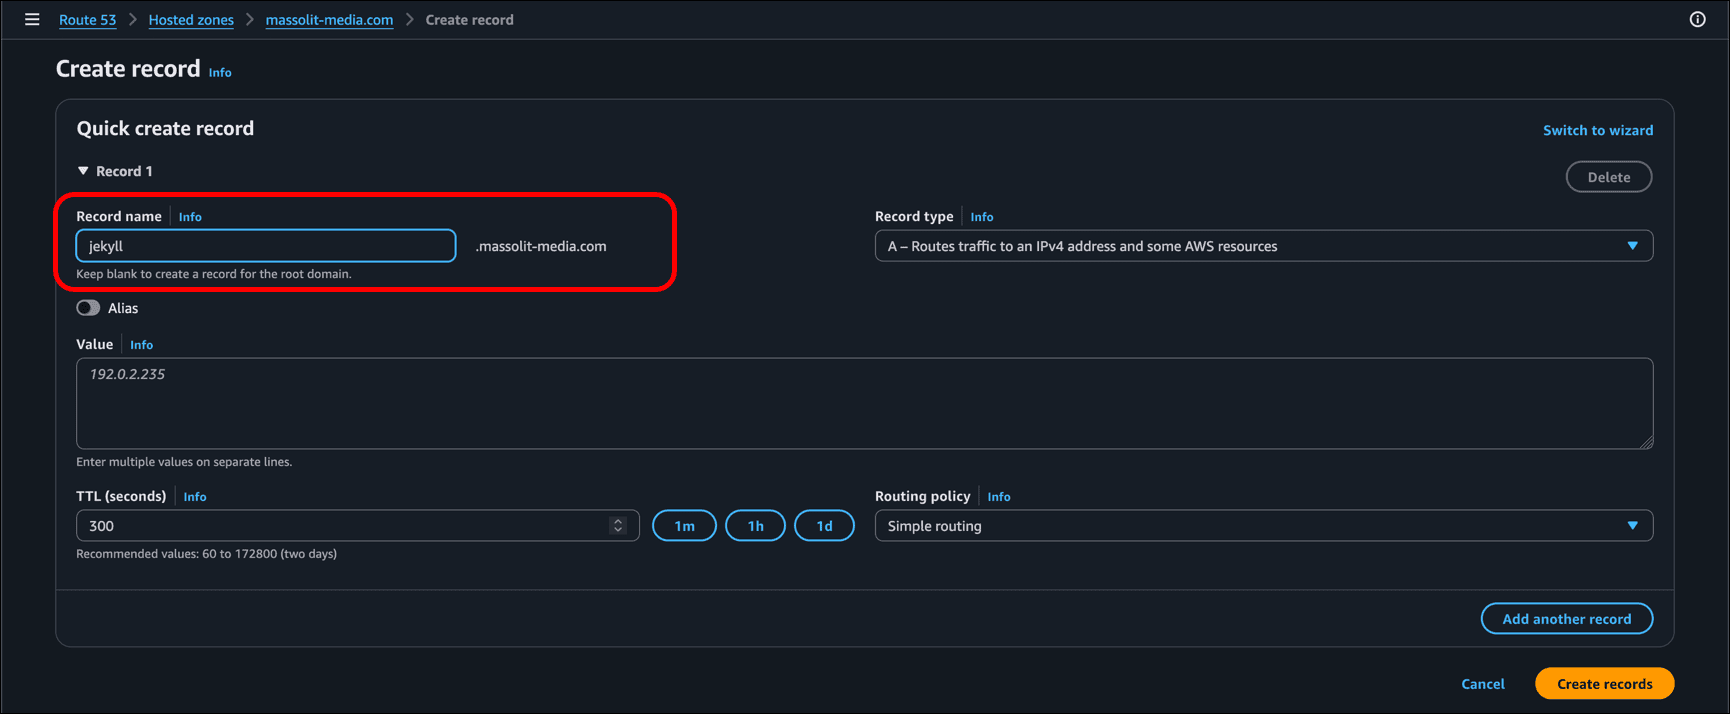
- Leave Record type as A – Routes traffic to an IPv4 address and some AWS resources.
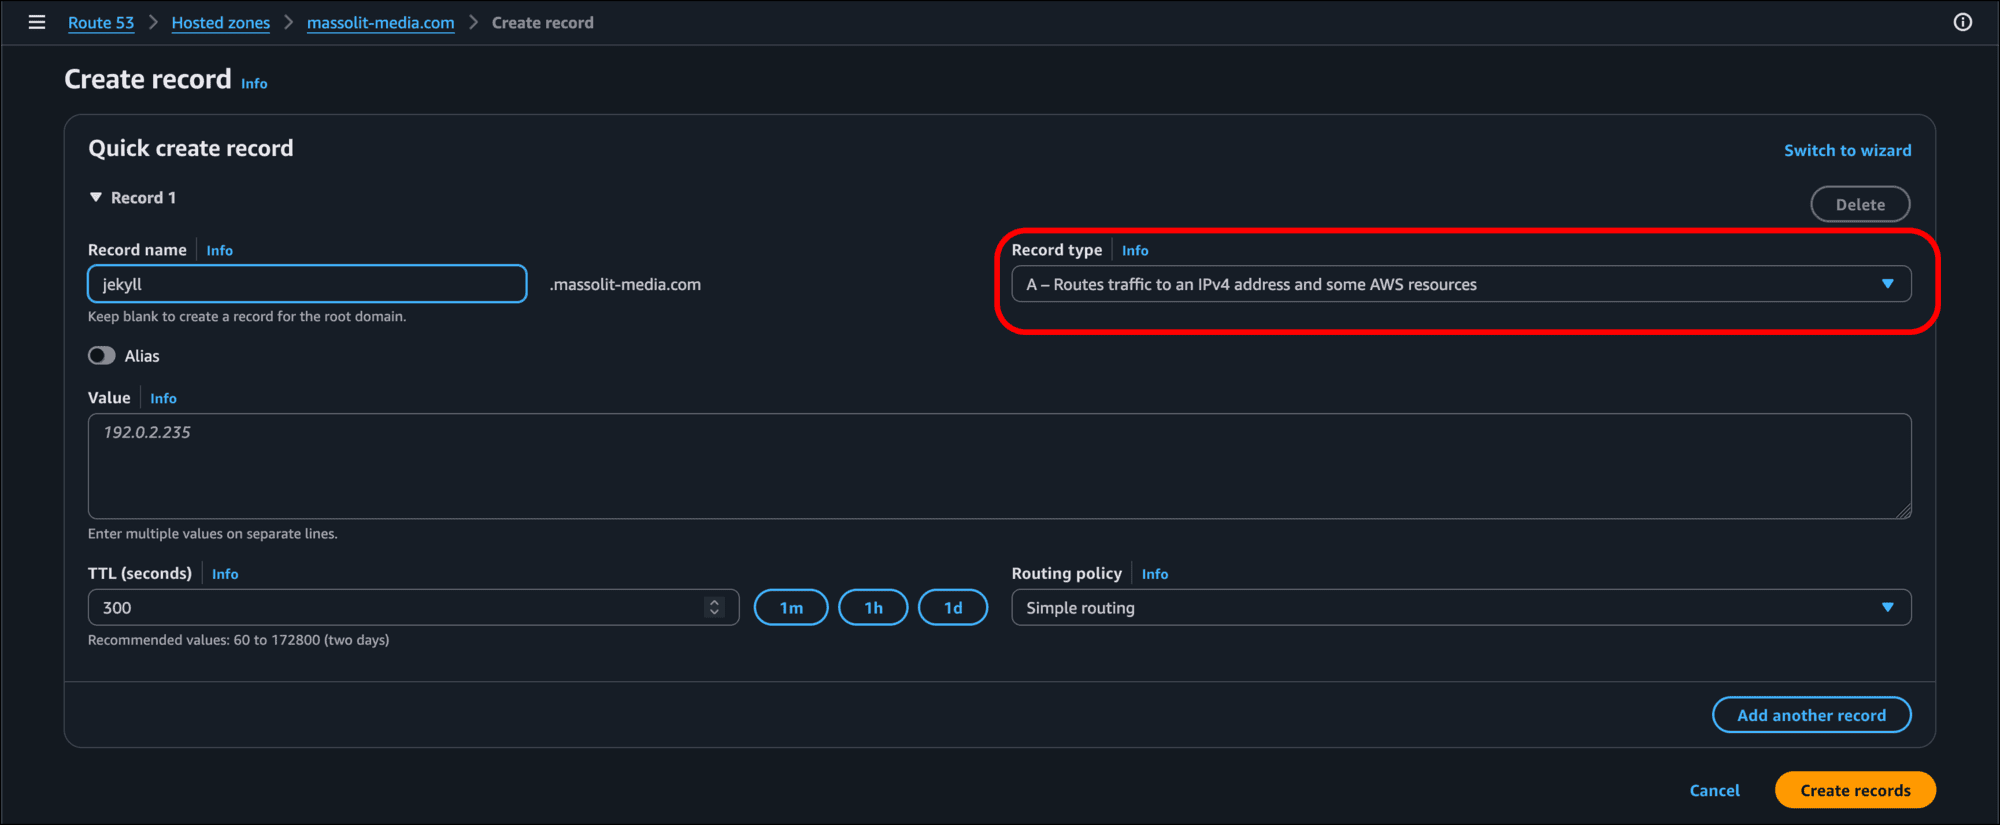
- Click the Alias switch to turn it on.
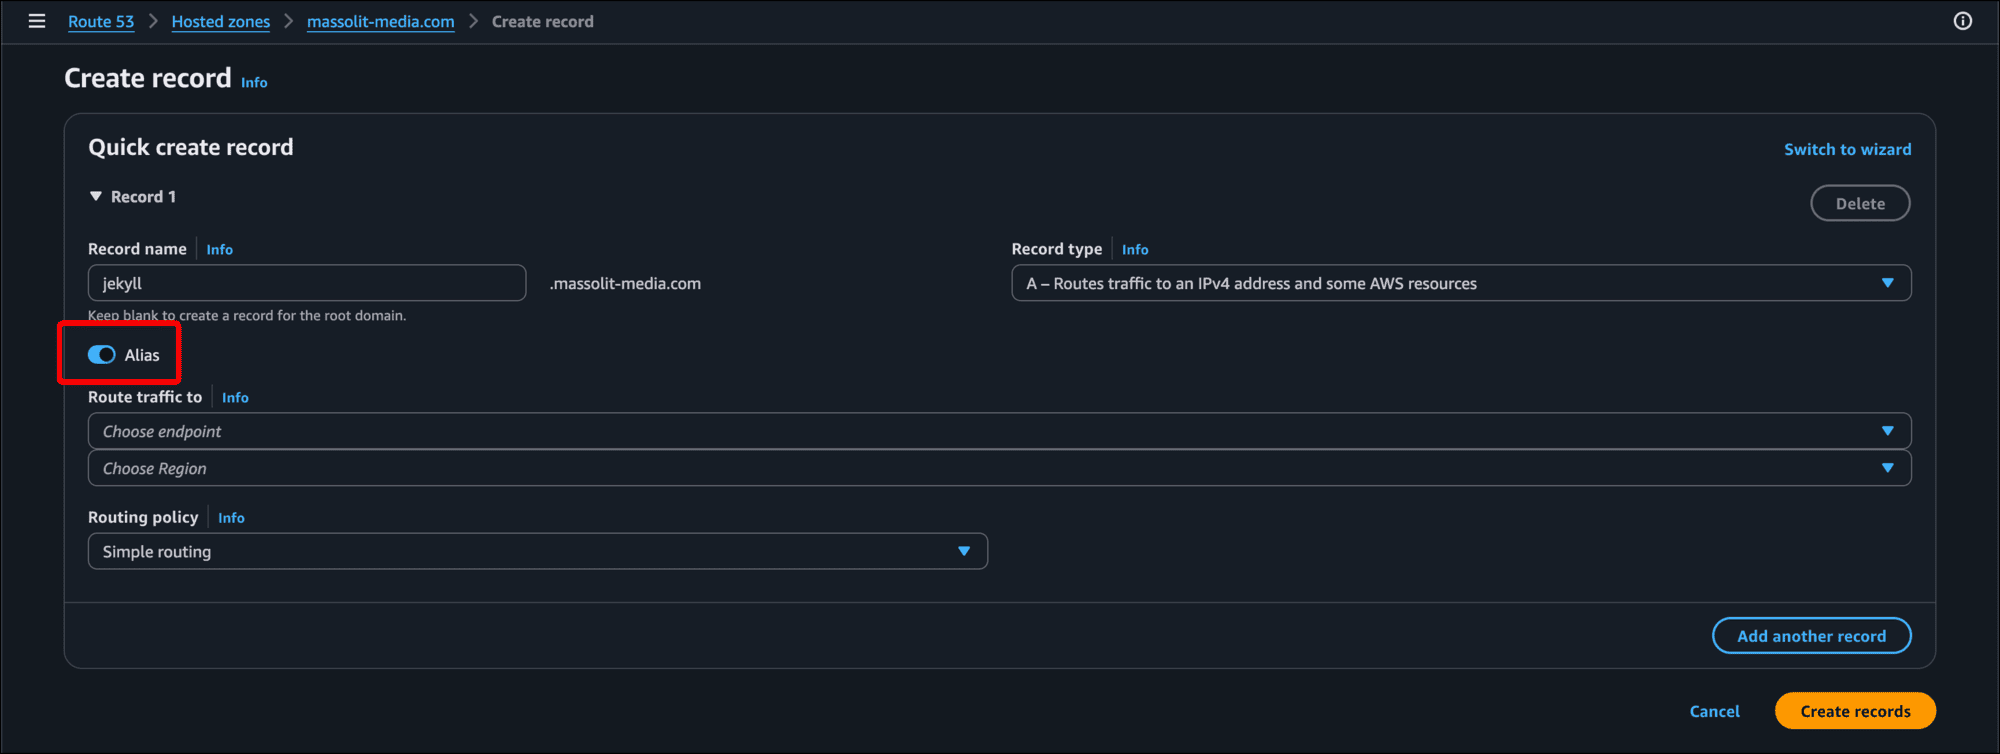
- In the Route traffic to field, click the drop-down and select Alias to CloudFront distribution.
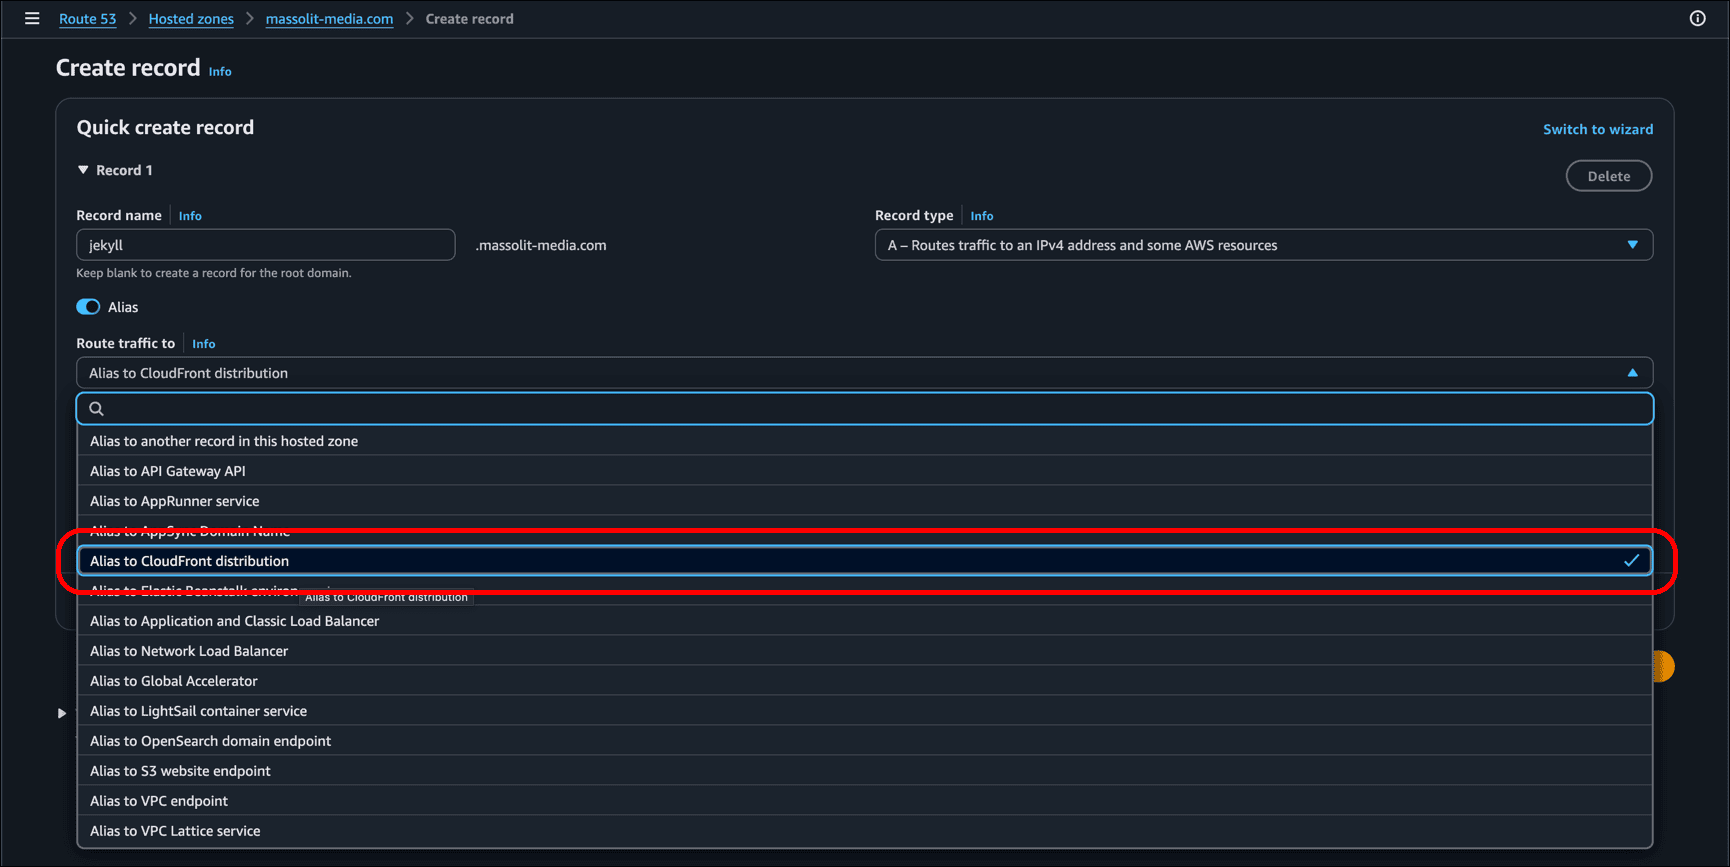
- When you click the Choose distribution field, it should suggest the distribution you just created.
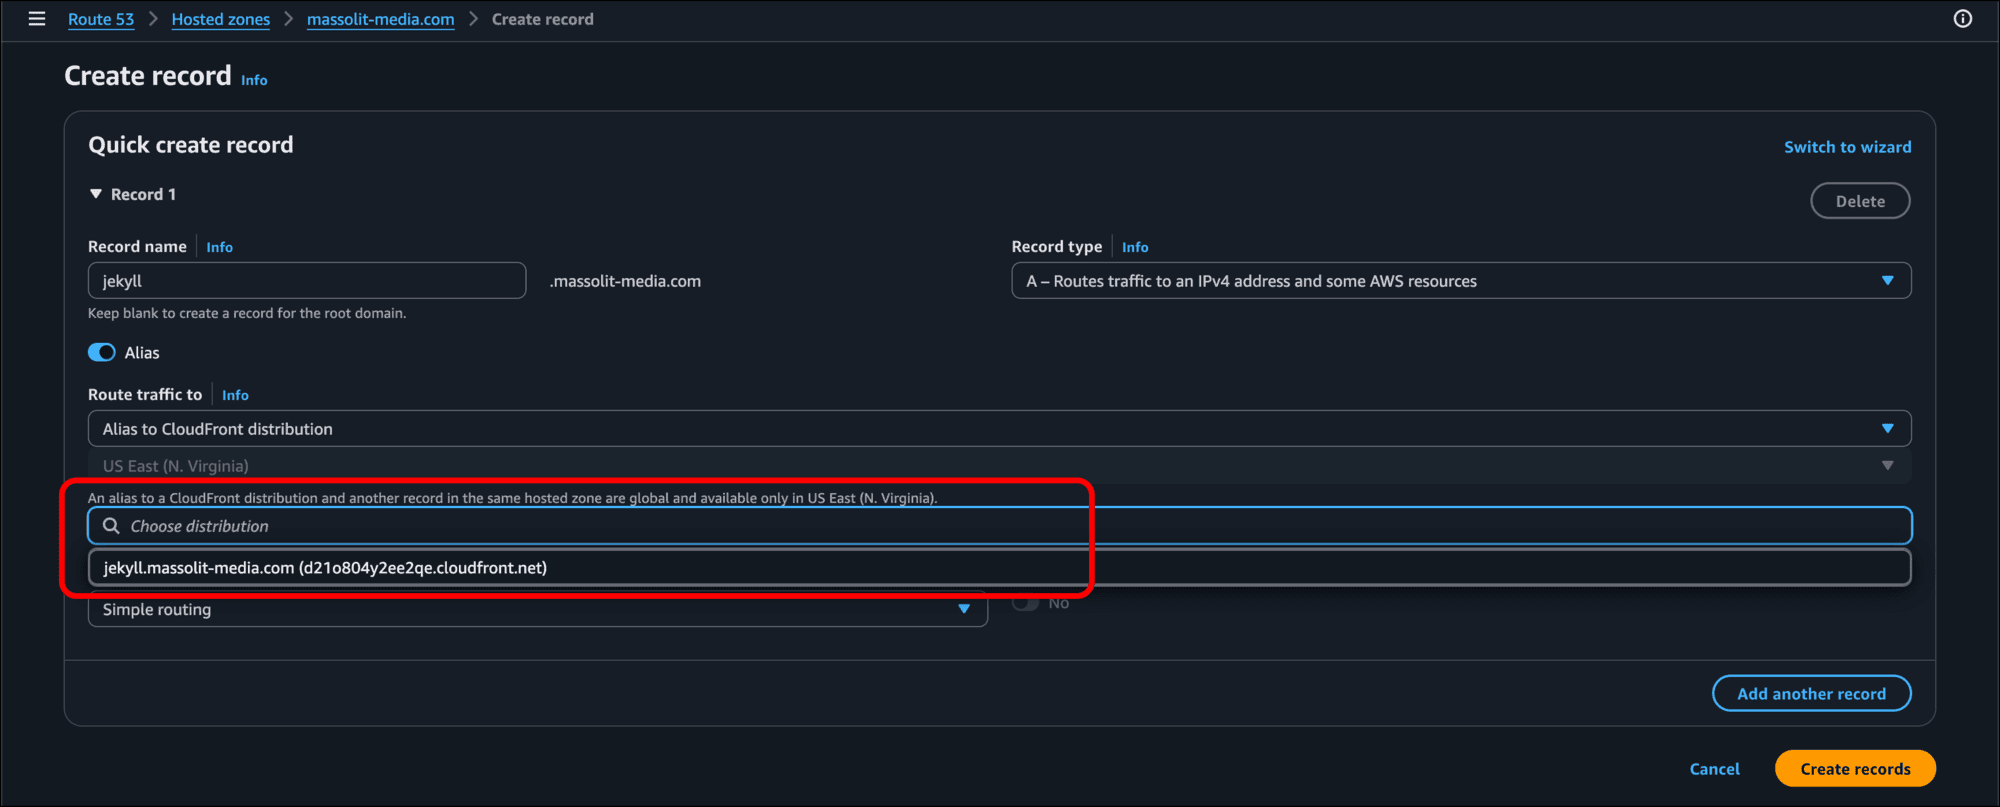
- When you click that distribution, the value that displays in the alias field matches the Distribution domain name of the distribution you created.
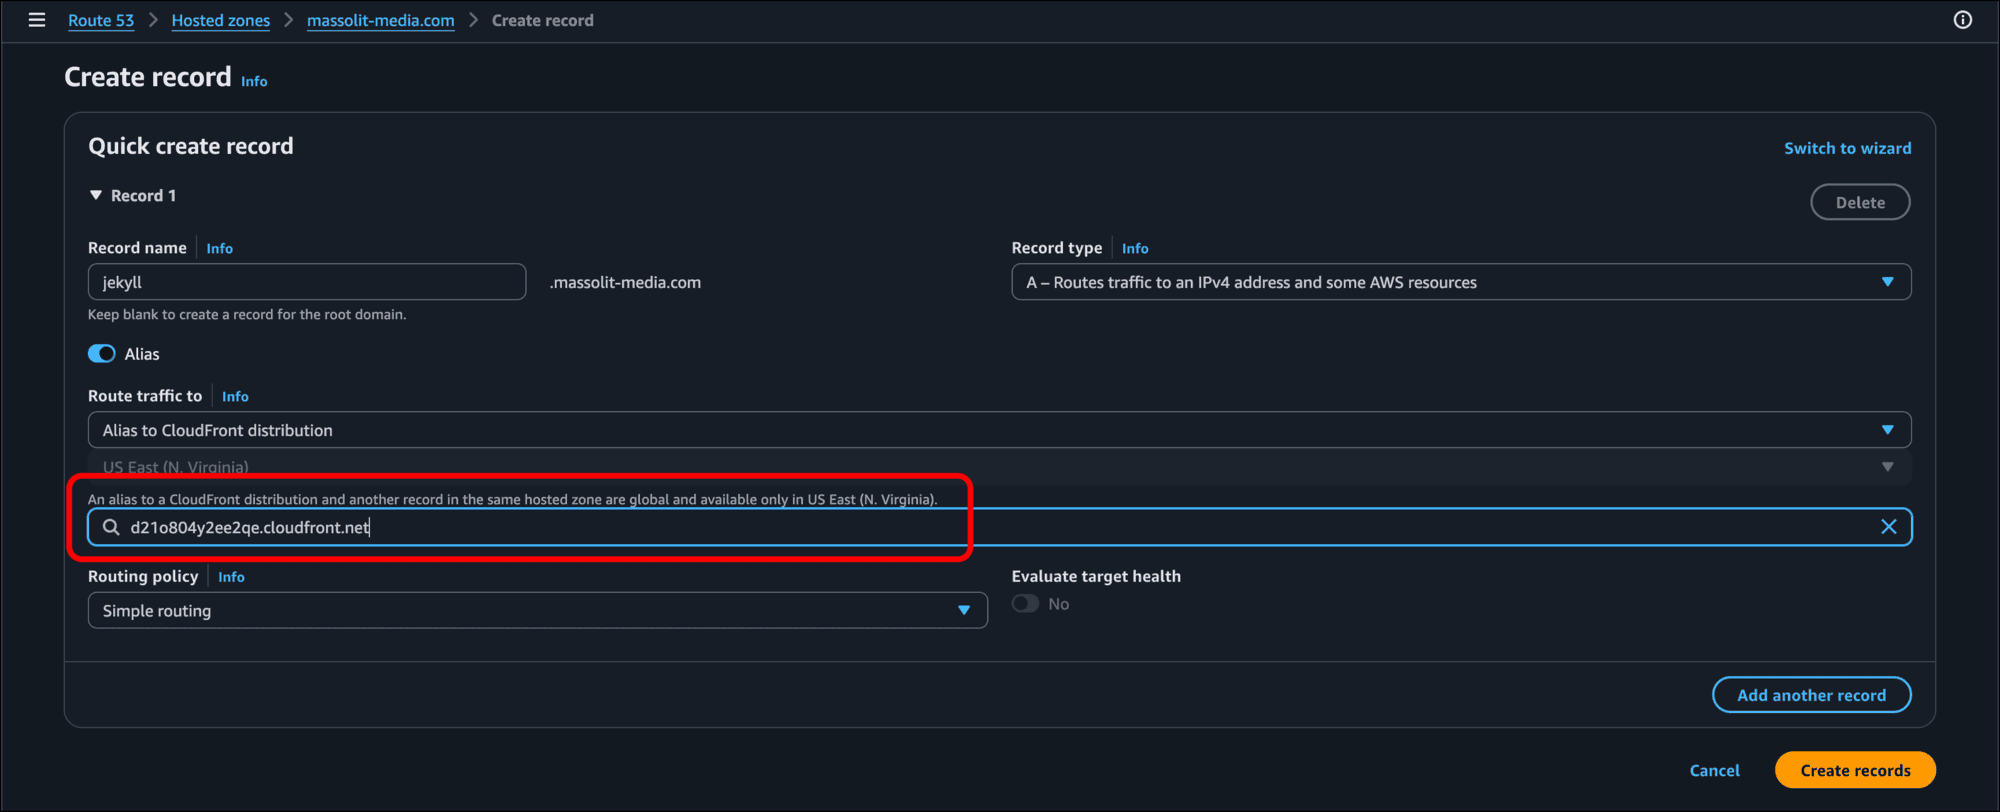
- Leave Routing policy as Simple routing and click Create records.
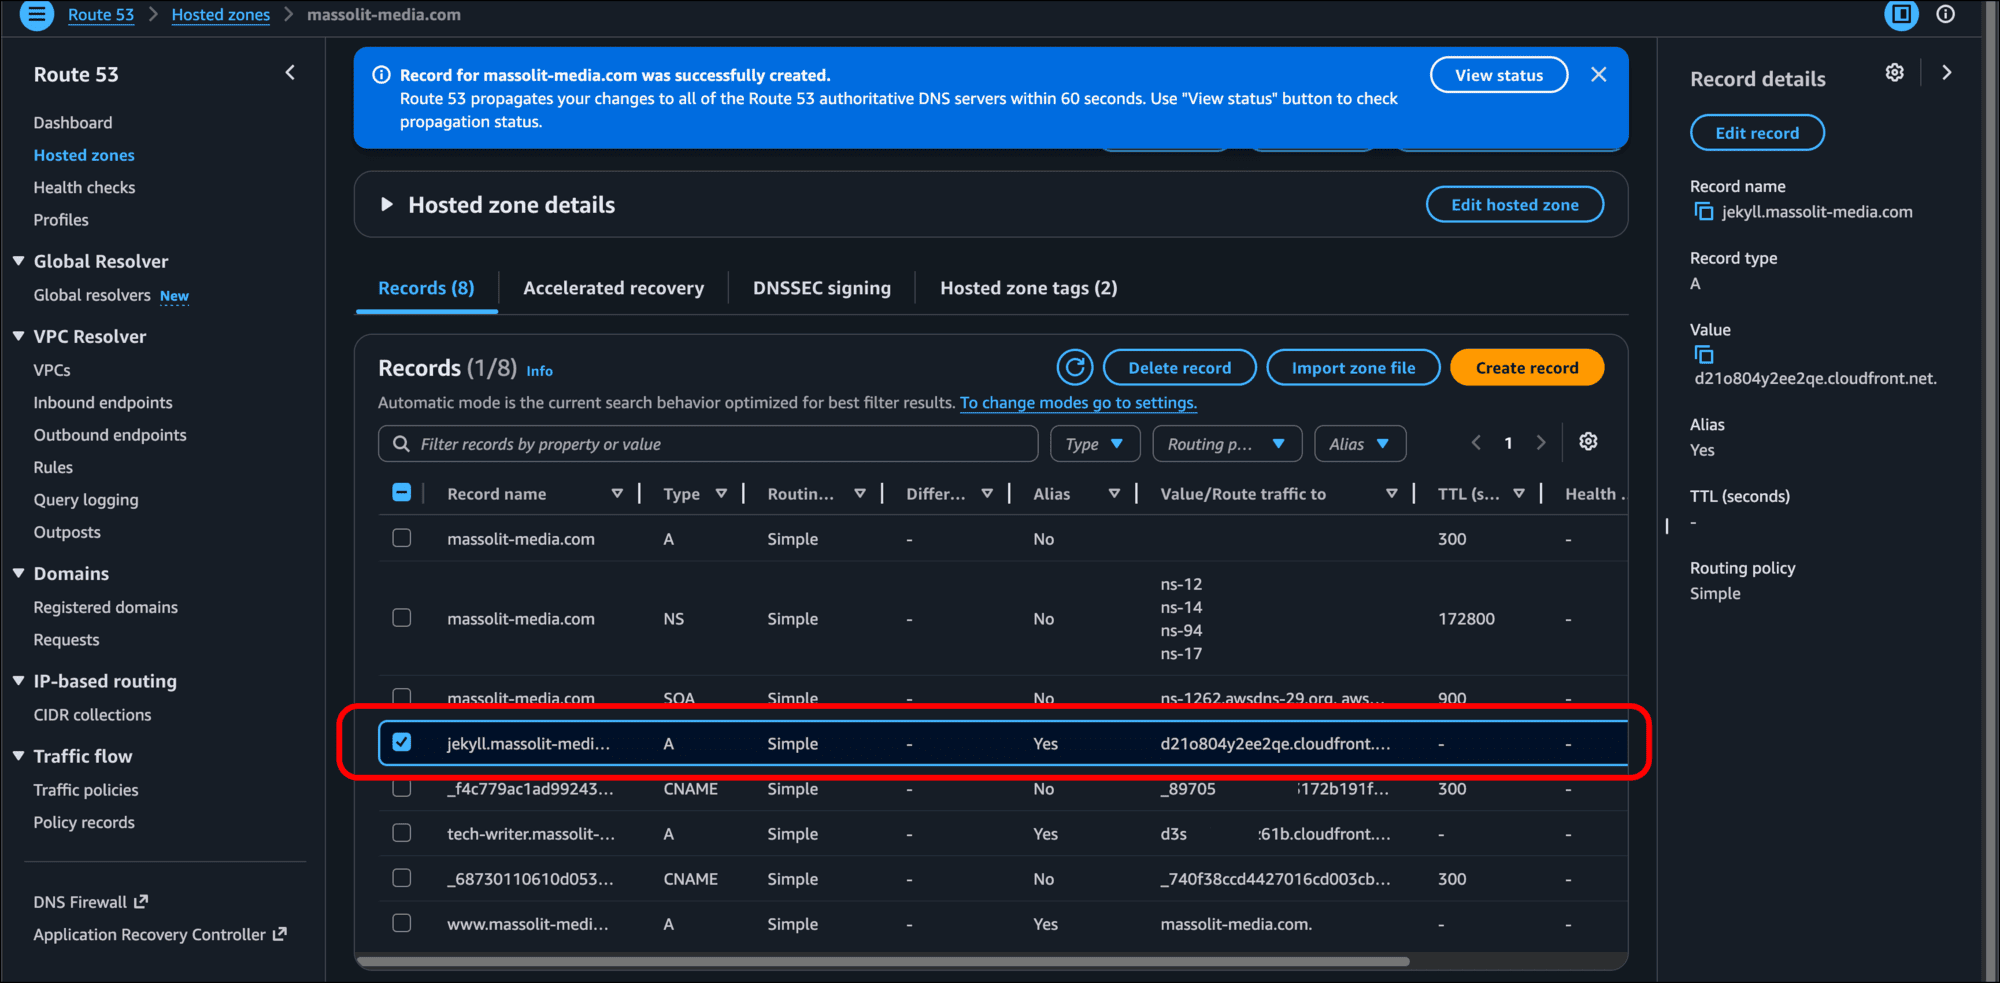
- The new A record should display in your hosted zone.
Create AWS CodeBuild Project to Build and Publish Your Jekyll Site
Now you need to create a CodeBuild project to tie everything together. This CodeBuild project will take your GitHub repo, use it to build the Jekyll site, and push it to your S3 bucket and CloudFront distribution, where users can visit the site because of the Route 53 domain name and TLS certificate you created.
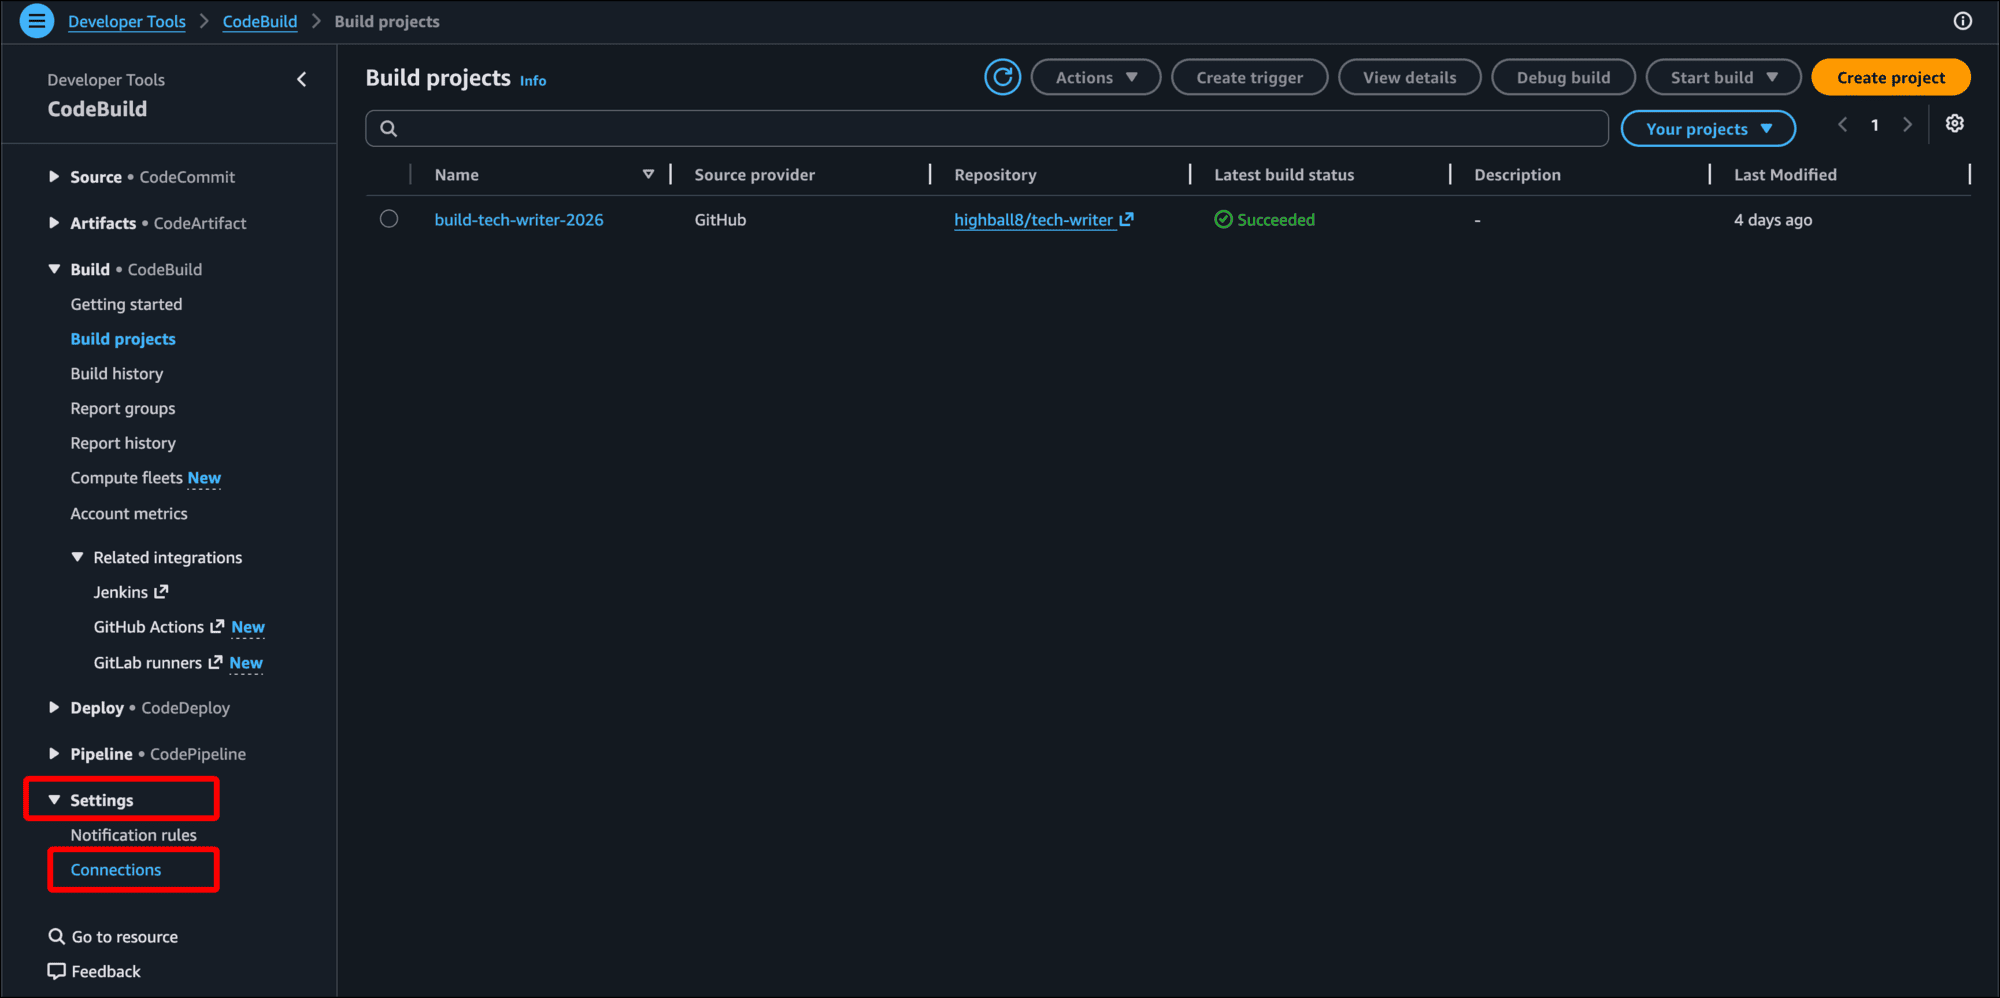
- Type codebuild into the search bar and select CodeBuild from the results.

- The first thing you need to do is to create a “connection” between AWS and your GitHub account and its repositories. In the left sidebar, expand Settings and click Connections.
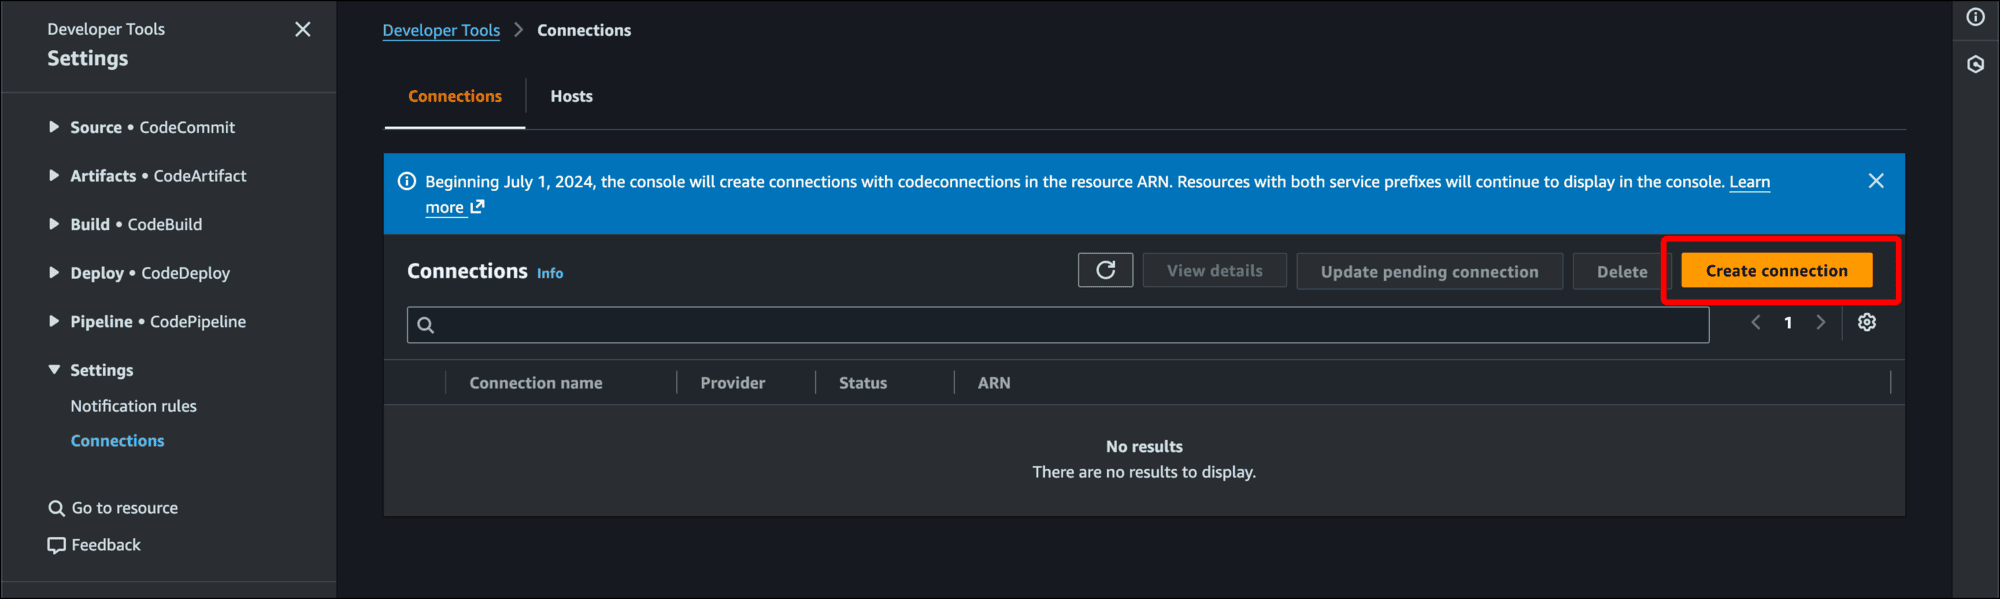
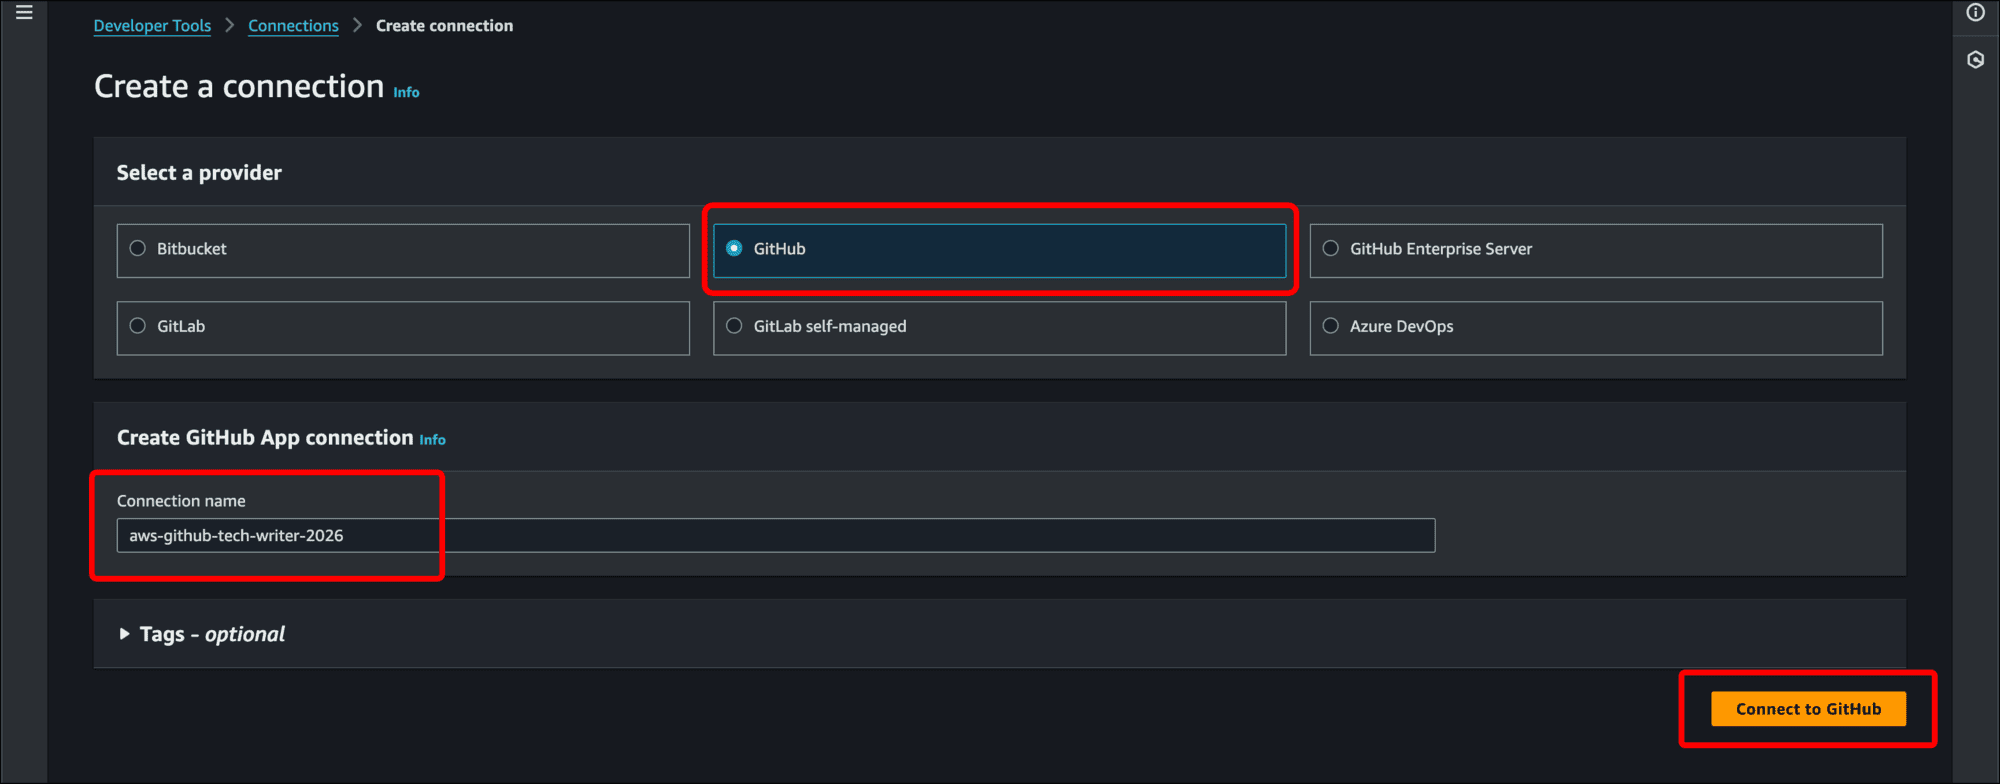
- Click Create connection.
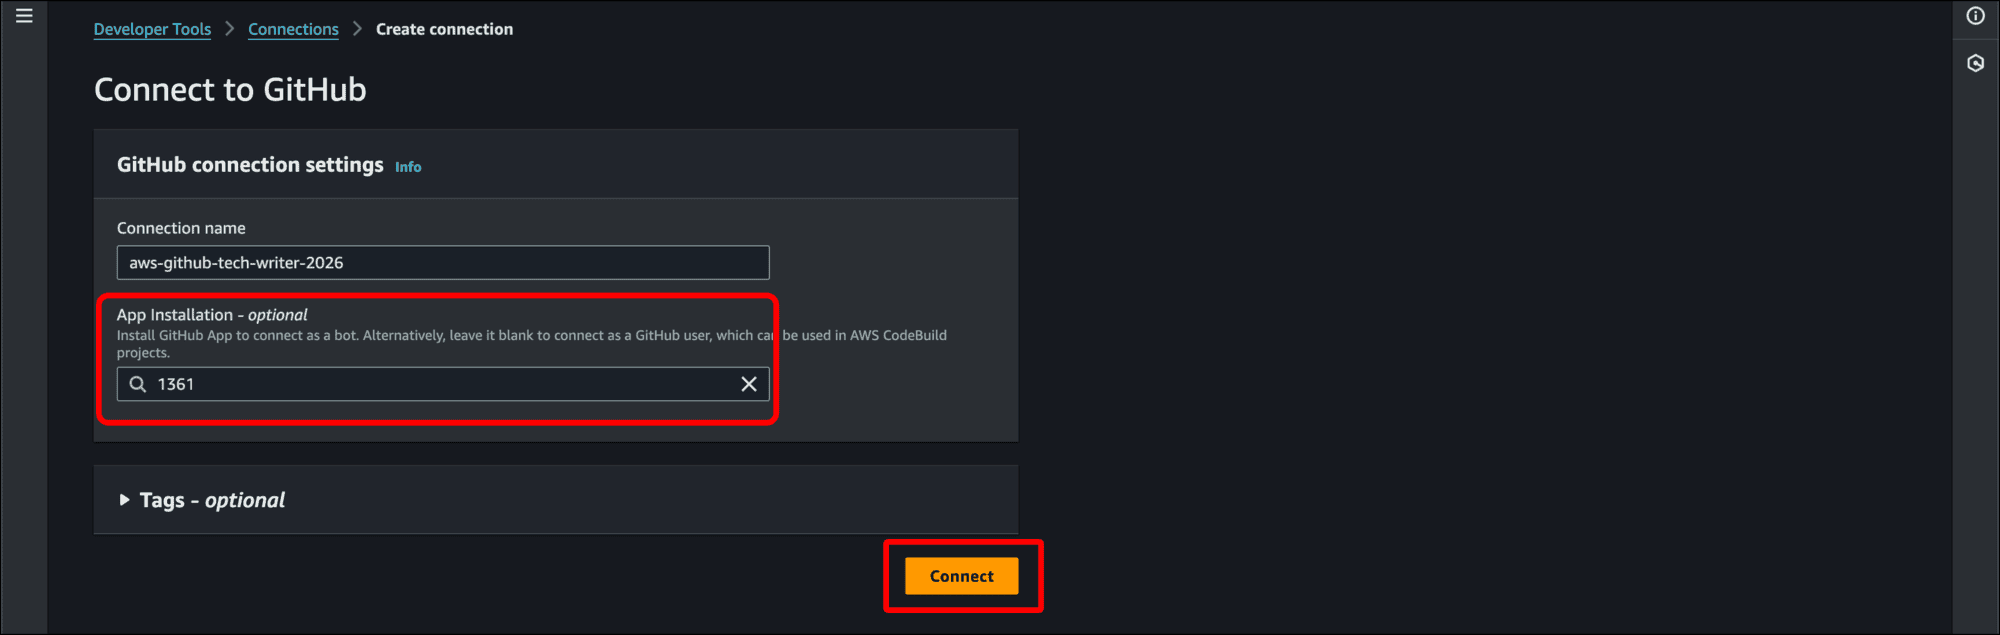
- On the Create a connection page, click the GitHub radio button under Select a provider and enter a Connection name that makes sense to you. Then click Connect to GitHub.
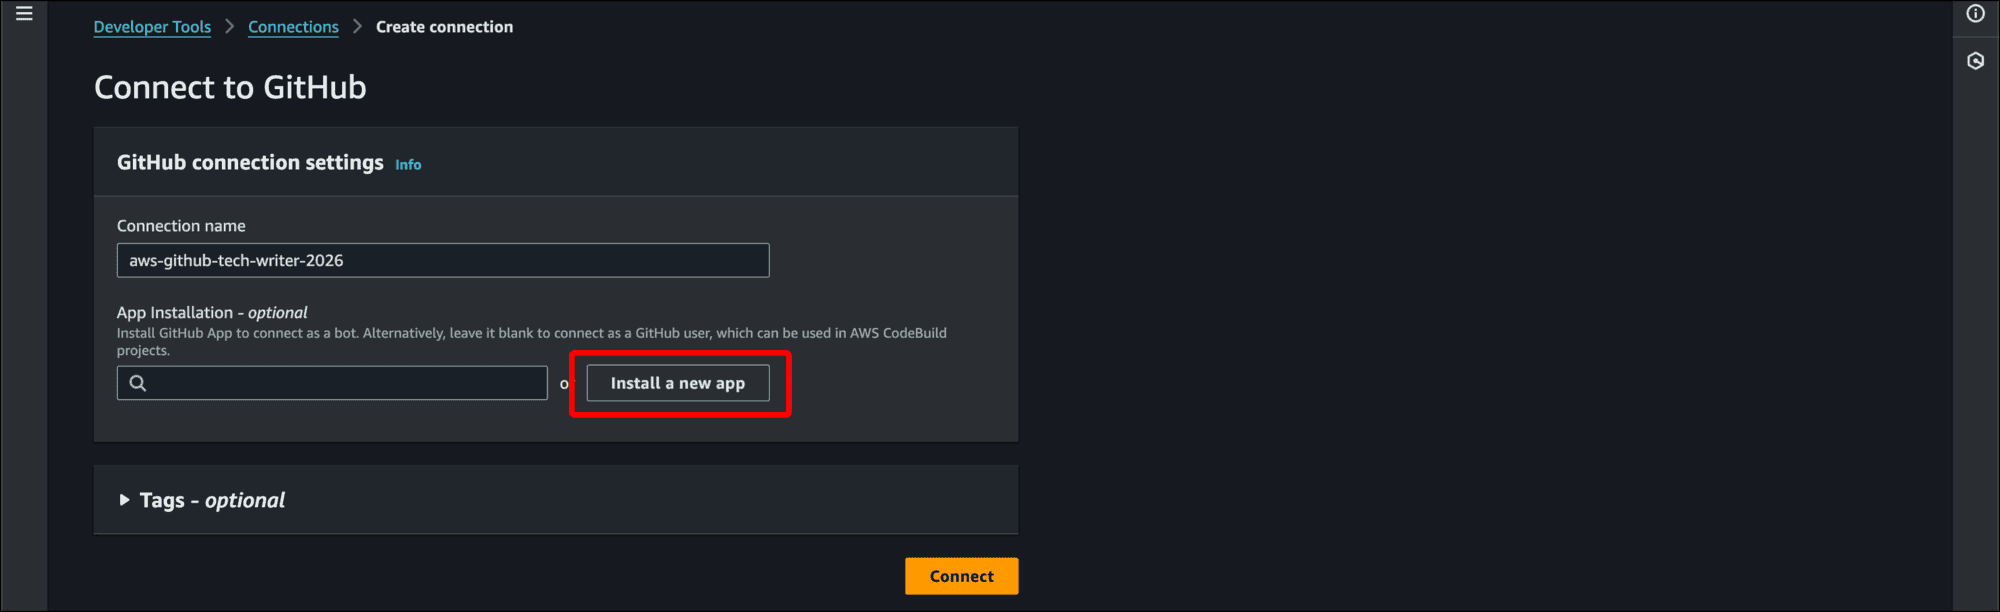
- On the Connect to GitHub page, click Install a new app.
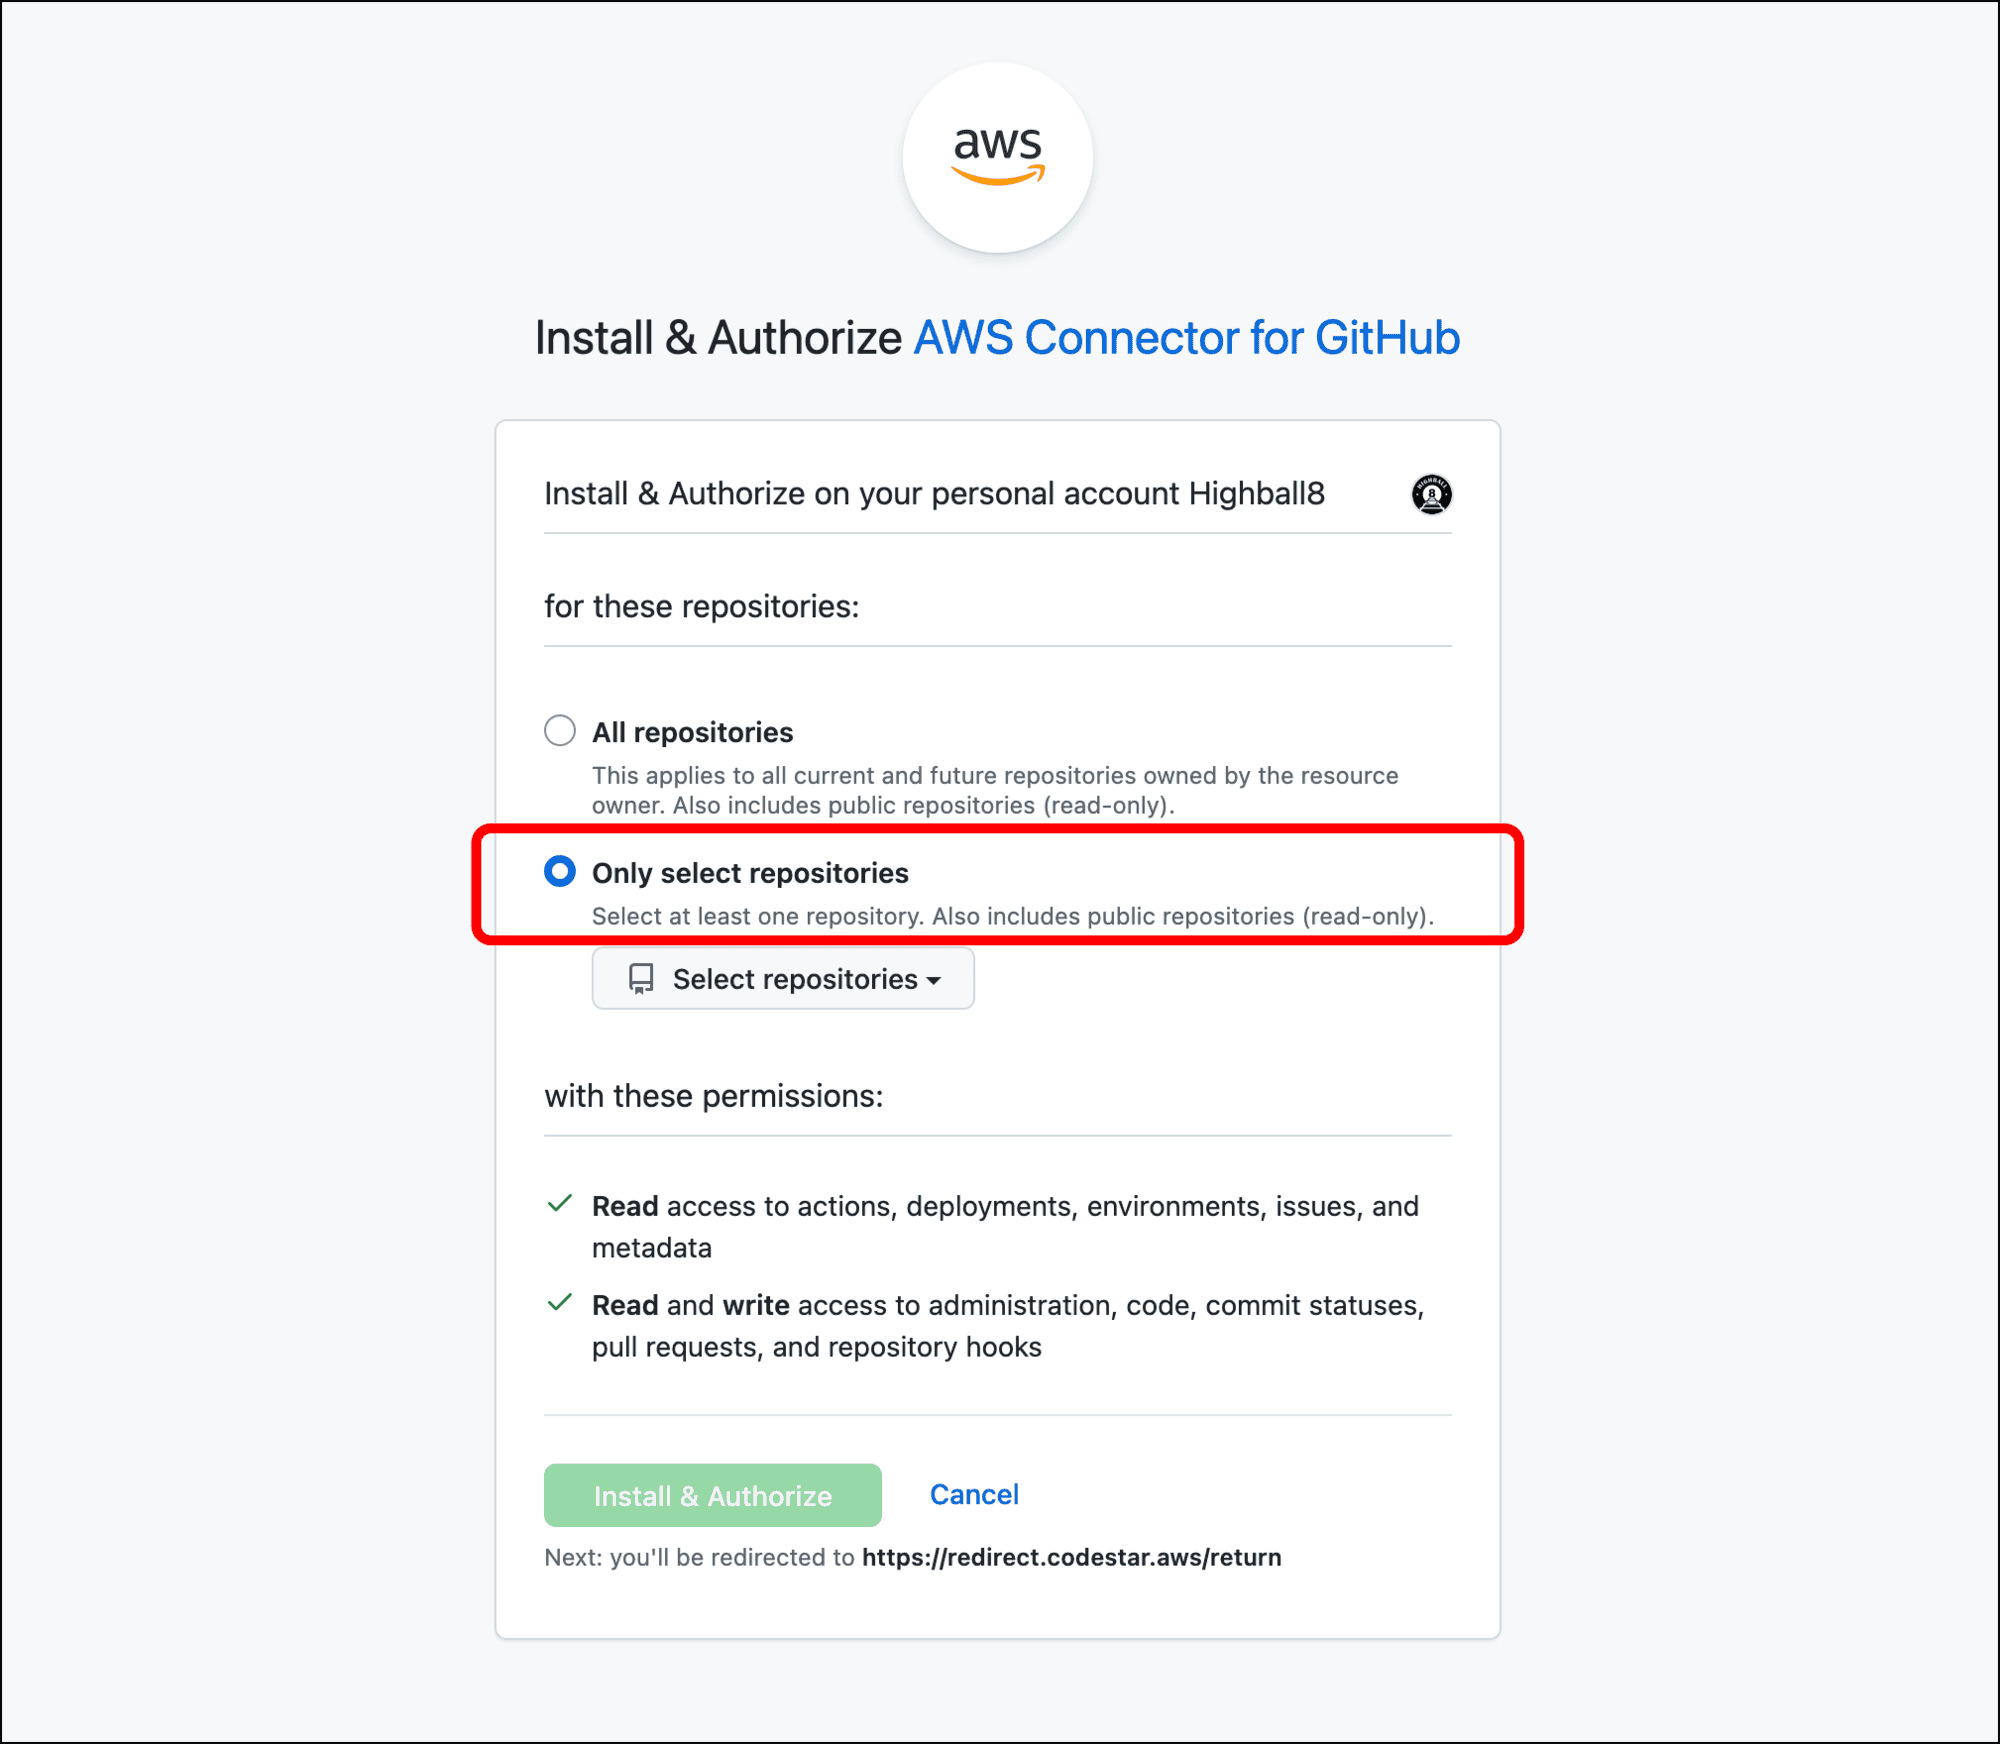
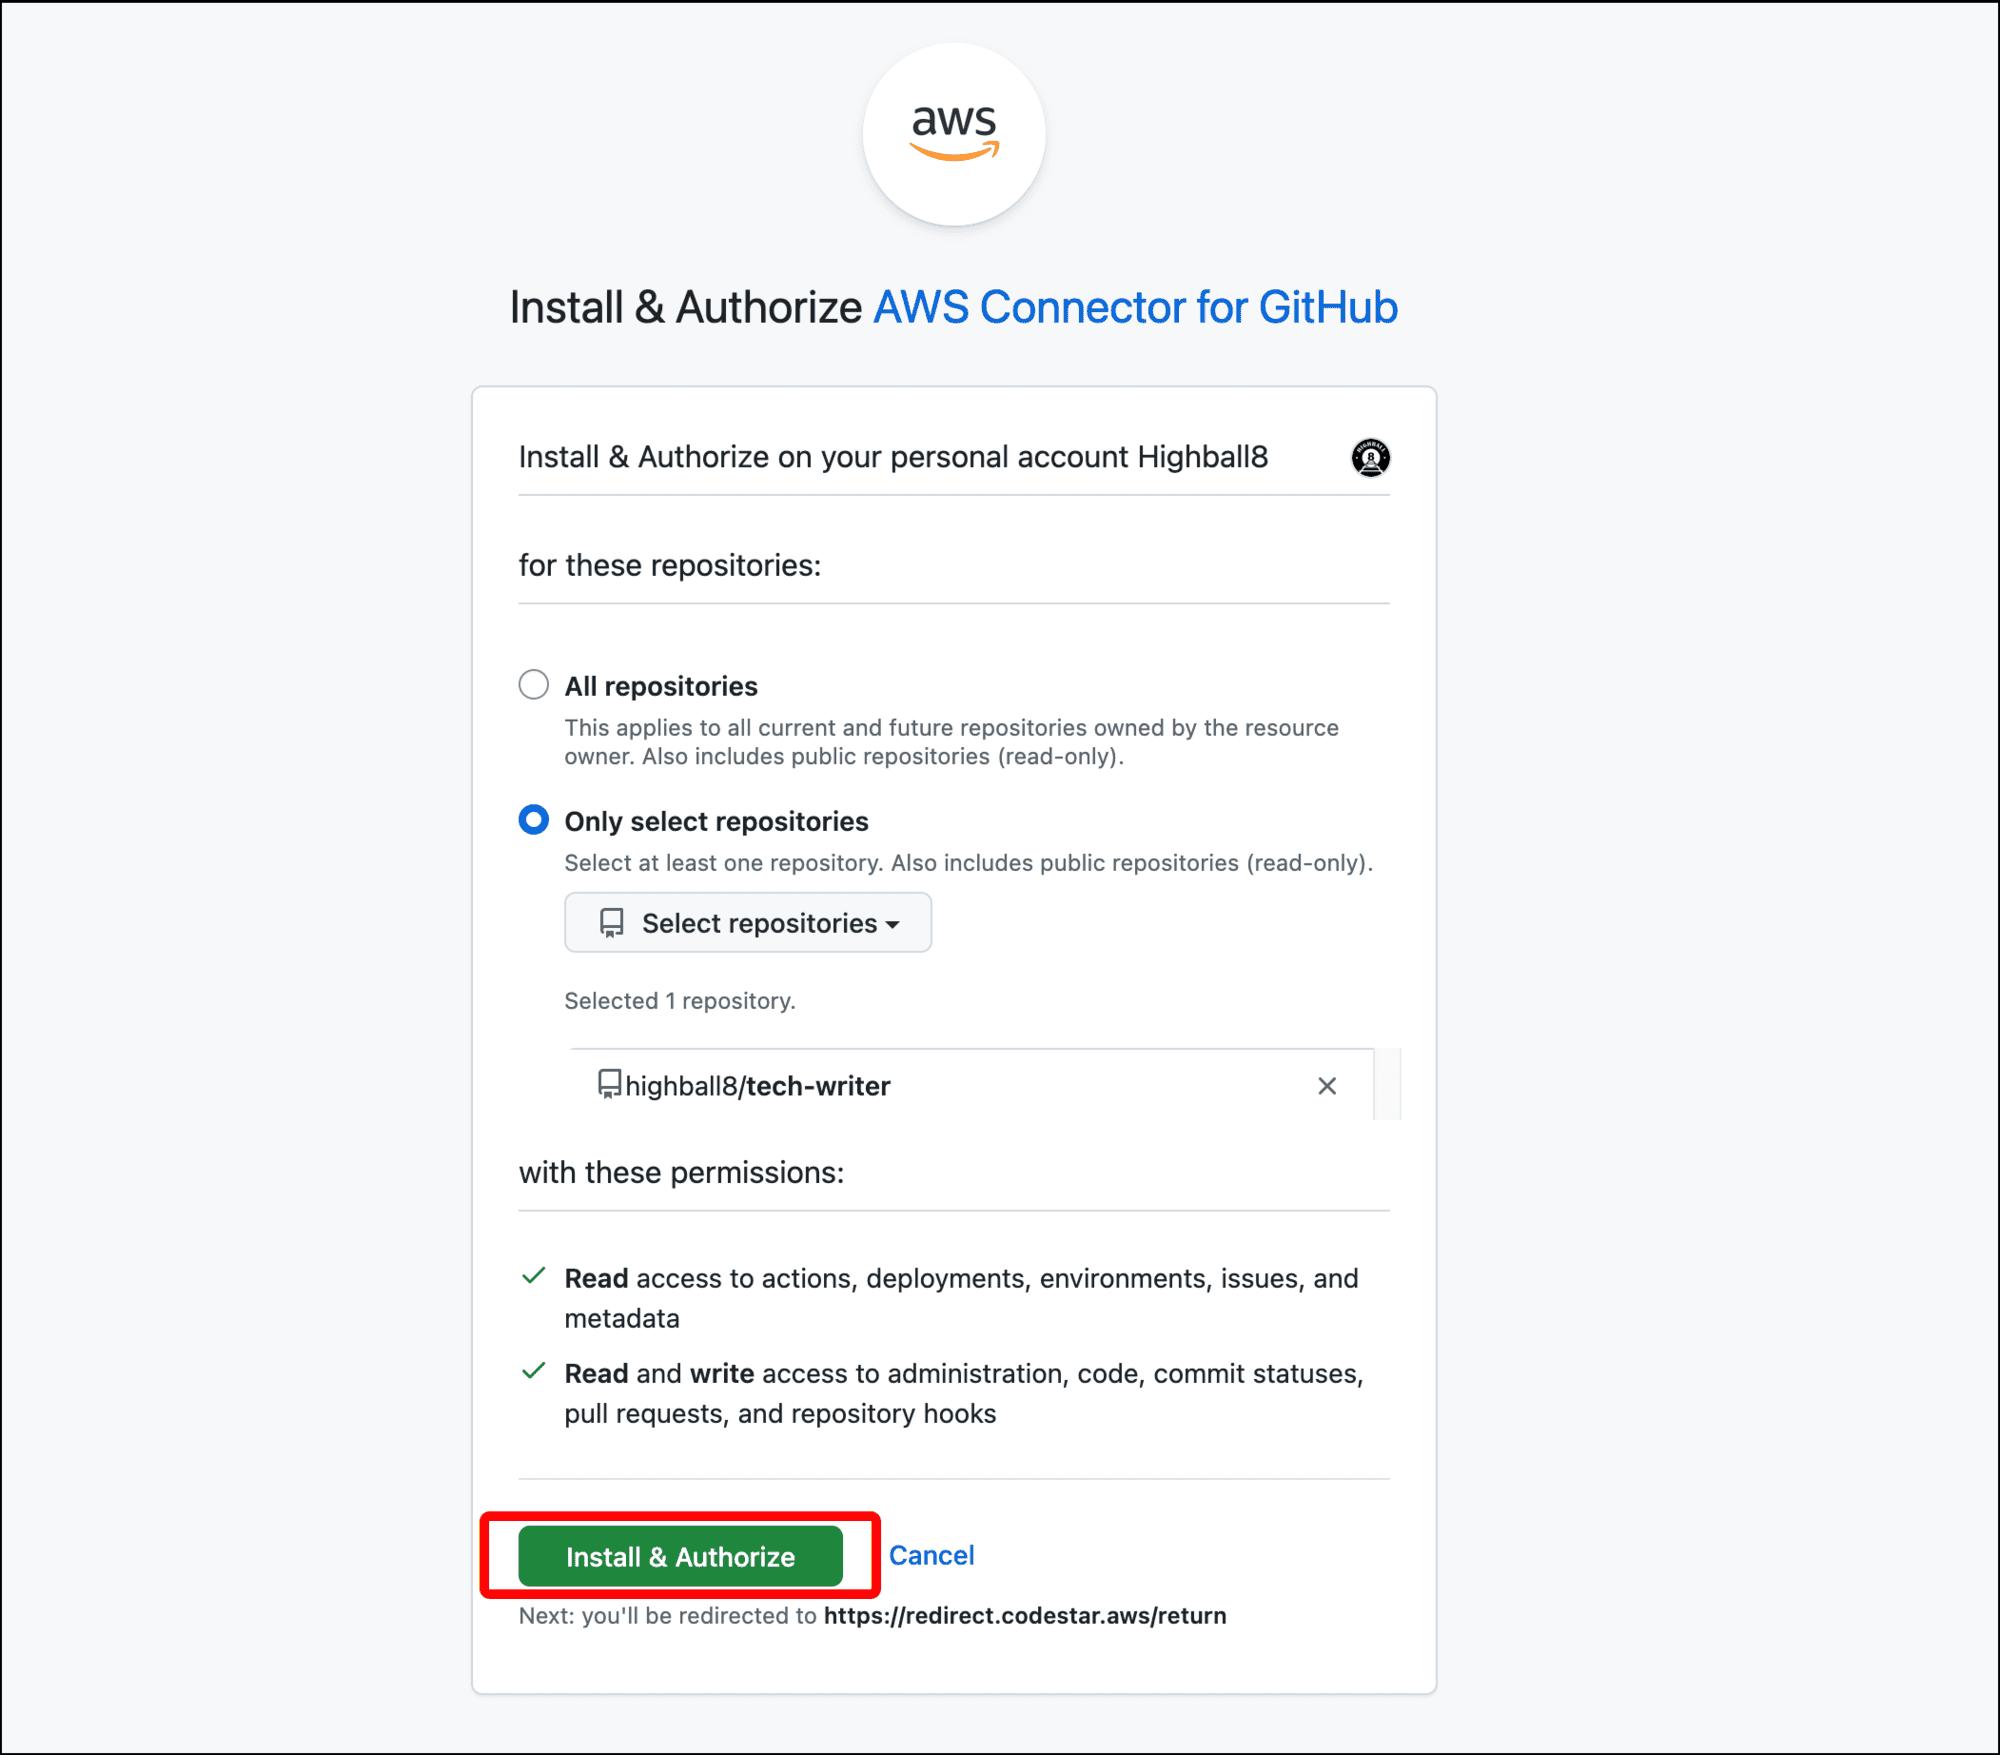
- You are redirected to GitHub. Assuming you are logged in, GitHub will prompt you to Install & Authorize AWS Connector for GitHub. In my case, I click the radio button for Only select repositories.
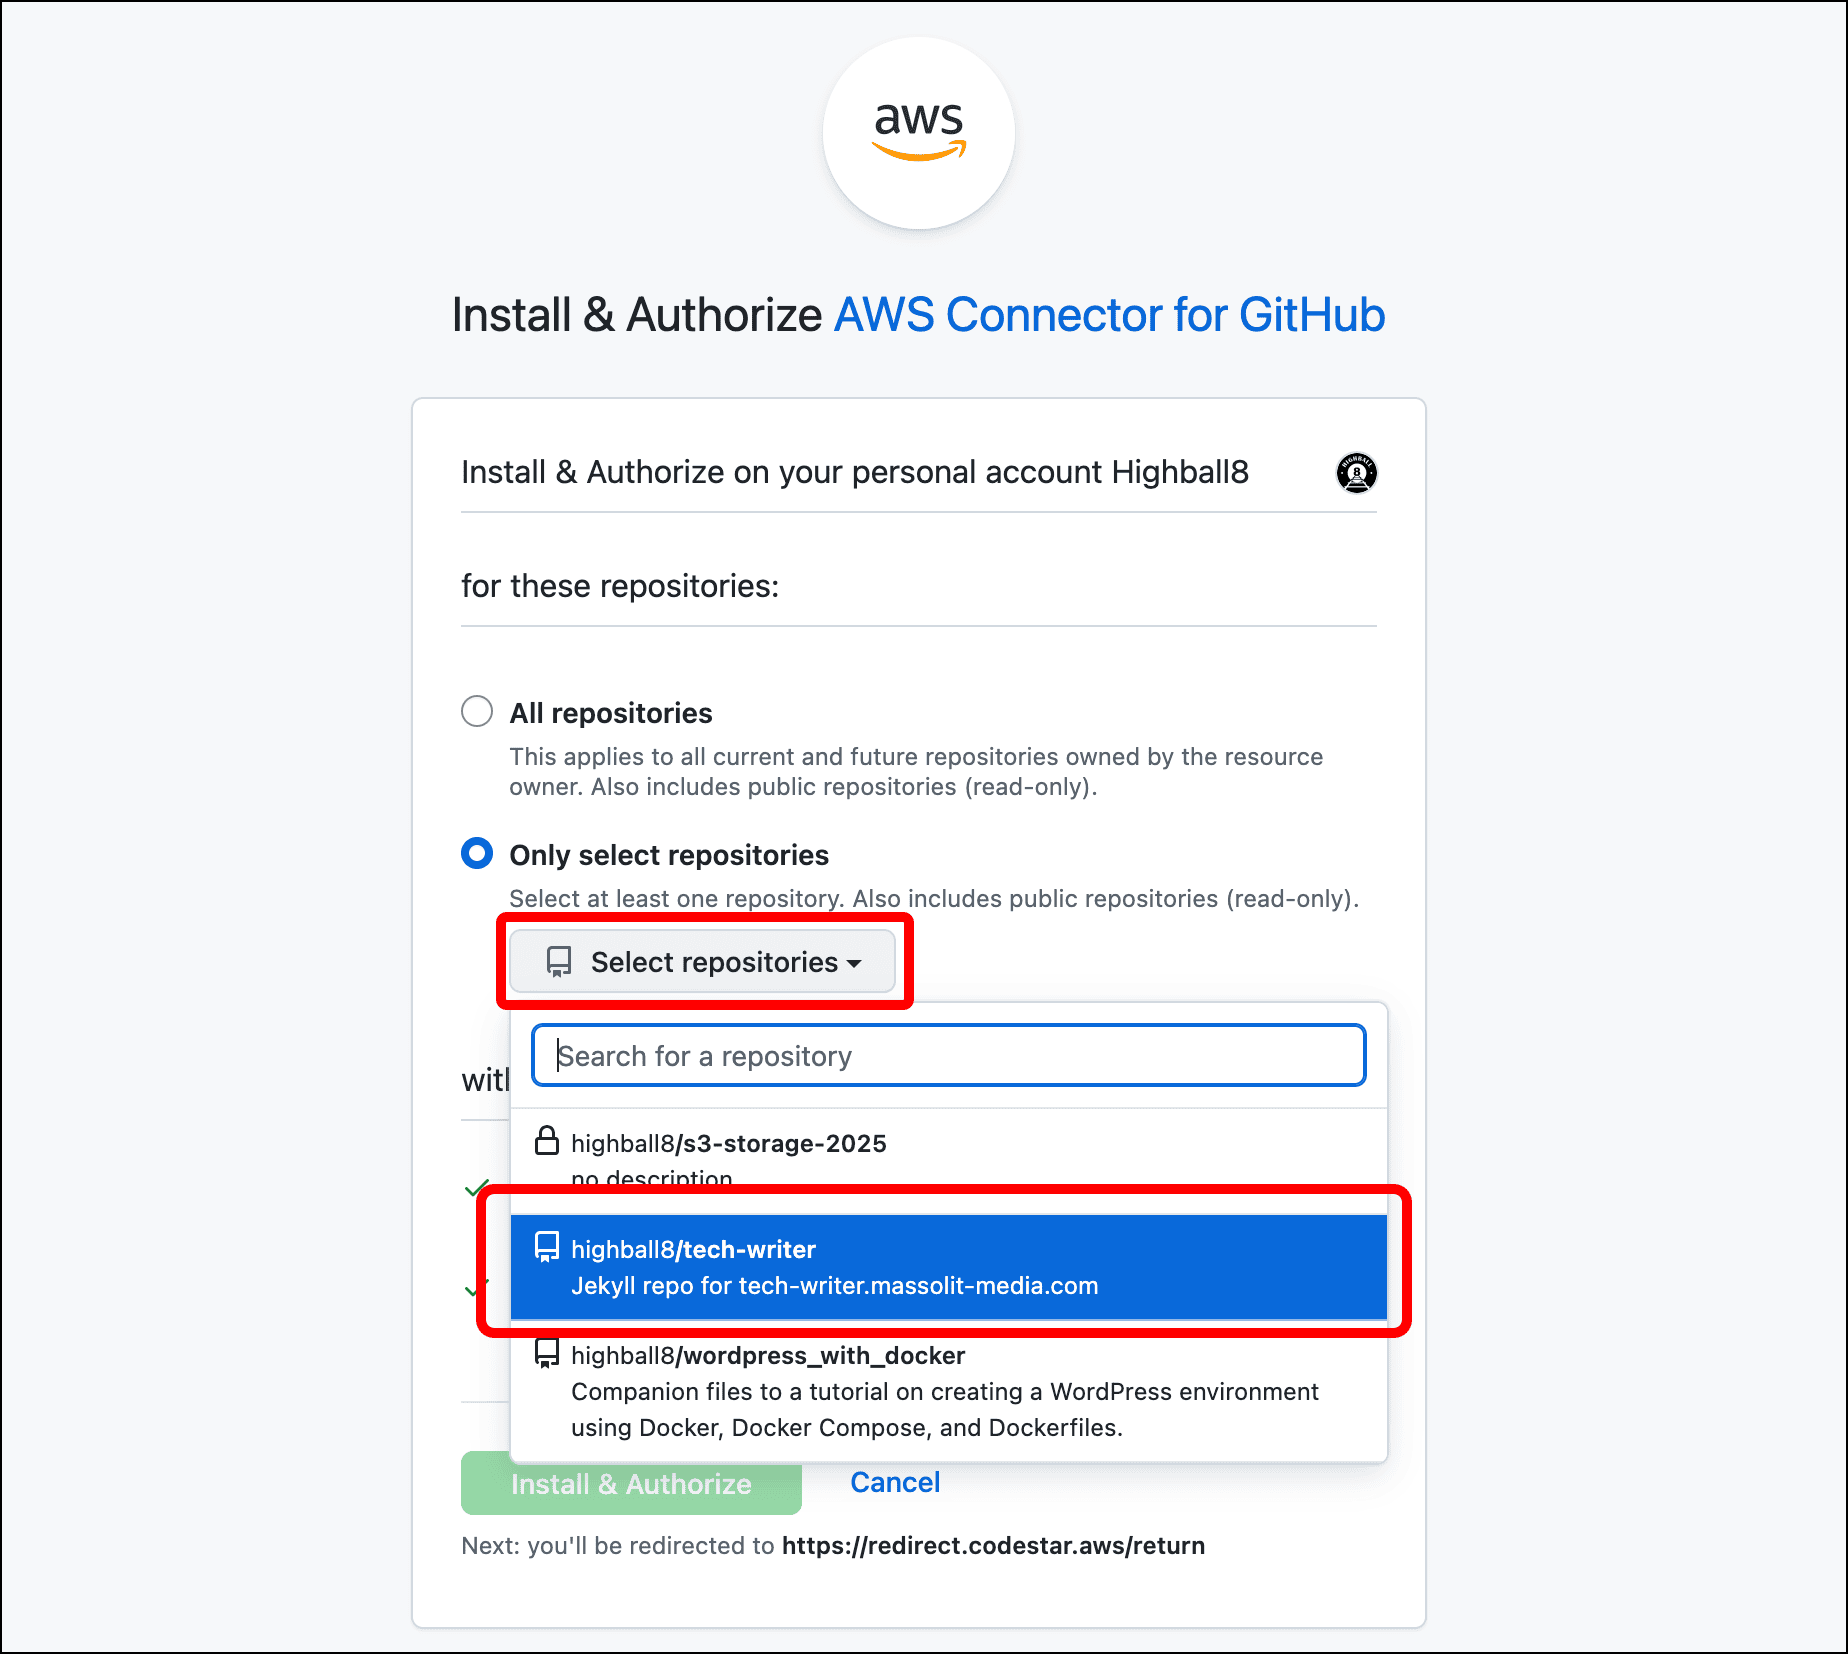
- I click the Select repositories drop-down and select the repo for this project.
- Click Install & Authorize.
- You are returned to the Connect to GitHub page in AWS CodeBuild. The App Installation - optional field should be populated with a numerical value. Click Connect.
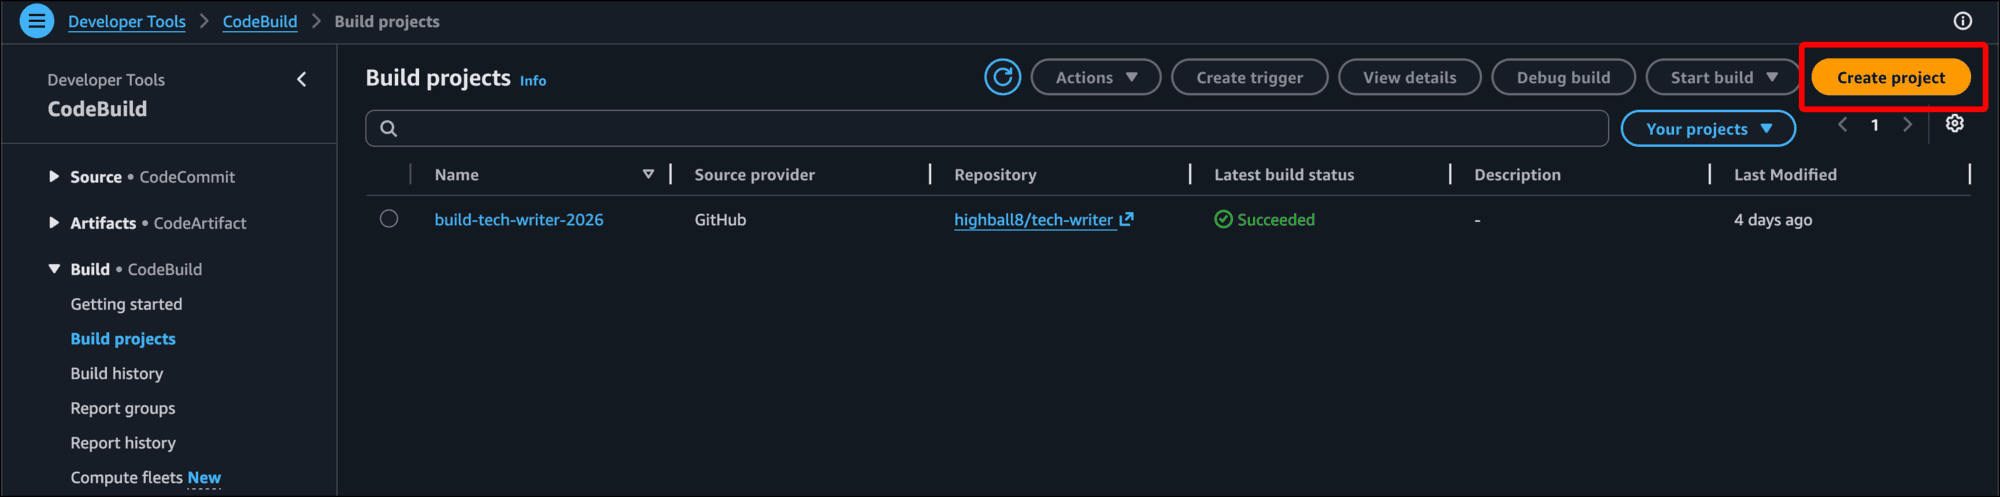
- Return to the CodeBuild Build projects page and click Create project.
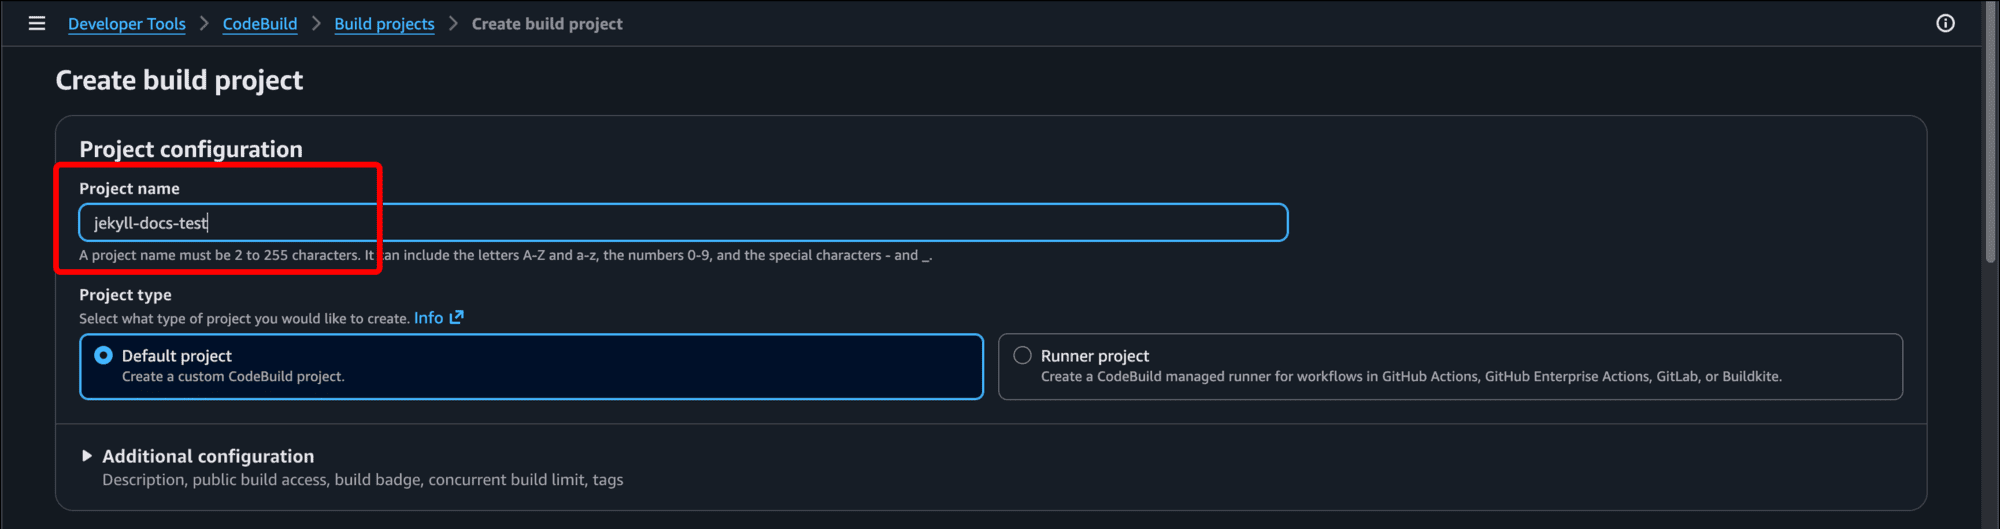
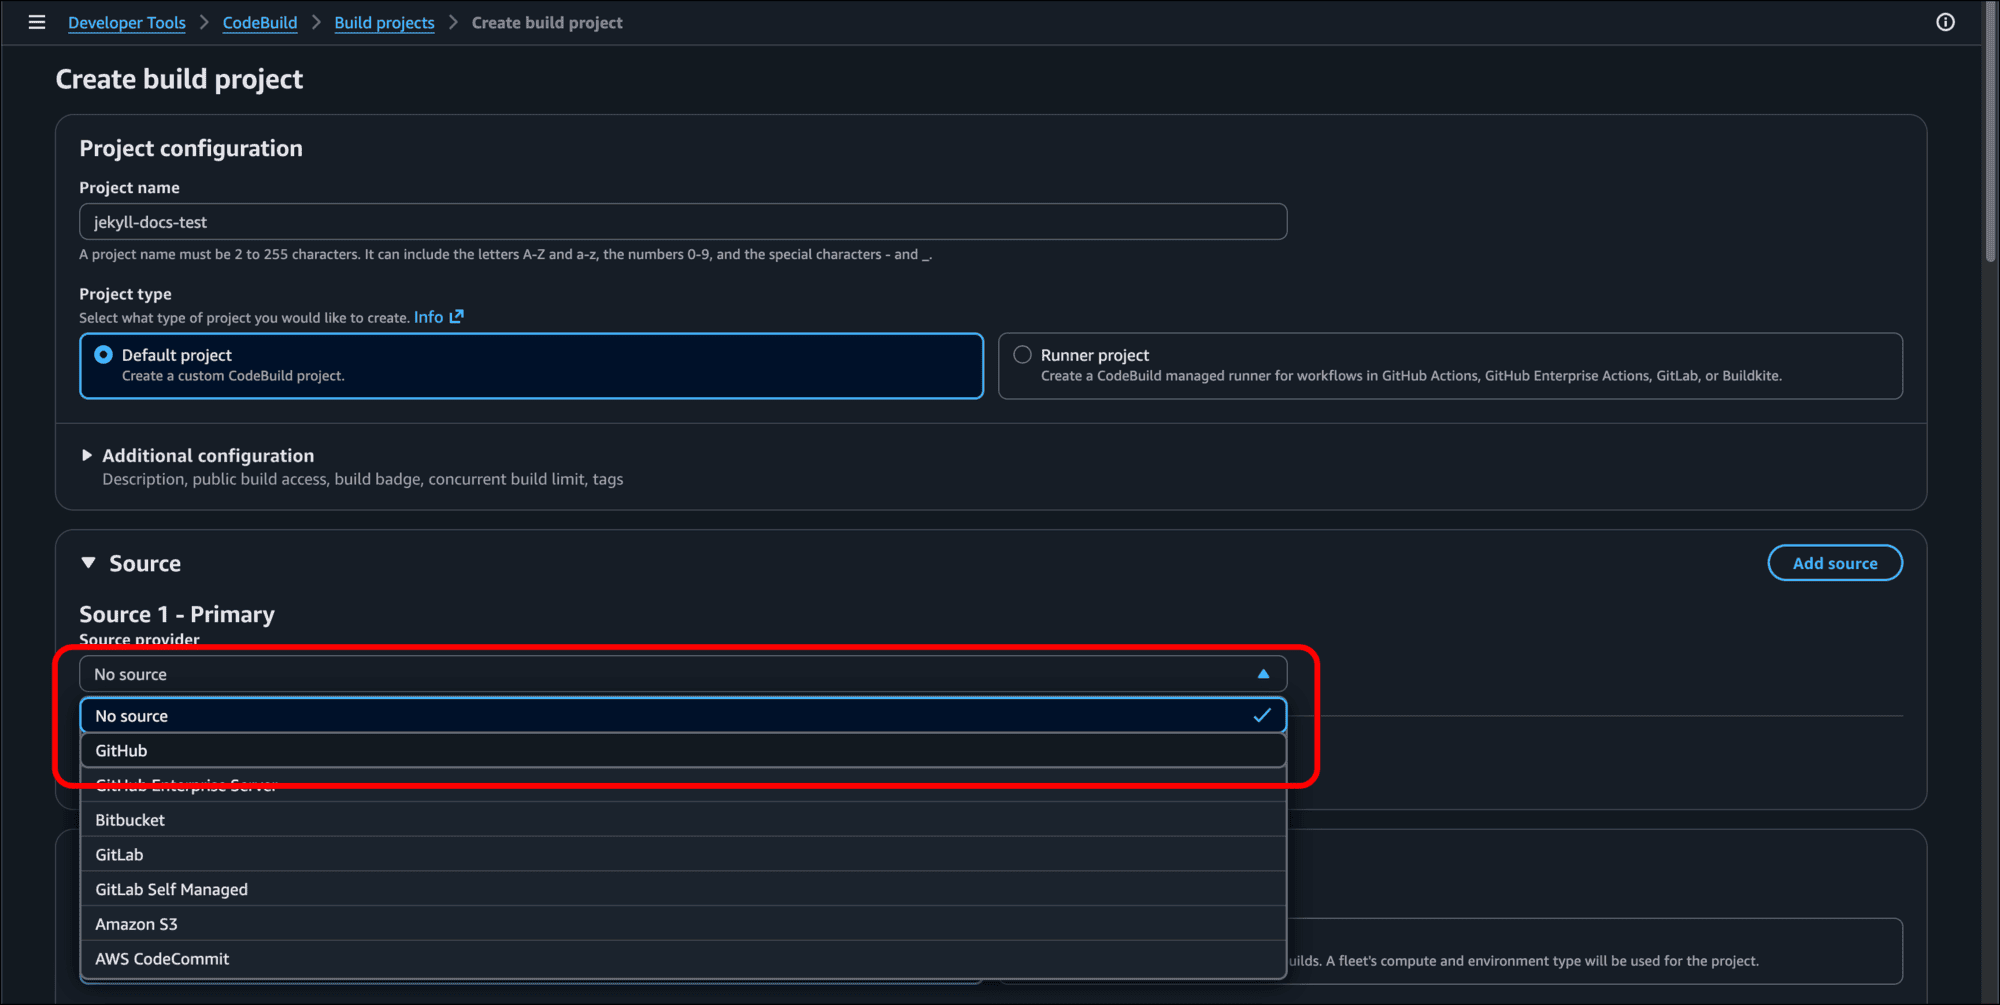
- Enter a Project name.
- Under Source, click the drop-down and select GitHub.
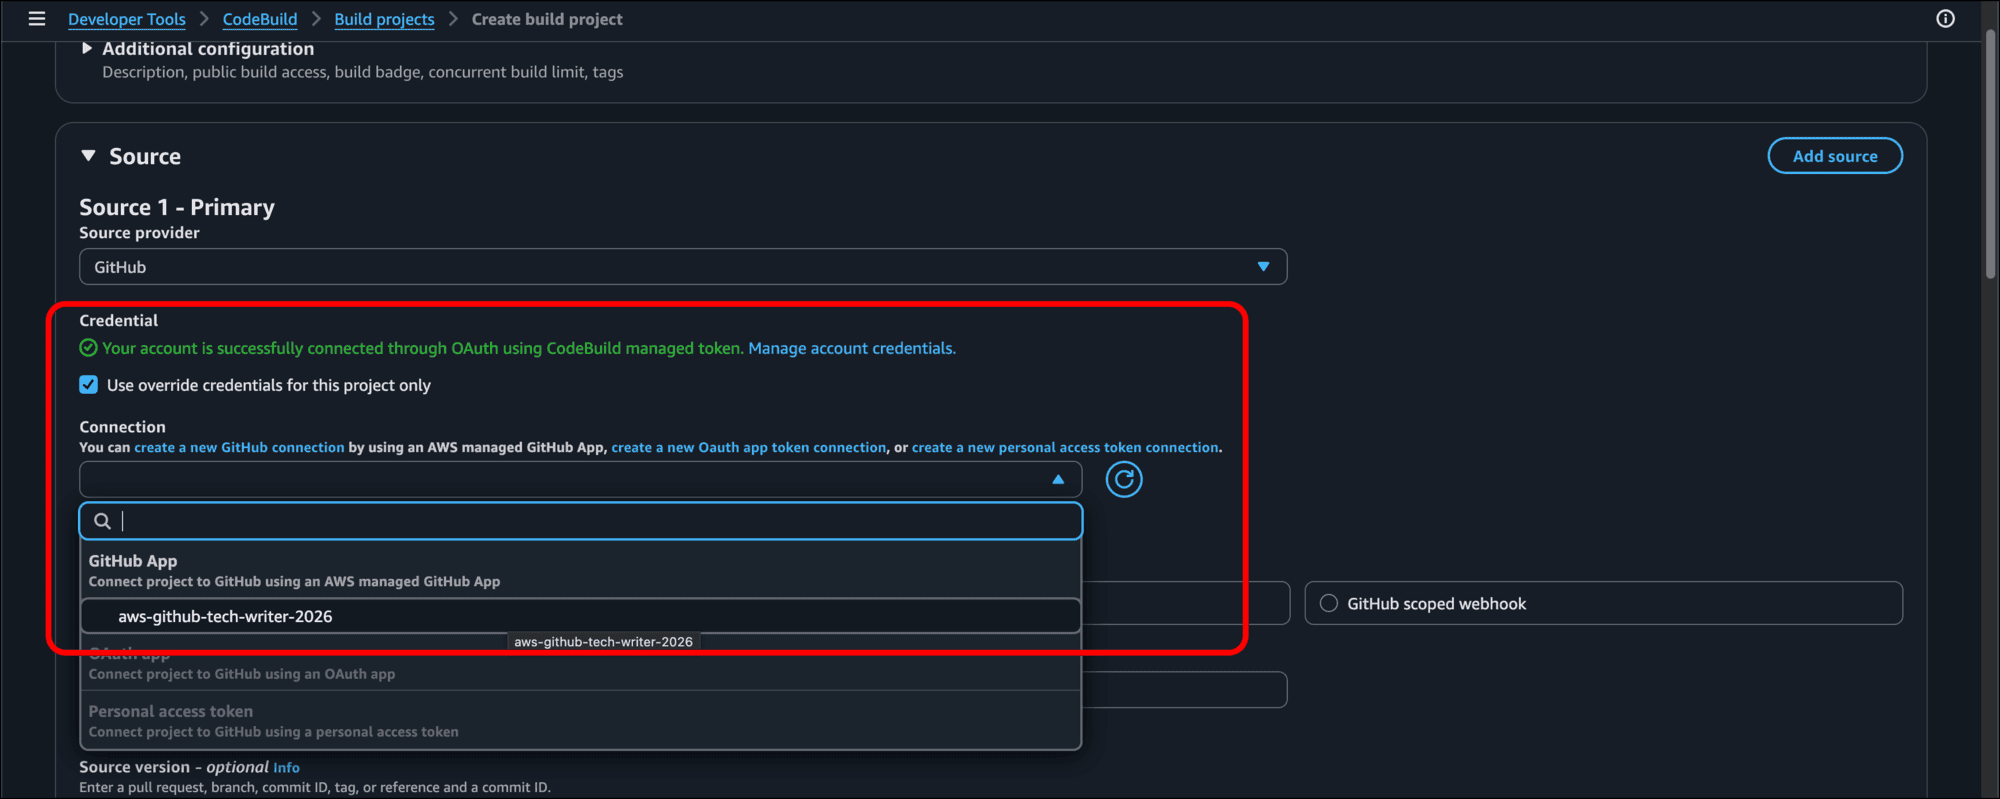
- Green text will display saying: Your account is successfully connected through OAuth using CodeBuild managed token. Select the checkbox for Use override credentials for this project only.
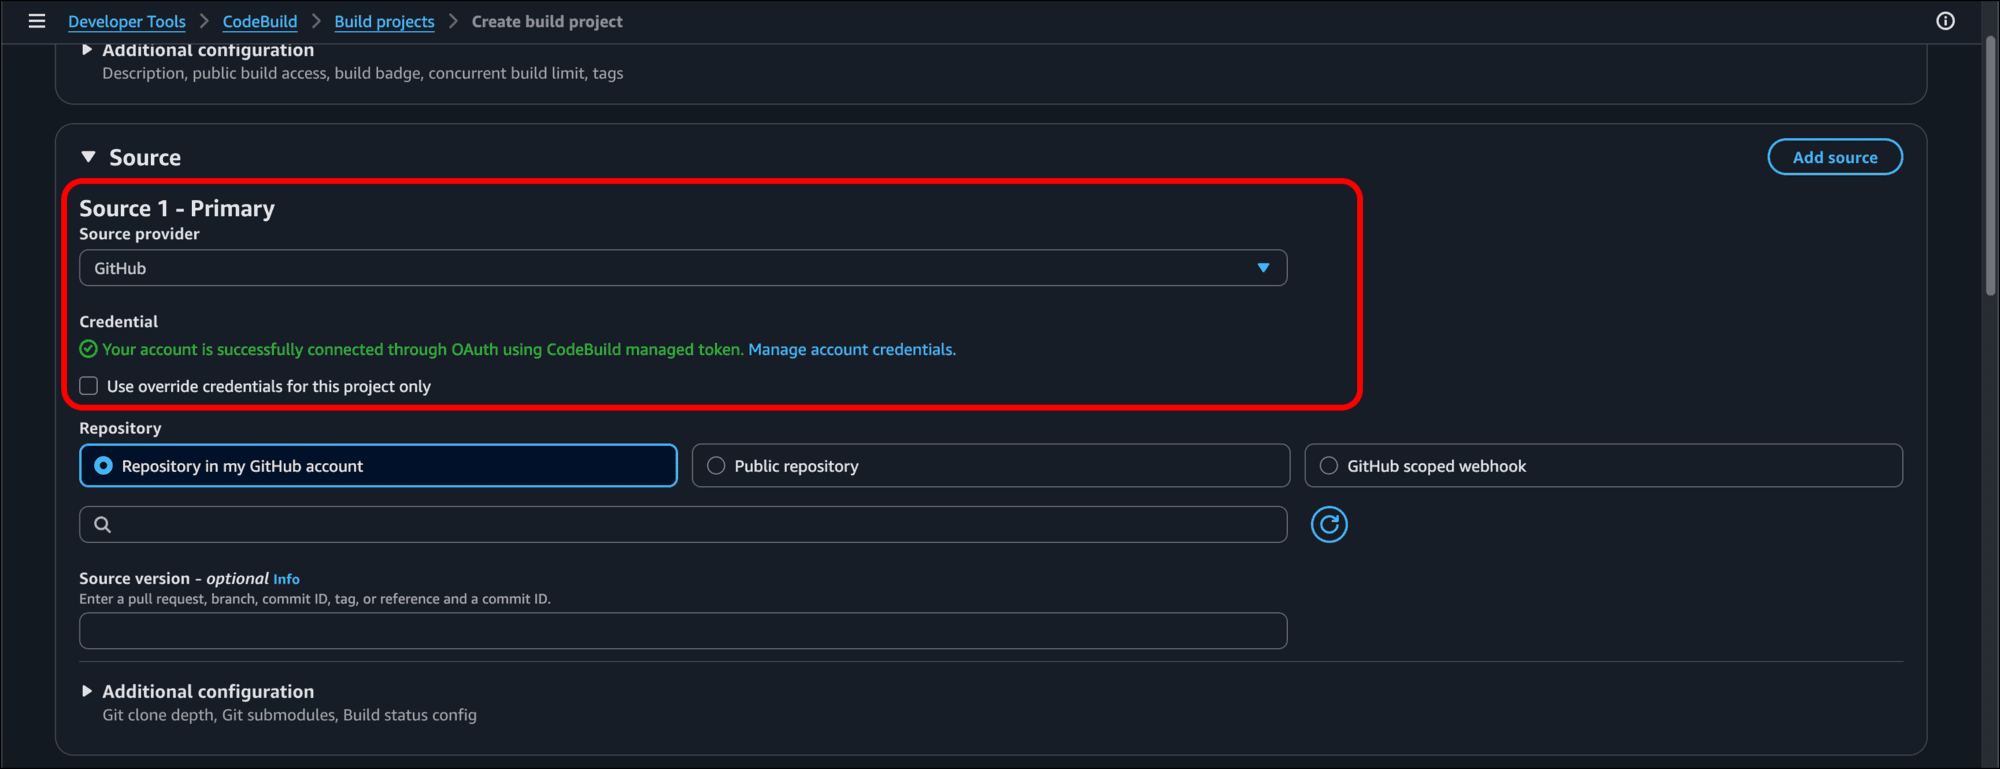
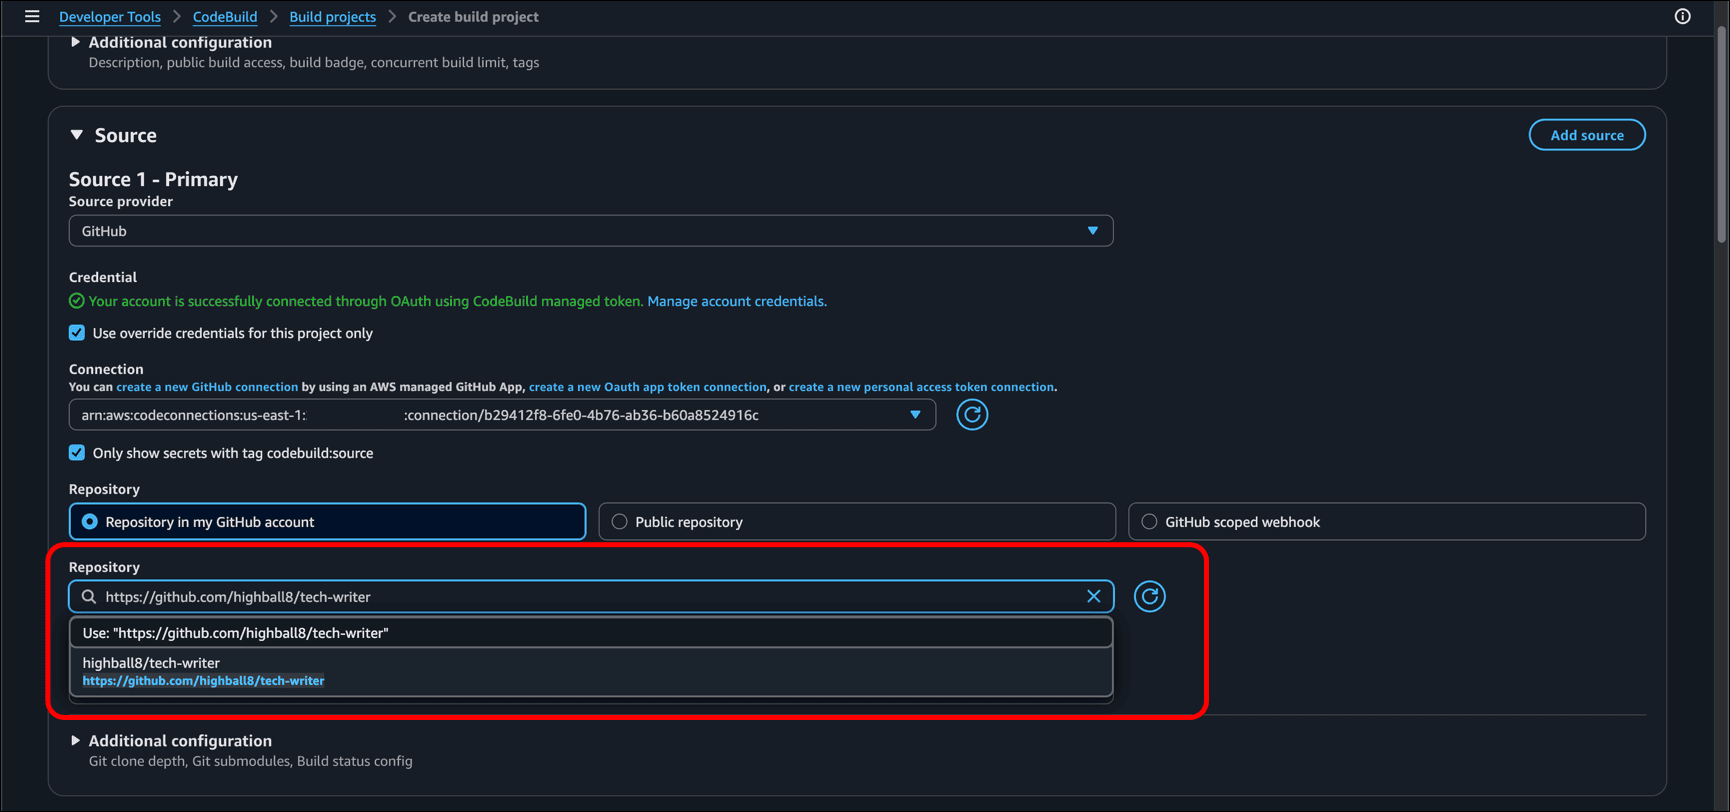
- Click in the Connection field and select the GitHub “connection” you just created.
- The page reloads and now displays a Repository field. Click the drop-down. You should see the repos that you authorized for AWS Connector for GitHub. Click the repo for your static site.
- Scroll down to the Environment section and make sure the following are selected:

- Provisioning model: On-demand
- Environment image: Managed image
- Compute: EC2
- Running mode: Container
- Operating system: Amazon Linux
- Runtime(s): Standard
- Image: Select aws/codebuild/amazonlinux-x86_64-standard:6.0 (pick the latest version available)
- Leave Image version as is
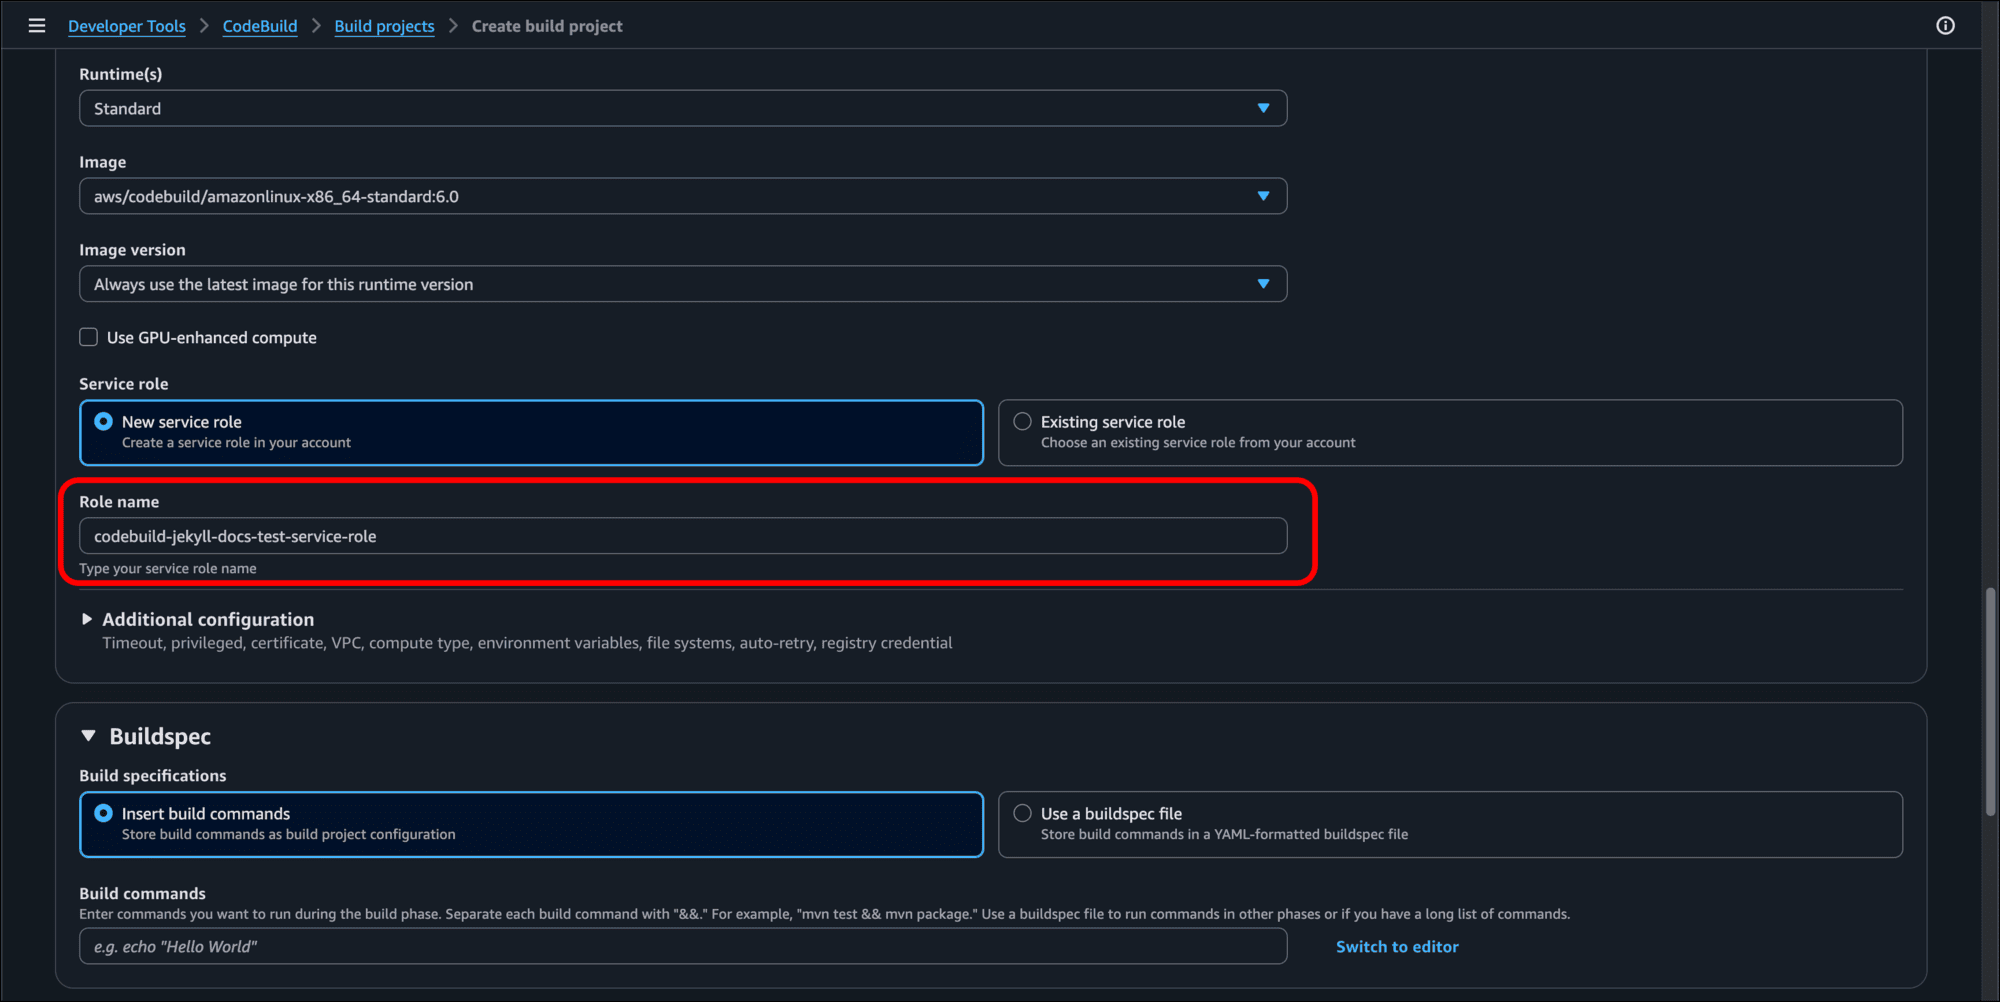
- Under Service role, leave the radio button default of Create a new service role. CodeBuild will create a Role name for the service role for you. (A Service role is like a service account that will execute the build.)
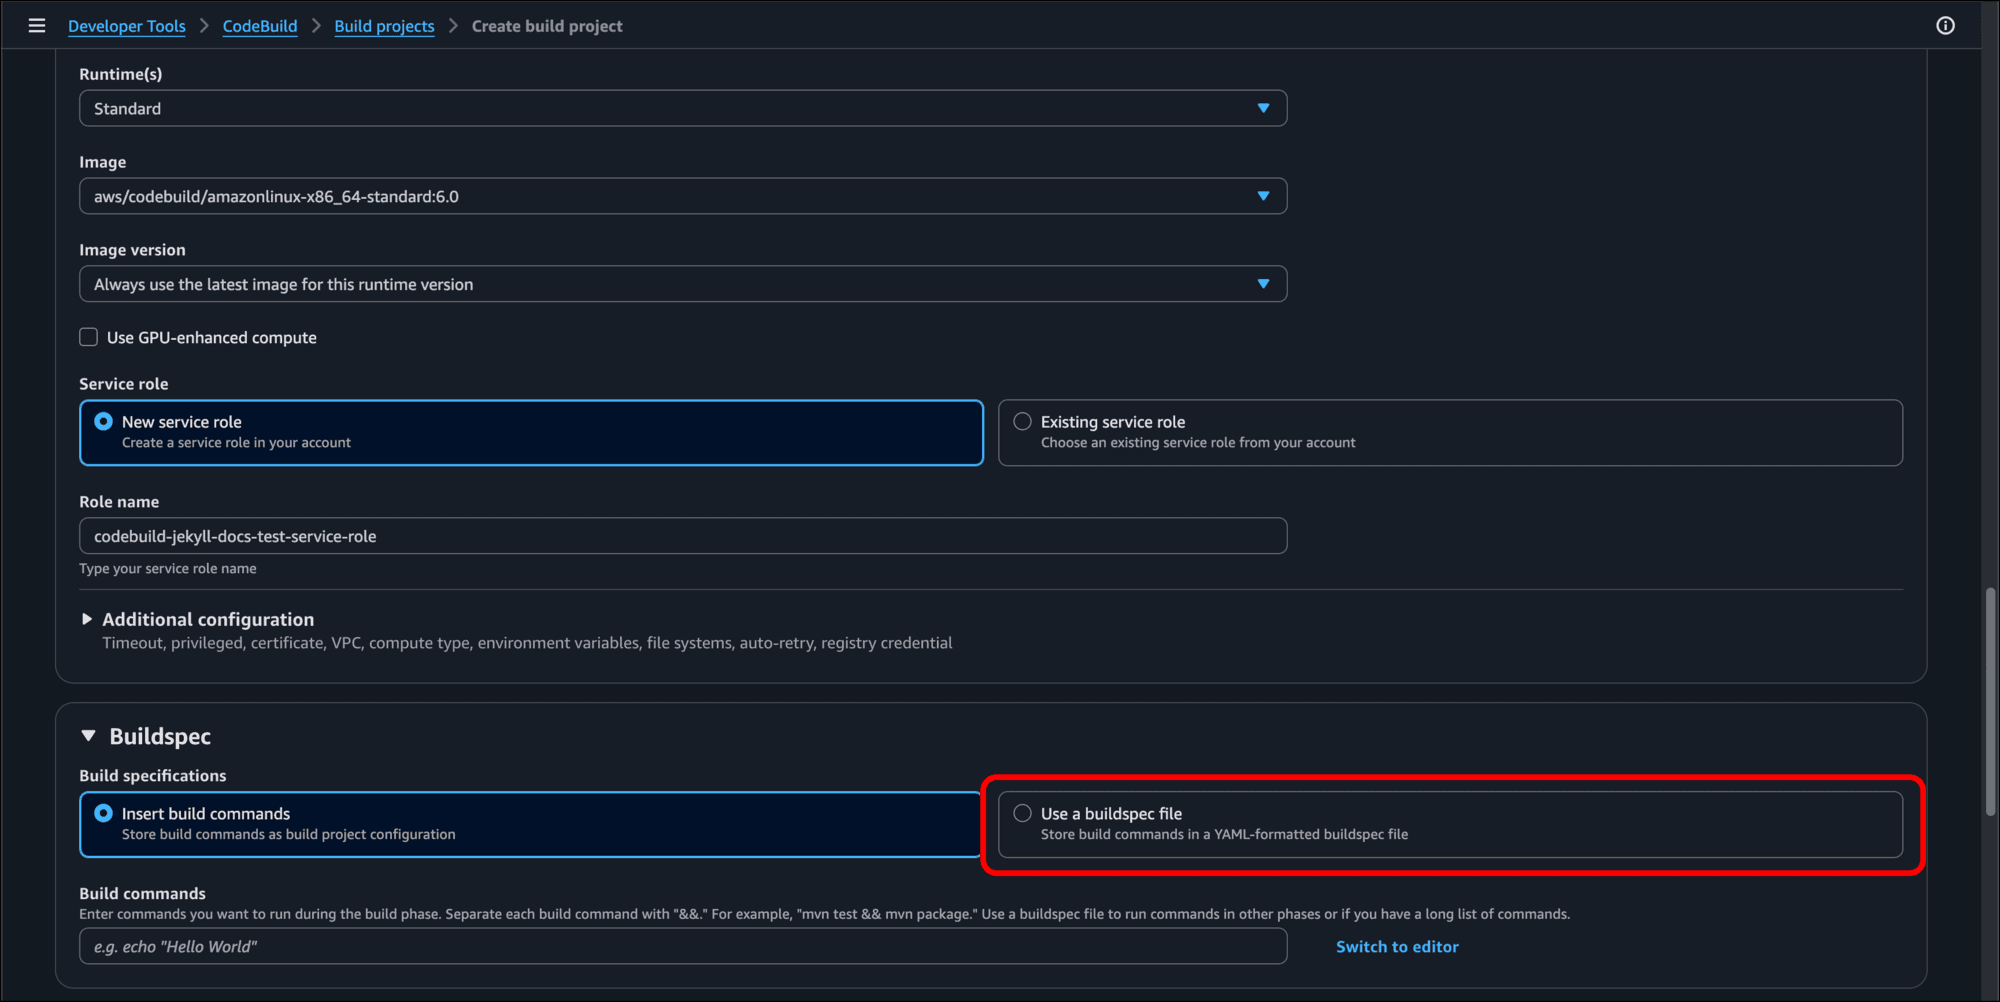
- Under Buildspec, click the Use a buildspec file radio button. A “buildspec file” is a YAML file that we will create in our Git repo and push to GitHub, where it will be picked up by CodeBuild.
- In the Artifacts section, make sure No artifacts is selected as the Type. Scroll down to the bottom of the page and click Create build project.

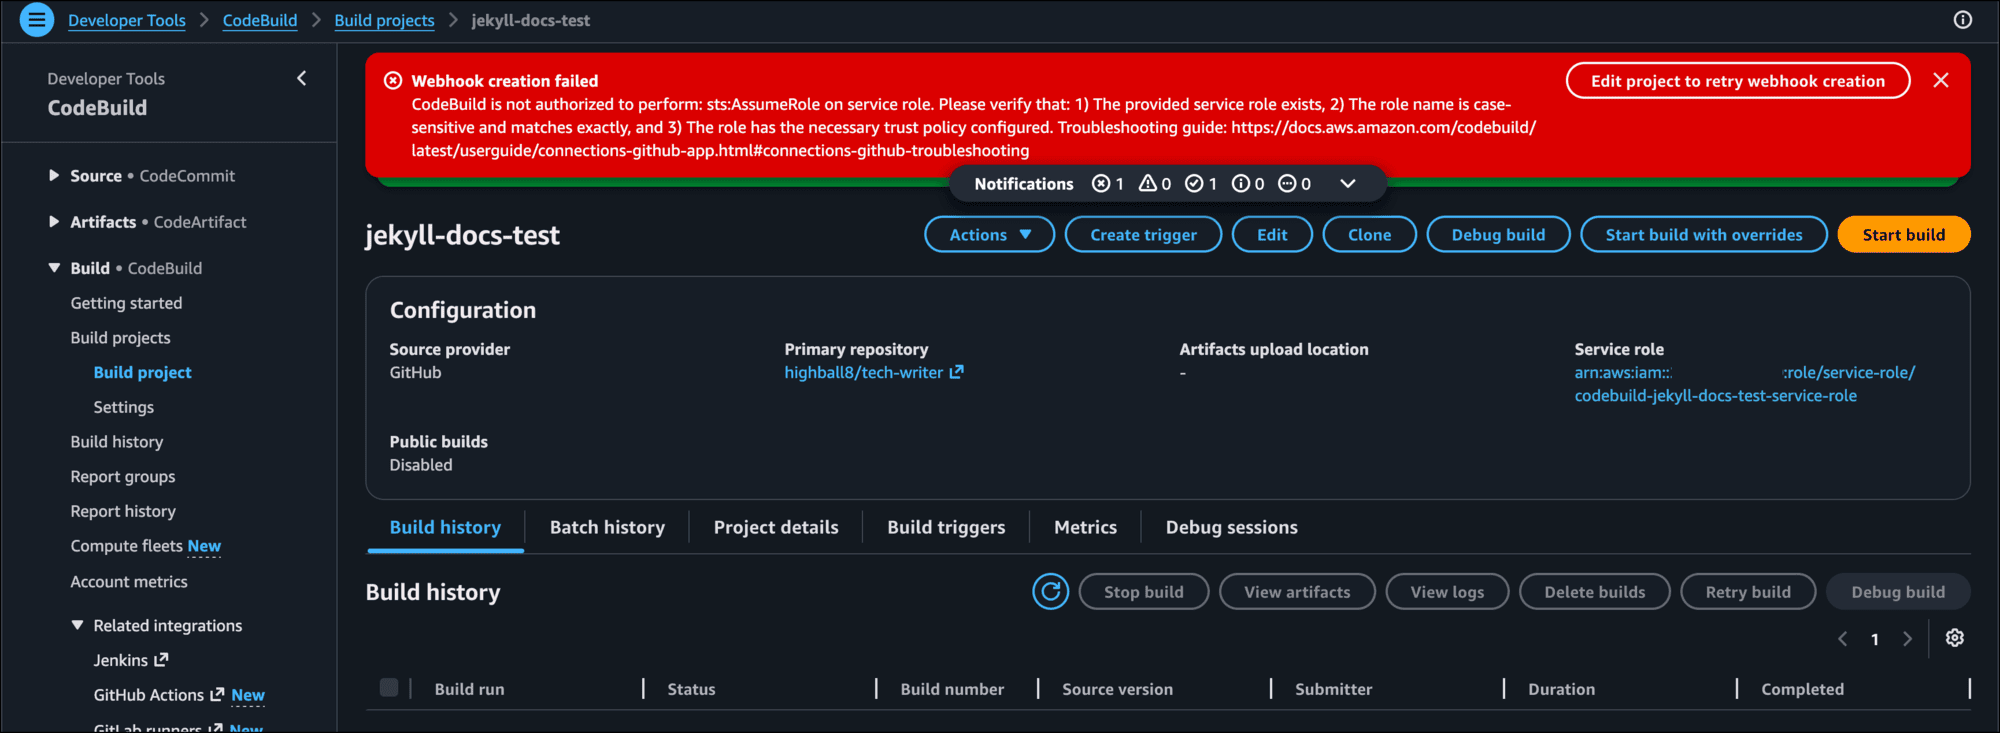
- When you return to the Build projects page you may see a red Webhook creation failed banner stating that CodeBuild is not authorized to perform certain actions on the service role. To fix this, you need to attach an Identity and Access Management (IAM) policy to the service role you just created.
Create Permissions Policy for CodeBuild Service Role
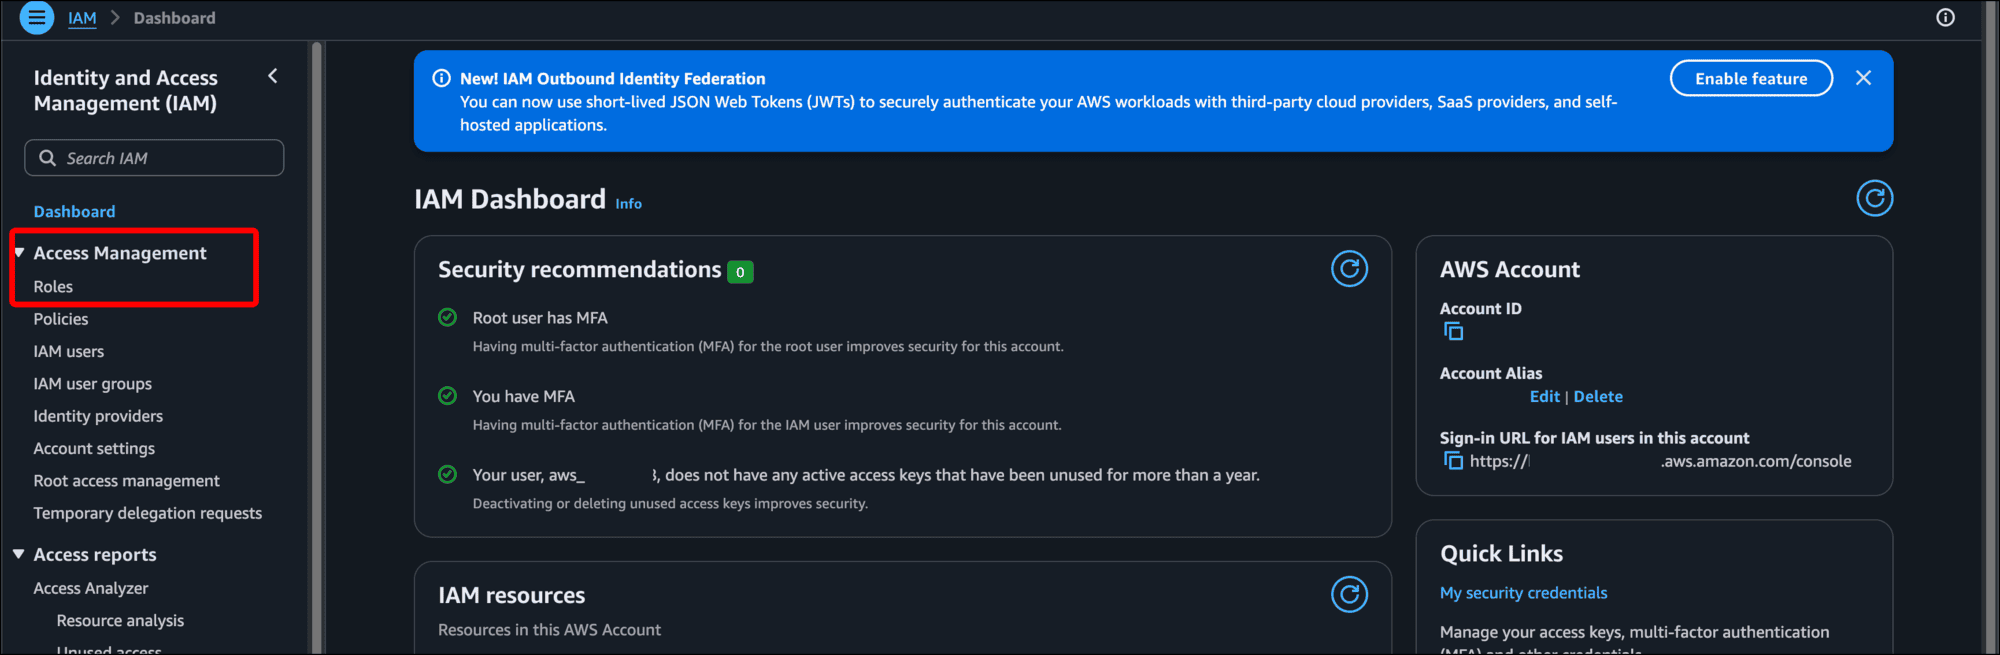
- Type iam in the search bar and select IAM from the results.
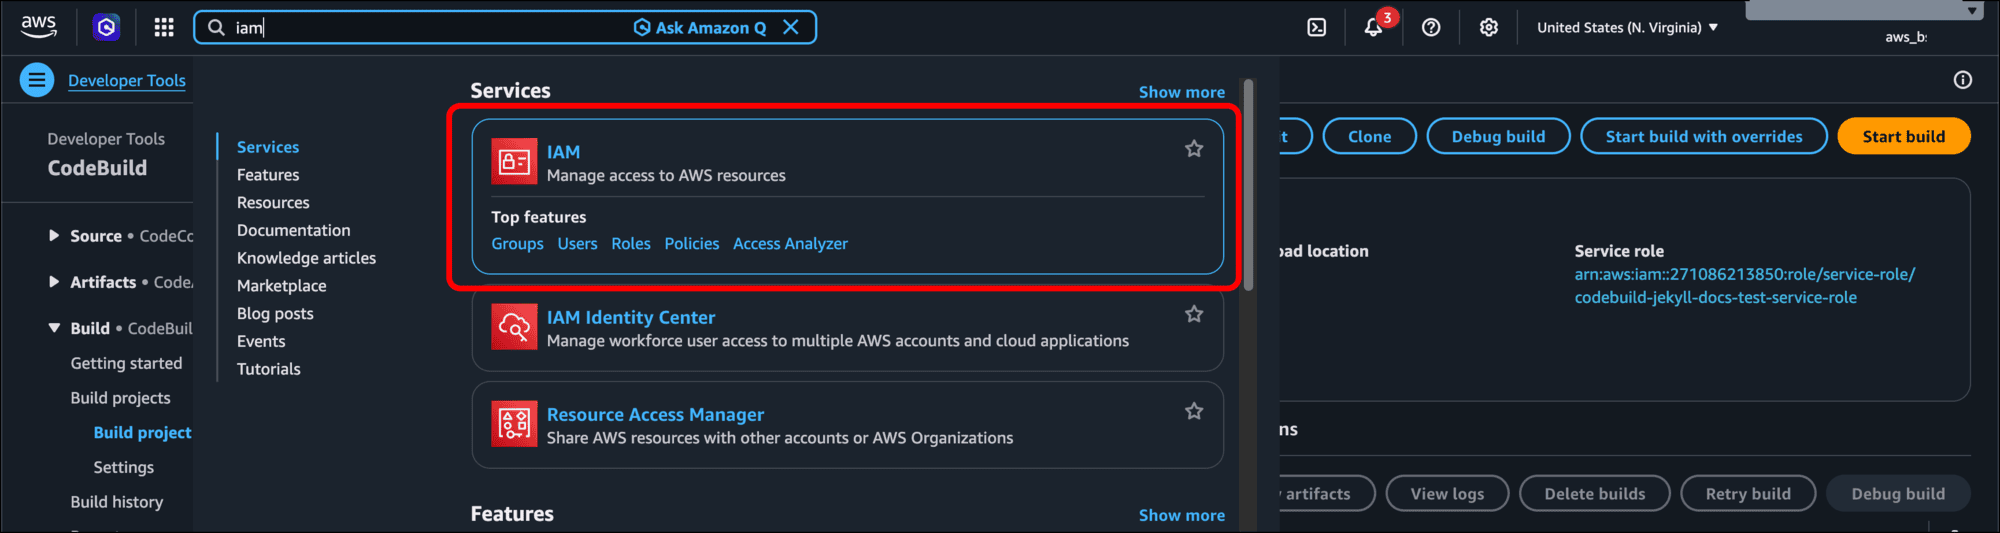
- Click Roles under Access Management in the left sidebar.
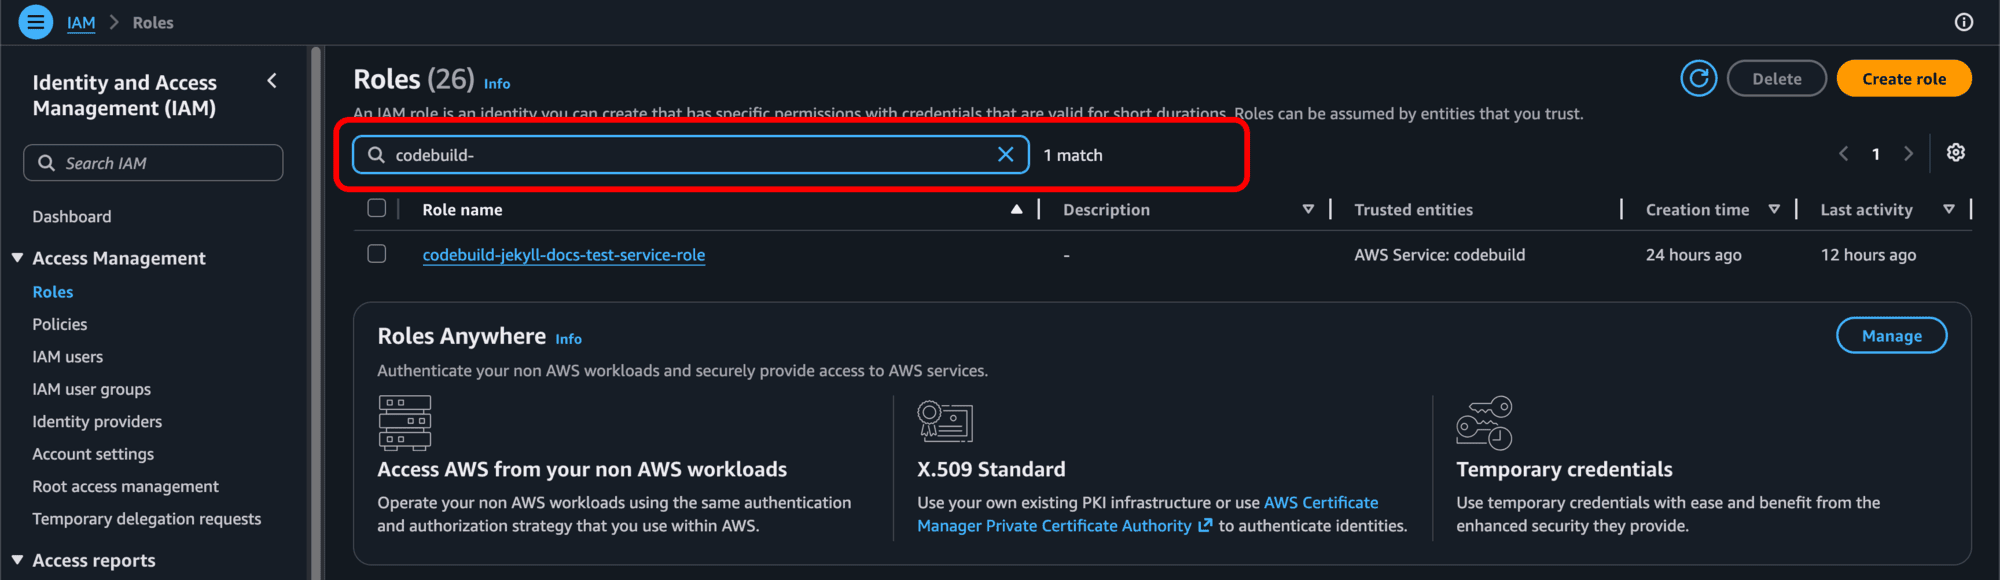
- Start typing the name you gave to the role when creating the build in the search bar and click the link for the role in the search results.
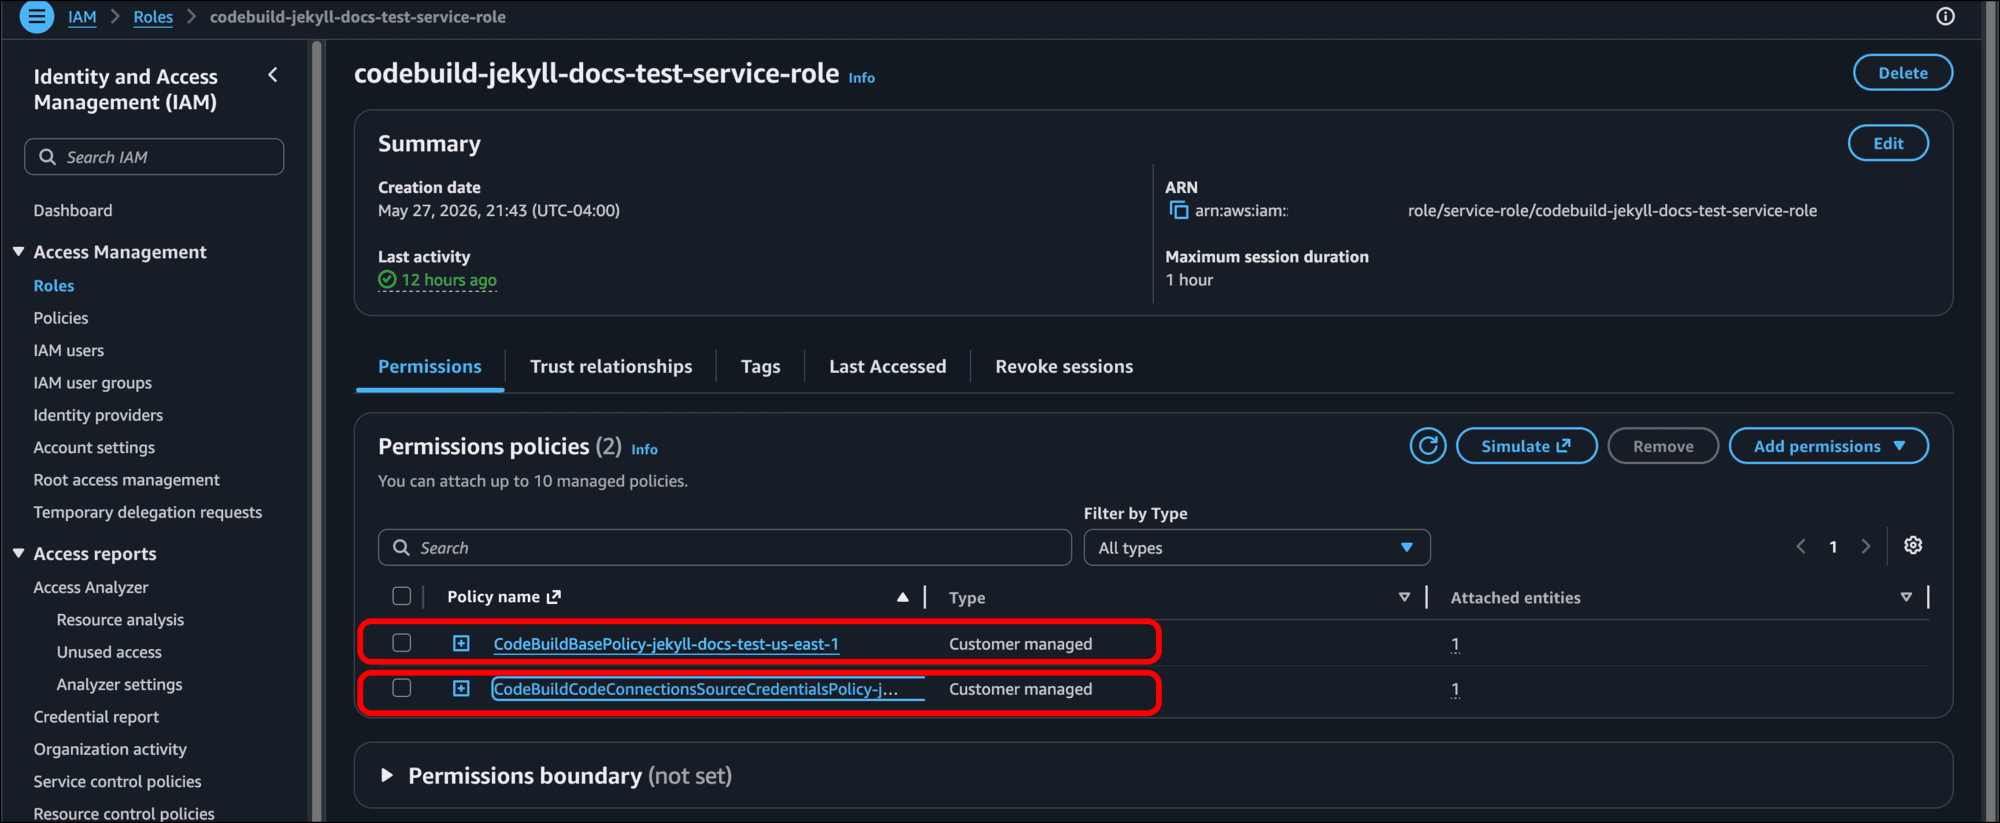
- When the role page loads, make sure the Permissions tab is selected. You may see two Permissions policies. You can look at each of them if you like by clicking the link under each Policy name.
-
In the Permissions defined in this policy section, click the JSON option to see the policy defined in JSON. In this example, I have two:
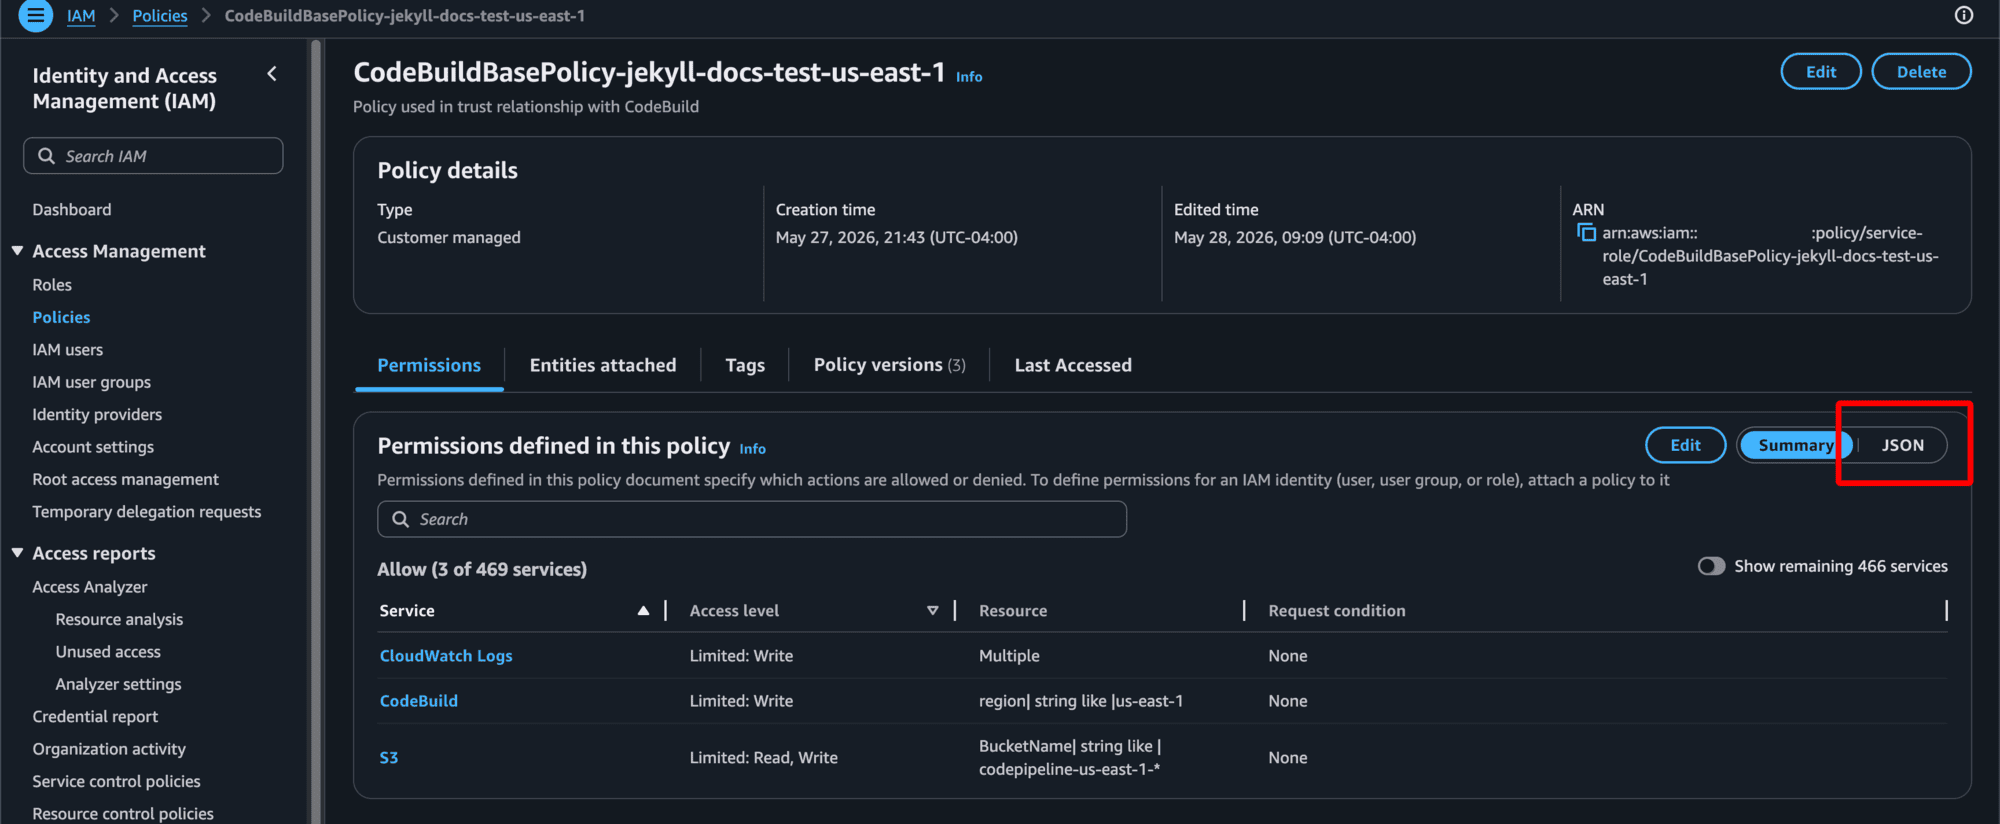
- CodeBuildBasePolicy-jekyll-docs-test-us-east-1: If you look at the JSON, this policy grants access to create CloudWatch log groups (as indicated by the appearance of
log-groupandlogsin the JSON).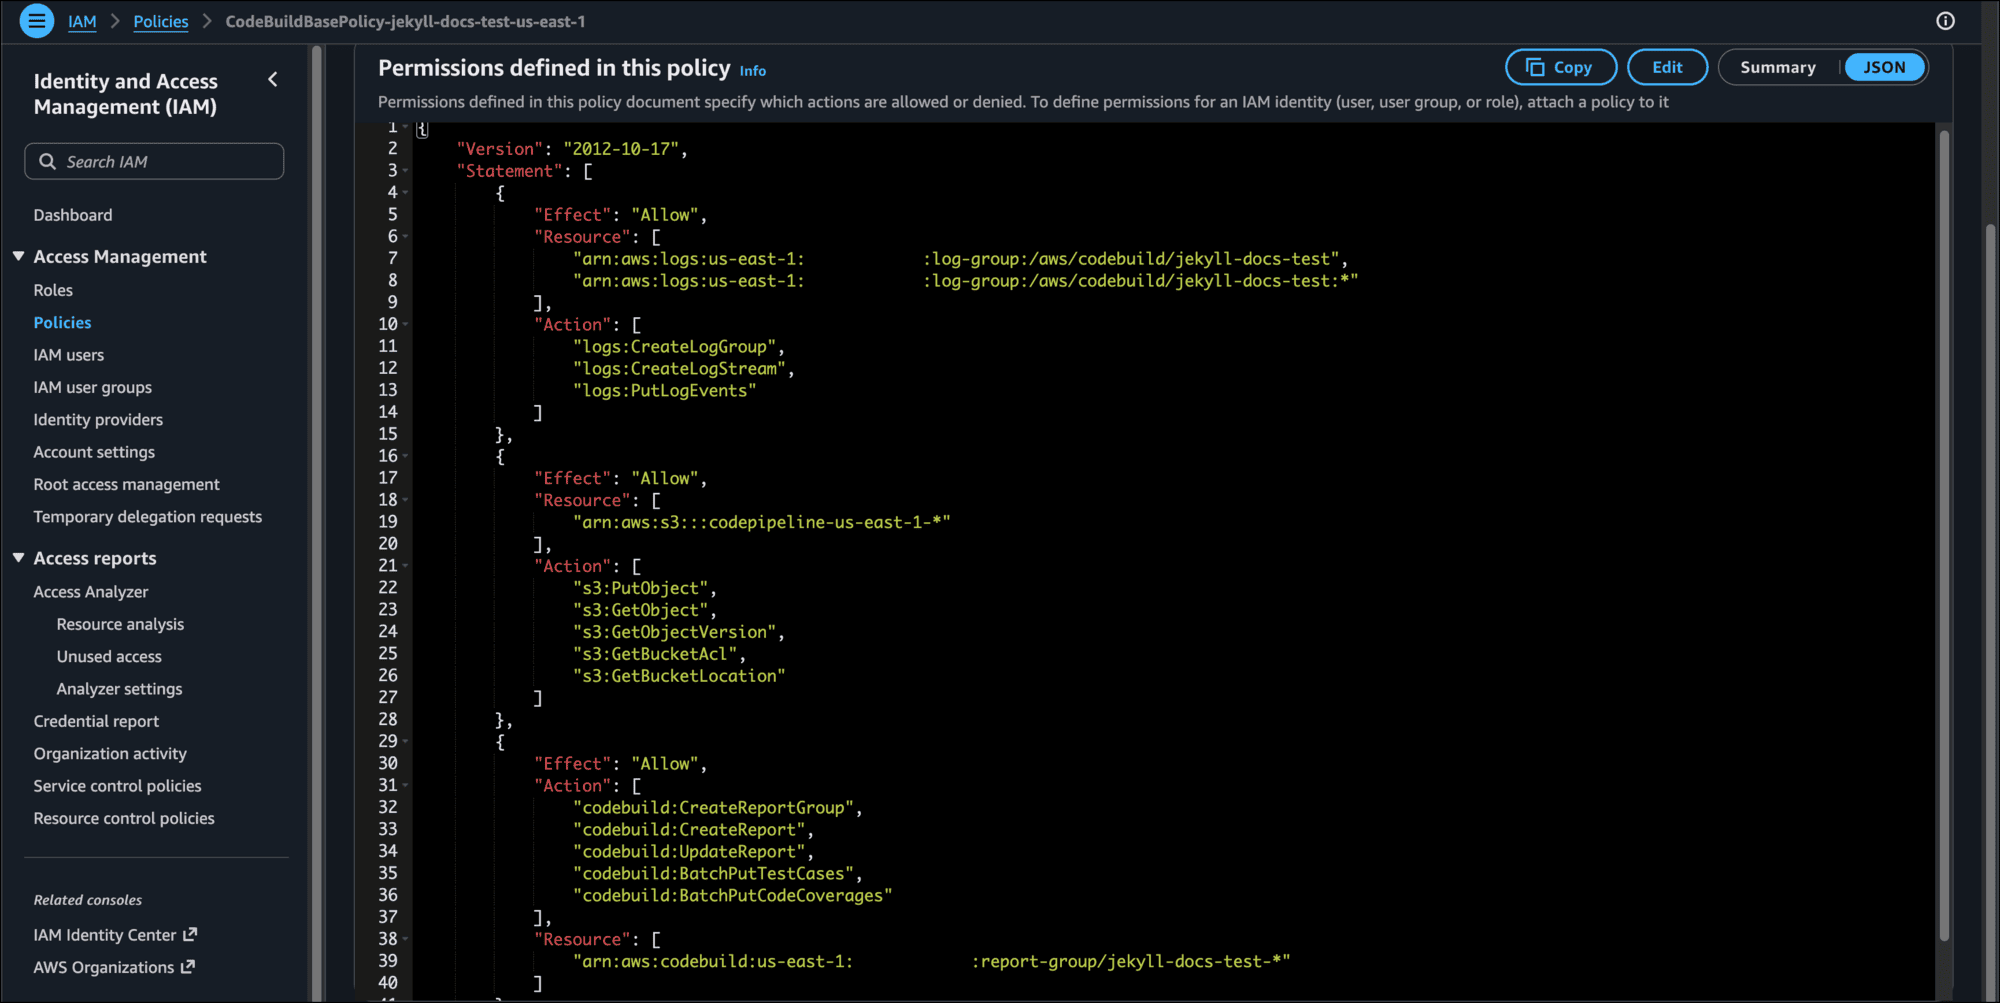
- CodeBuildCodeConnectionsSourceCredentialsPolicy-jekyll-docs-test-us-east-1-<account-number>: This is the CodeStar Connection, or the connection integration with GitHub.

- CodeBuildBasePolicy-jekyll-docs-test-us-east-1: If you look at the JSON, this policy grants access to create CloudWatch log groups (as indicated by the appearance of
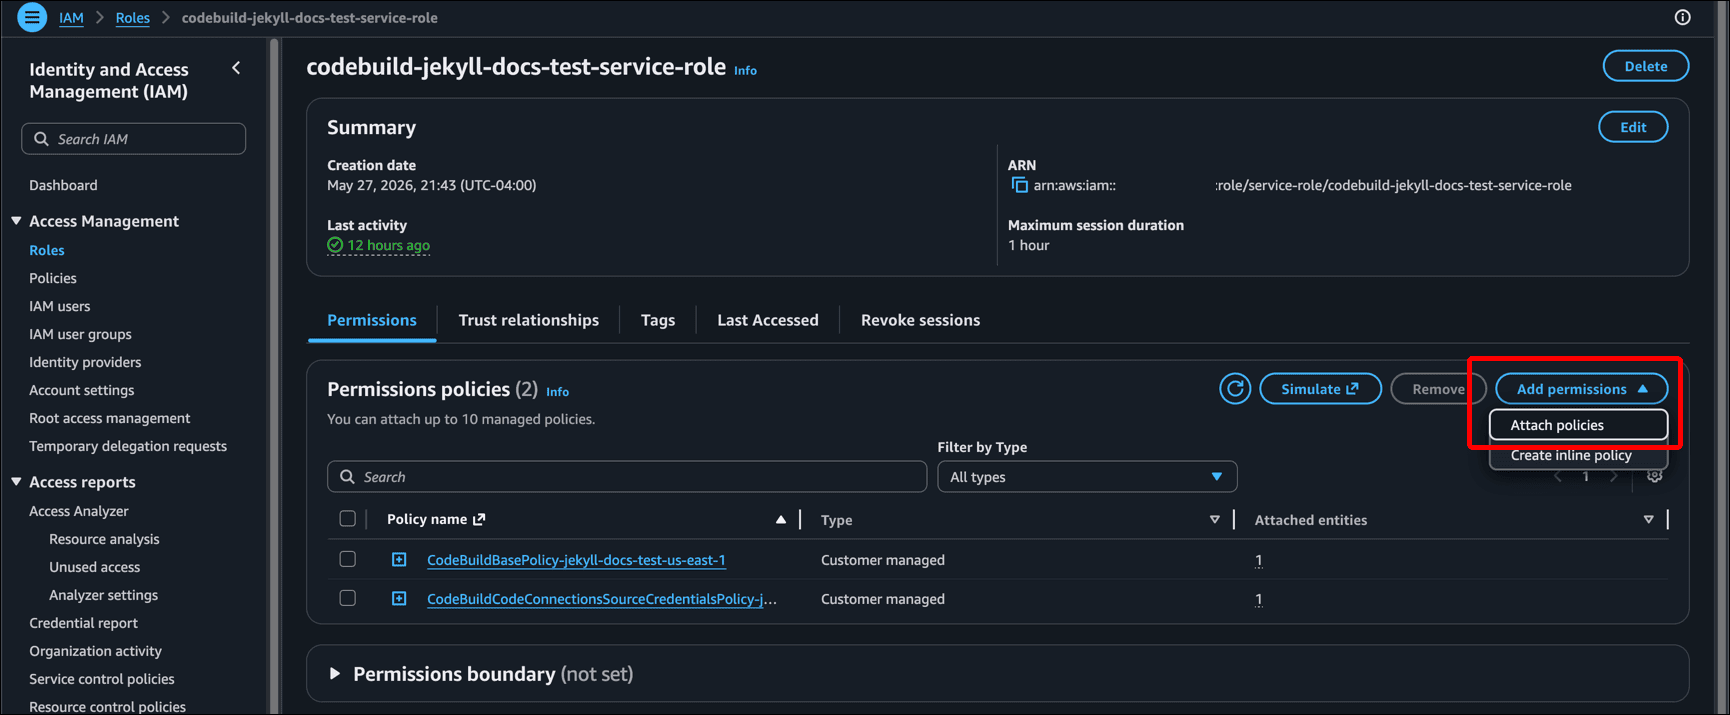
- Now you need to add a policy that grants access to the S3 bucket you created, and allows you to invalidate (or delete) your CloudFront distribution to replace it with new content. Back on the role page, click the Add permissions button and select Attach policies.
- On the Specify permissions page, click the JSON option.
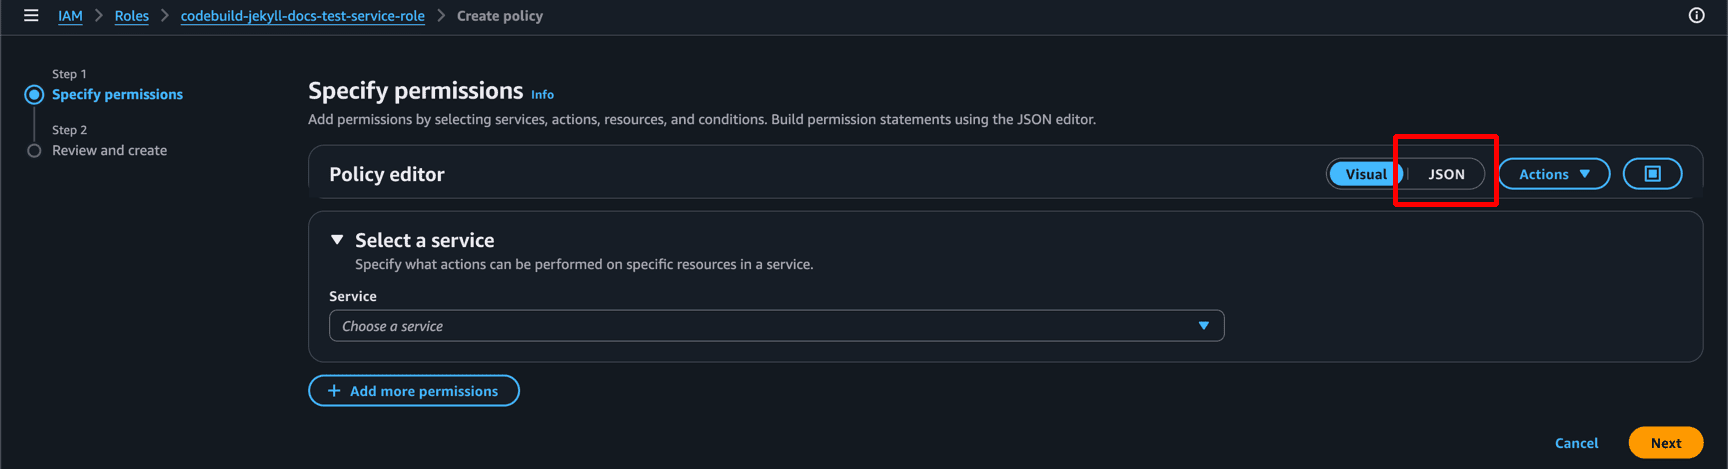
- Delete the JSON pre-populated in the Policy editor (it’s an example or starting point).
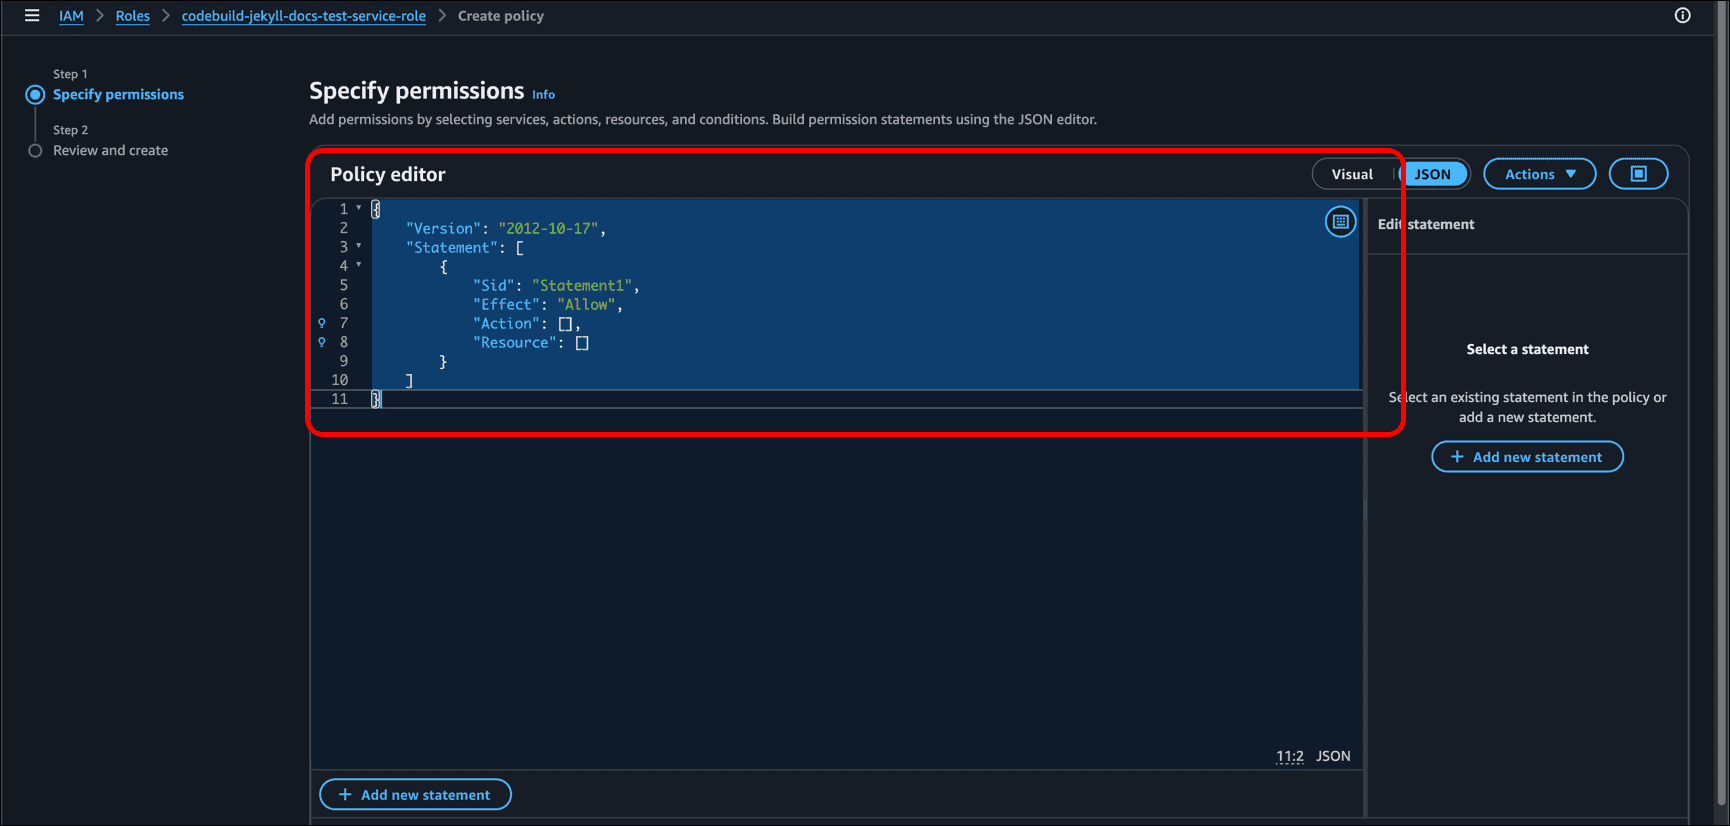
-
Paste this, changing to your ARN values where I have the angle brackets:
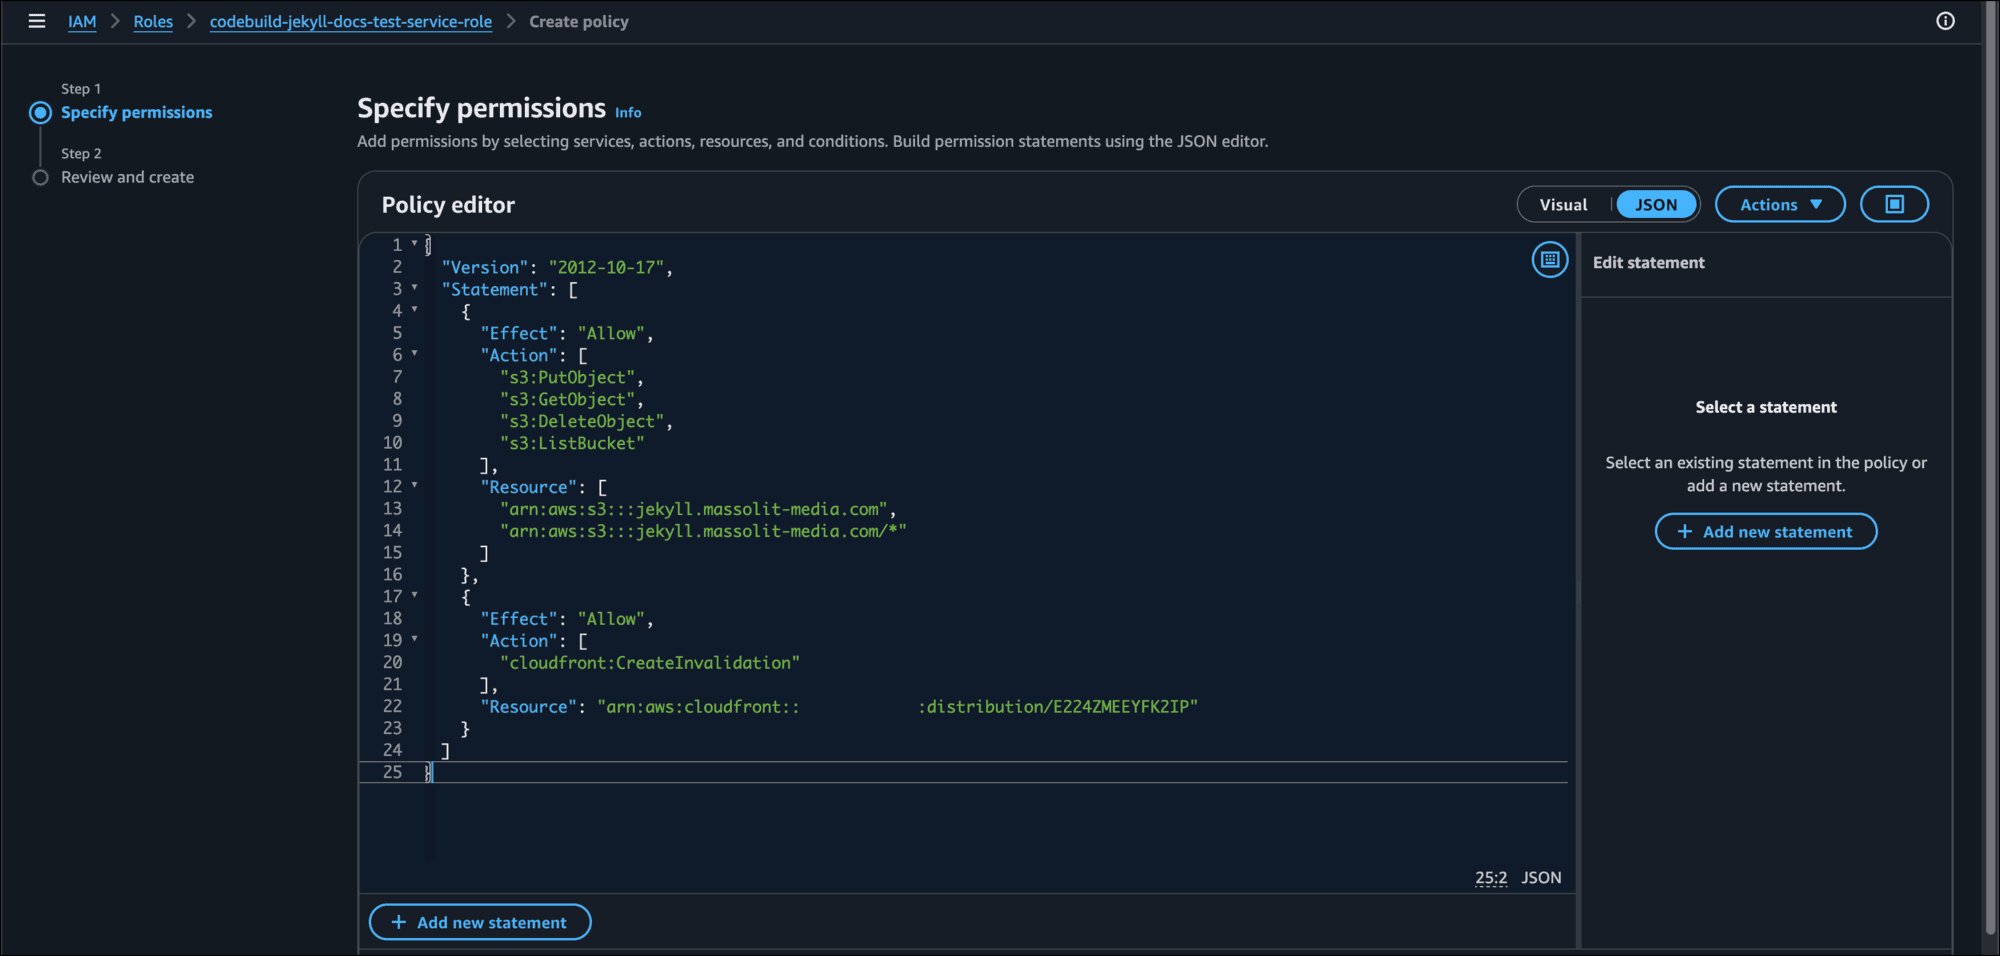
{ "Version": "2012-10-17", "Statement": [ { "Effect": "Allow", "Action": [ "s3:PutObject", "s3:GetObject", "s3:DeleteObject", "s3:ListBucket" ], "Resource": [ "arn:aws:s3:::<bucket-name>", "arn:aws:s3:::<bucket-name>/*" ] }, { "Effect": "Allow", "Action": [ "cloudfront:CreateInvalidation" ], "Resource": "arn:aws:cloudfront::<account-number>:distribution/<distribution-id>" } ] } - When you are done, click Next.
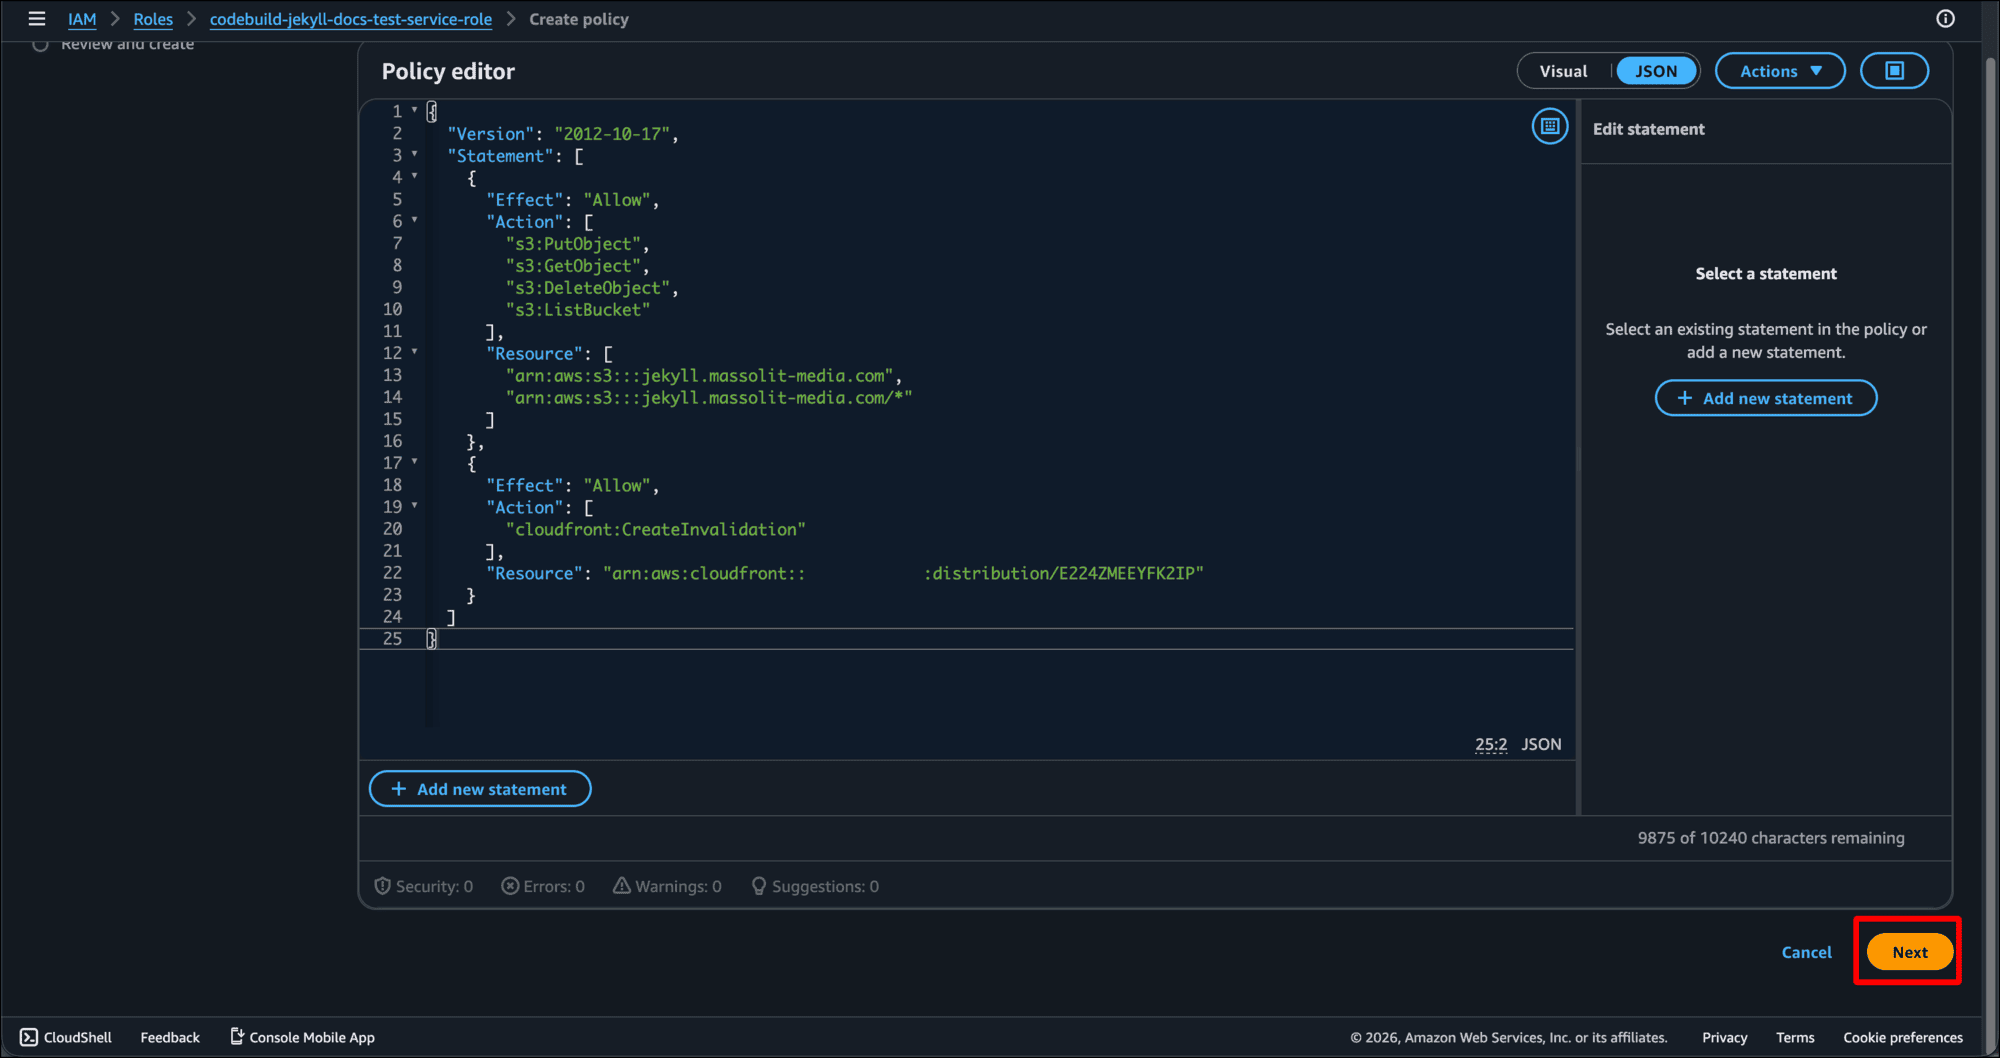
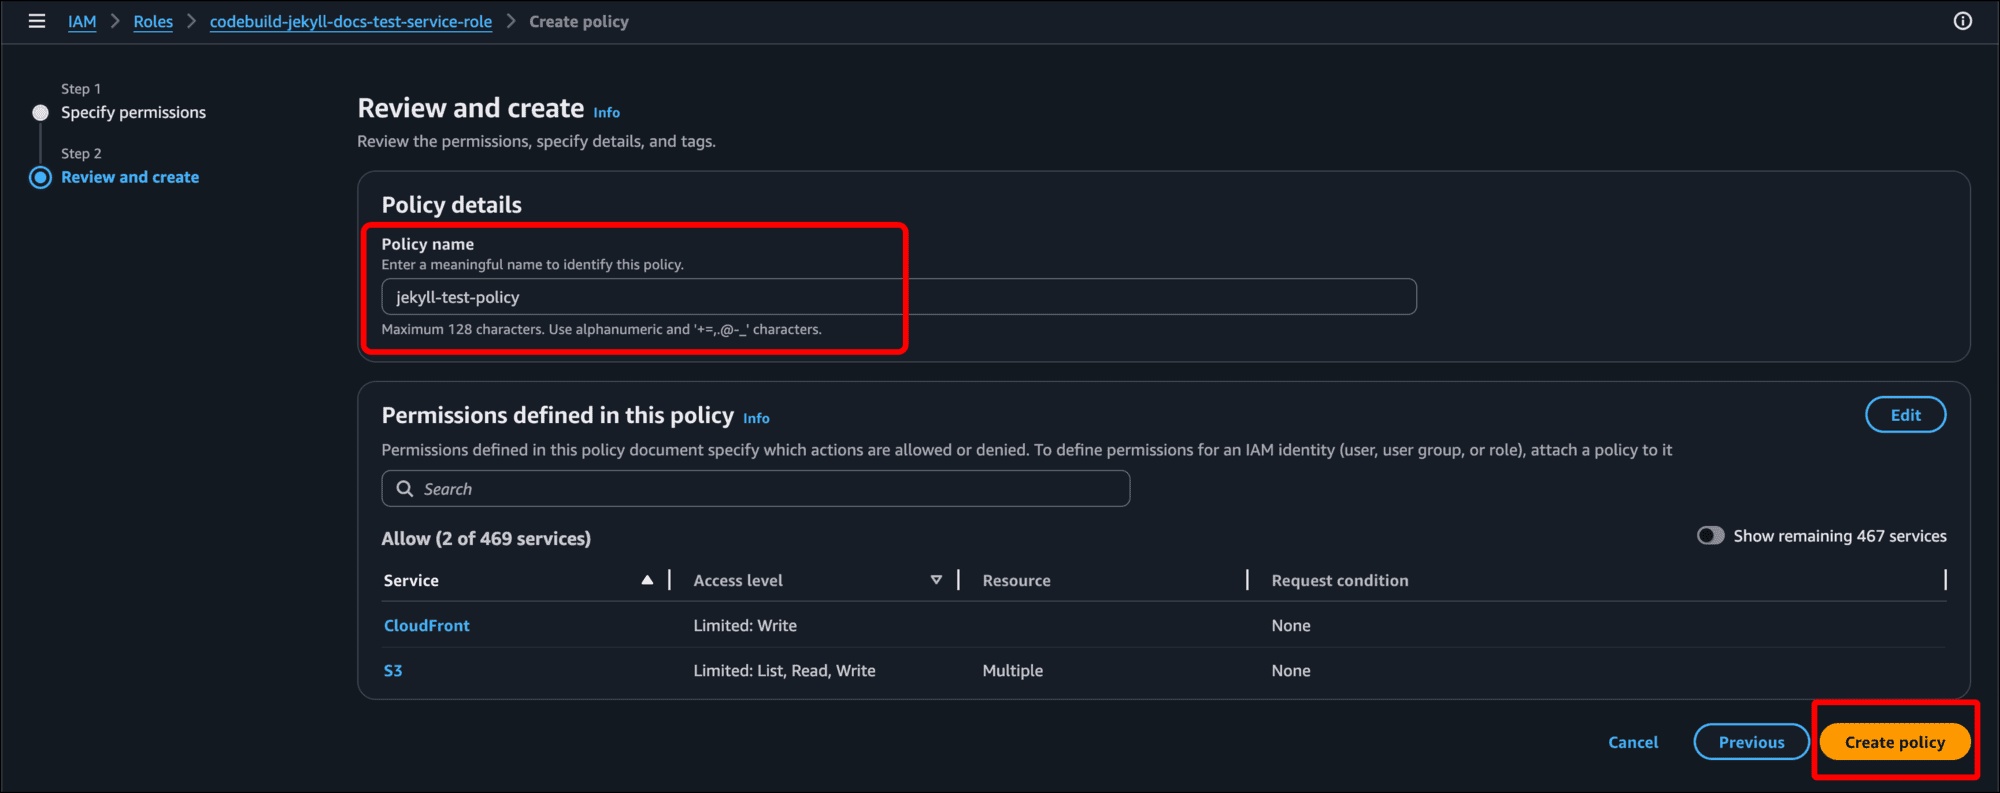
- On the Review and create page, enter a Policy name and click Create Policy.
Create a Buildspec YAML File
Now we need to create the Buildspec. Create a file in your Jekyll project, name it buildspec.yml, and paste this in:
version: 0.2

phases:
  install:
    runtime-versions:
      ruby: latest
    commands:
      - ruby -v # Print the version of Ruby being used (latest)
      - gem install bundler -v 4.0.12 # Install a specific version of bundler - you may need to change this
      - rm -rf _site # Delete the contents of the _site directory
      - bundle install # Run Bundle install

  build:
    commands:
      - echo "******** Building Jekyll site ********" # Display text for the user
      - bundle exec jekyll build # Build the site
      - echo "******** Uploading to S3 ********" # Display text for the user
      - aws s3 sync _site/ s3://jekyll.massolit-media.com --delete # Delete the _site contents on the S3 buckets
      - aws cloudfront create-invalidation --distribution-id <distribution-id> --paths '/*' # Invalidate the previously published CloudFront distribution so the new Jekyll build replaces it; use the Distribution ID that you created in Create an AWS CloudFront Distribution for Your Static Website
Save buildspec.yml, add it to your repo, commit it, and push it to your GitHub repo.
Build and Deploy Your Jekyll Site
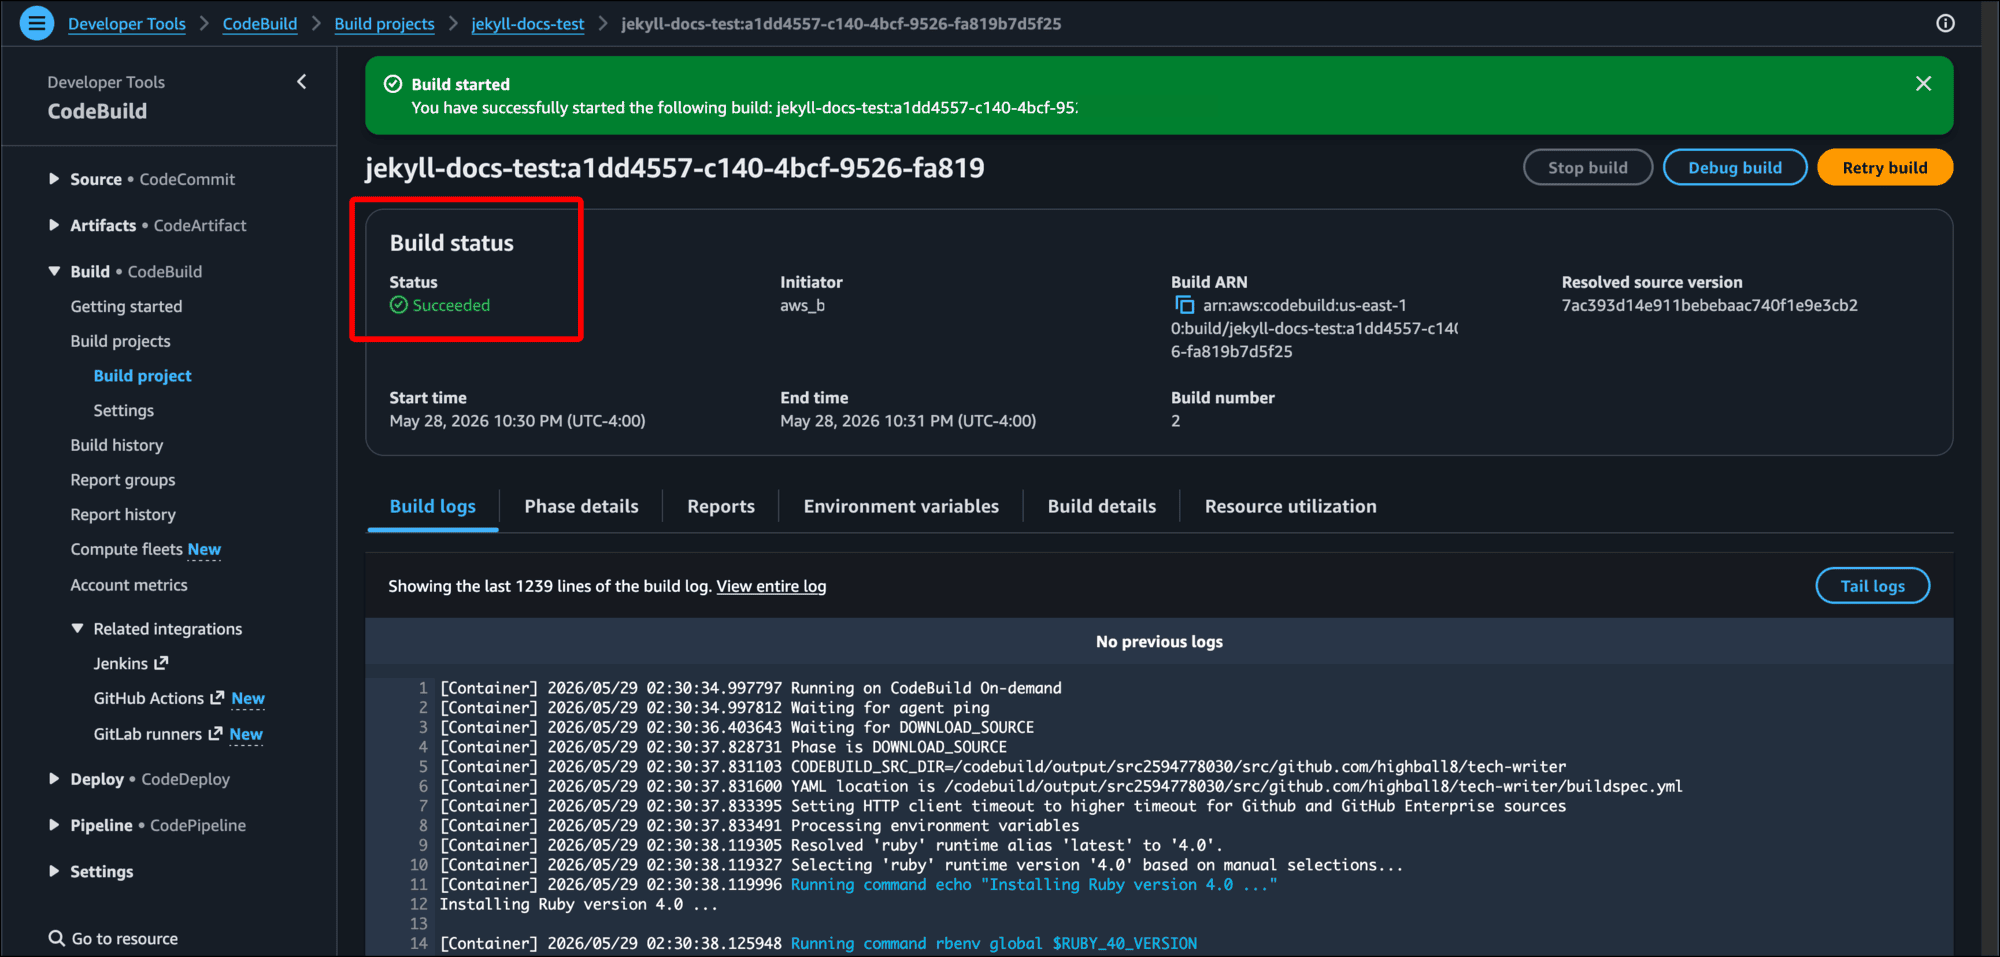
- At this time you should be ready to run your CodeBuild project, so return to CodeBuild.
- Back on the Build projects page, click the link for the project you created.

- Click Start build.
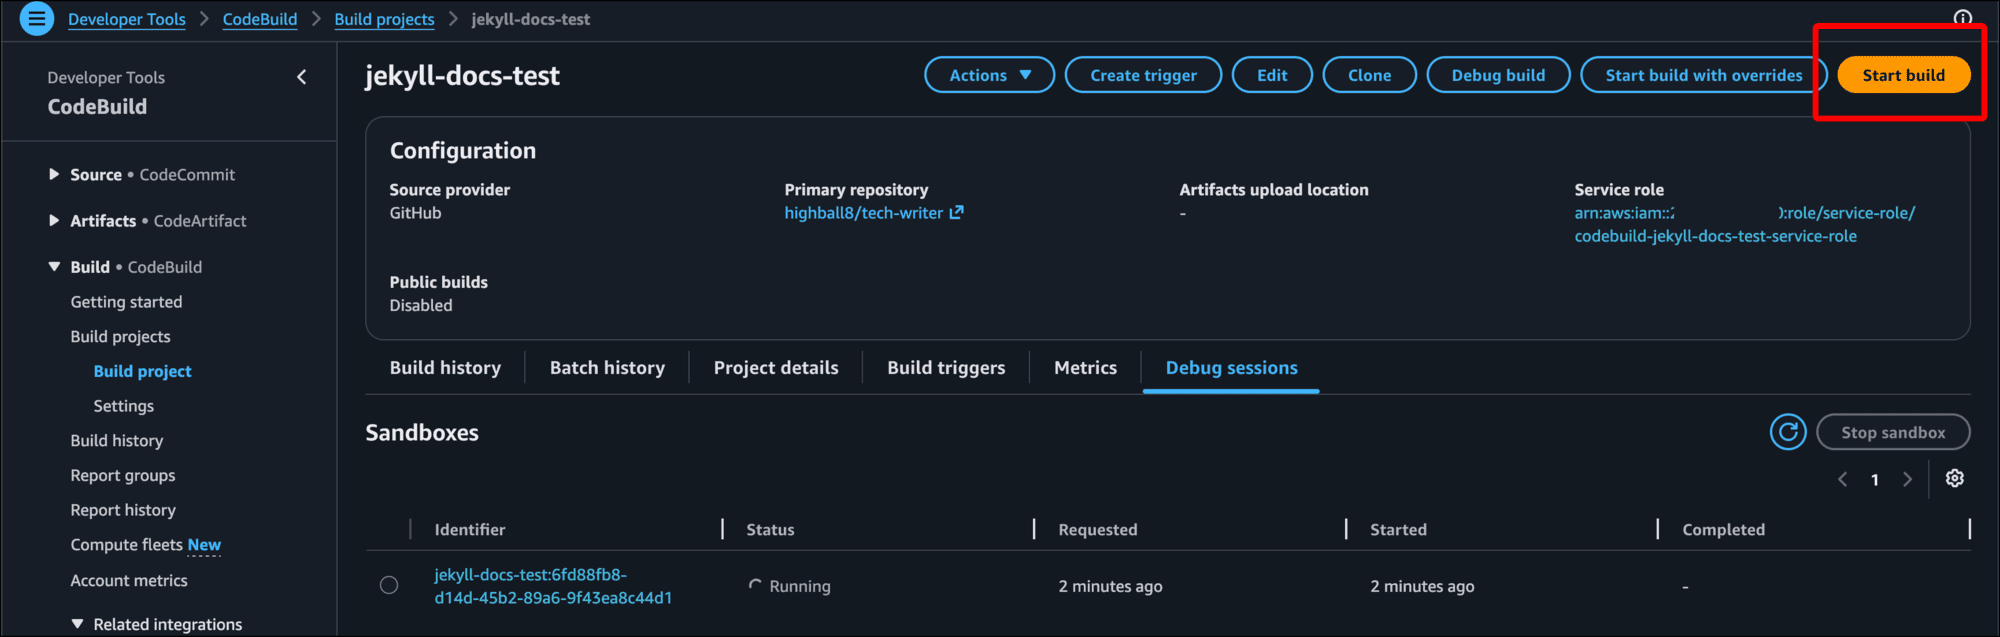
- As the build infrastructure spins up and starts executing
buildspec.yml, you will see the output of the logs. You can scroll down to see the progress as the logs output it.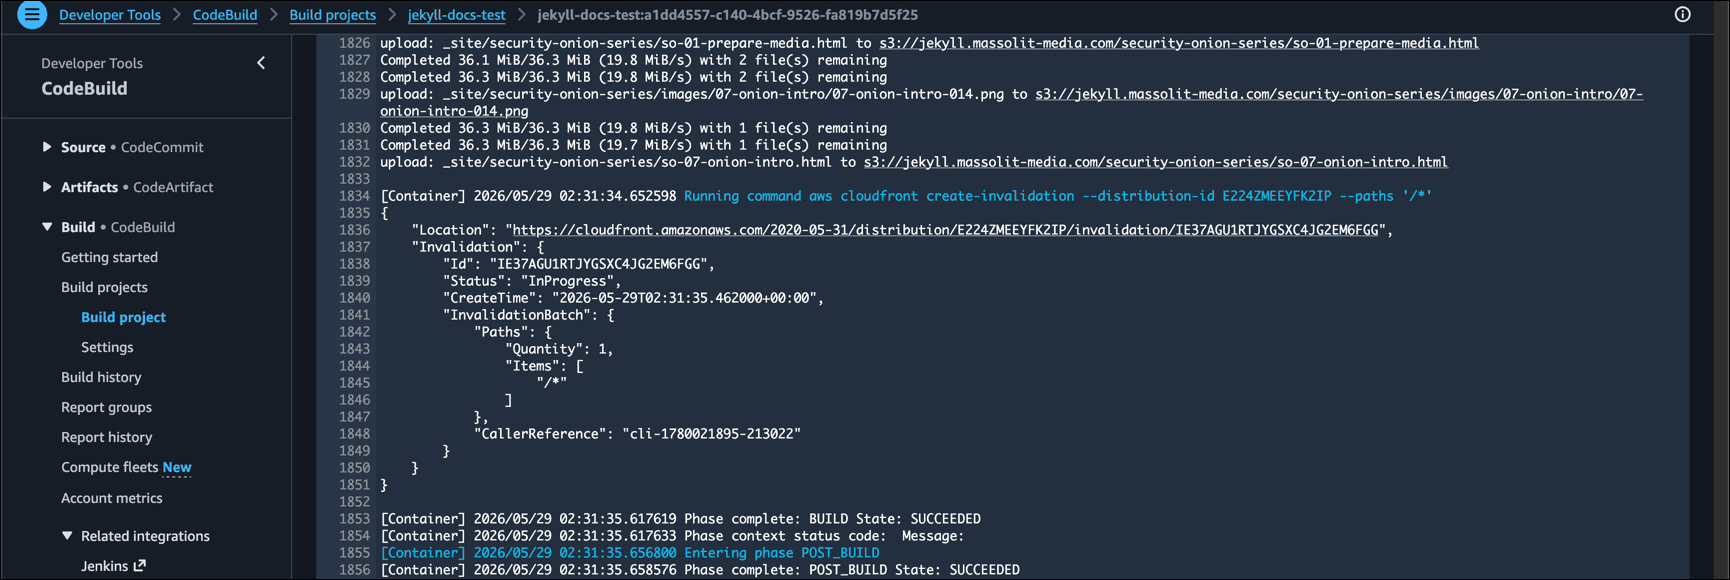
- When it is done, you will see Succeeded under Build status.
- Now you can go look at your Jekyll site. In this example, I created a subdomain, cloud distribution, and TLS certificate for jekyll.massolit-media.com. So I can enter that into the browser and check it out.

- Note: If this is the first time using a domain or publishing content to it, it may take a few minutes for the site to be available.
All of the steps detailed in this tutorial should allow you to get started on your own Jekyll site (and AWS administration!). Have fun with it.